


Difficulté
Modérée
Étapes
10
Temps nécessaire
02:00:00 - 03:00:00

Ce tutoriel a été créé par la communauté
User contributed
-
-
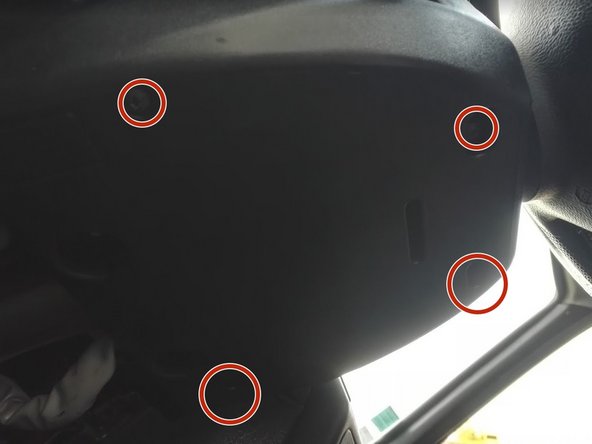
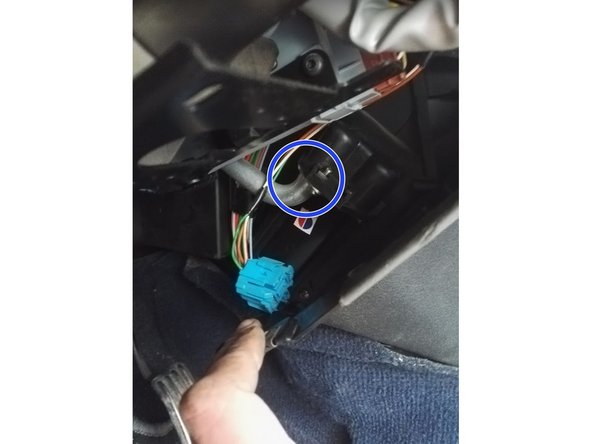
Commencer par démonter le panneau inférieur du tableau de bord en dévissant les 6 vis de fixations (2 près de la console centrale, une sur le coté, une à gauche du volant derrière la commande de starter (ou cache plastique si modèle à injection) une derrière le pédalier, et une derrière la buse de chauffage
-
Desserrer également la vis de fixation de la commande d'ouverture de capot
-
-
-
Tirer simplement la buse vers vous pour accéder à la dernière vis
-
Tirer ensuite le panneau vers le bas pour le déposer
-
-
-
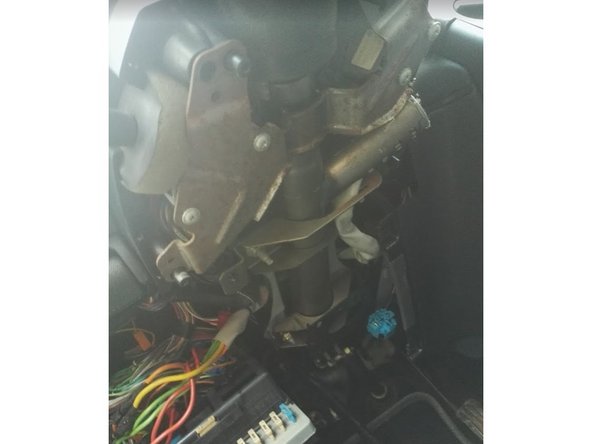
Dévisser les 4 vis de fixation de la demi coquille inférieure sous le volant, puis la déposer
-
-
-
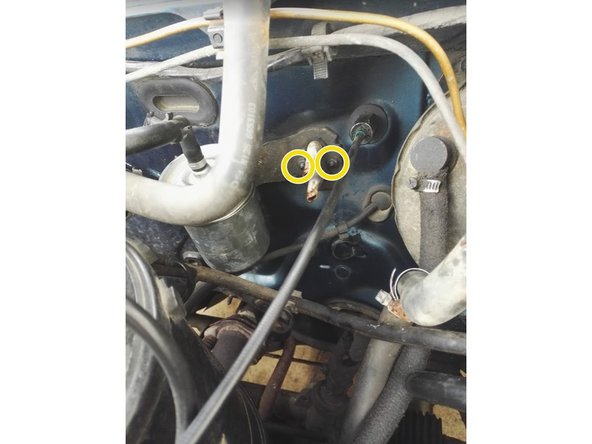
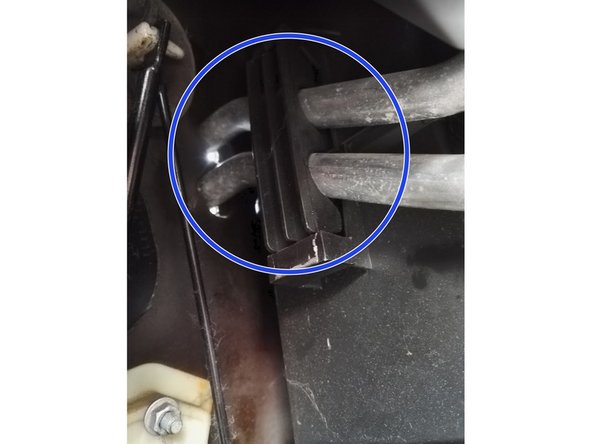
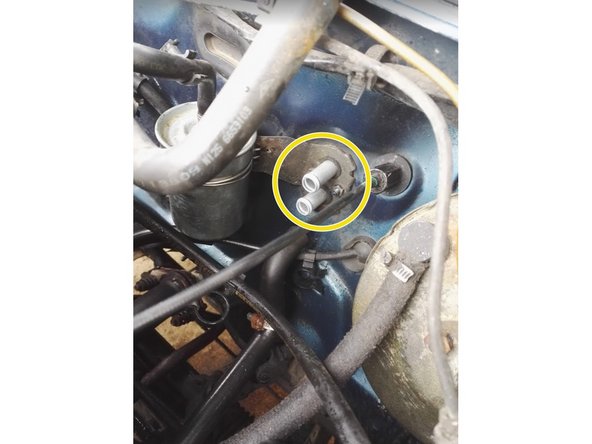
Déposez les 2 durites côté compartiment moteur en ouvrant les colliers, les pincer ou placer en point haut afin d'éviter de vider tout le liquide de refroidissement
-
Si vous changez également les conduites en alu, vous pouvez "écraser" ces dernières pour faciliter l'extraction des durites (souvent collées avec le temps)
-
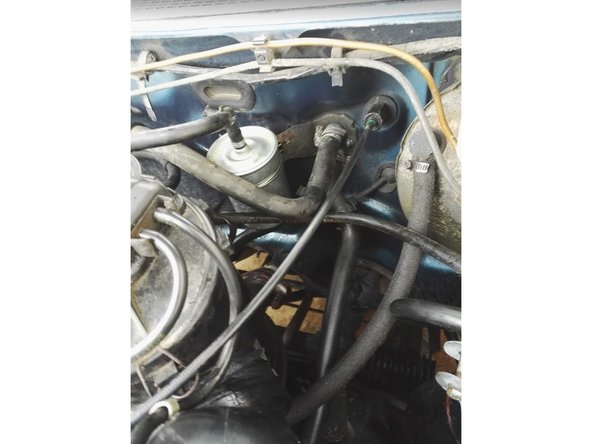
Dévisser également les 2 écrous de maintiens de la petite plaque et déposer cette dernière, avec le joint caoutchouc
-
Petite astuce pour vider le reste de liquide dans le radiateur : soufflez avec une soufflette (ou un aspirateur monté à "l'envers") dans la durite du haut
-
-
-
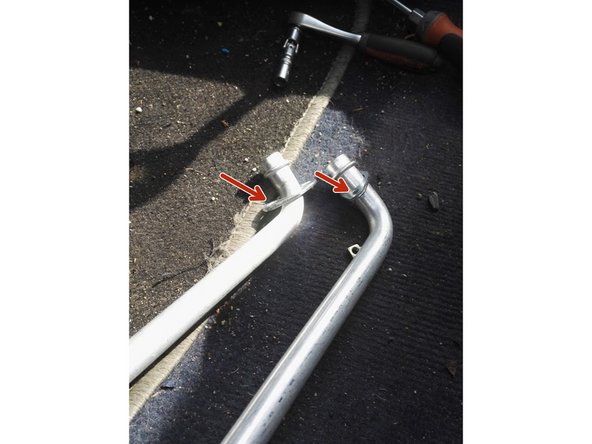
Il existe 2 types de combinaison radiateur - durite différente, ici il s'agit de la sortie avec angle (Voir le remontage pour l'autre type)
-
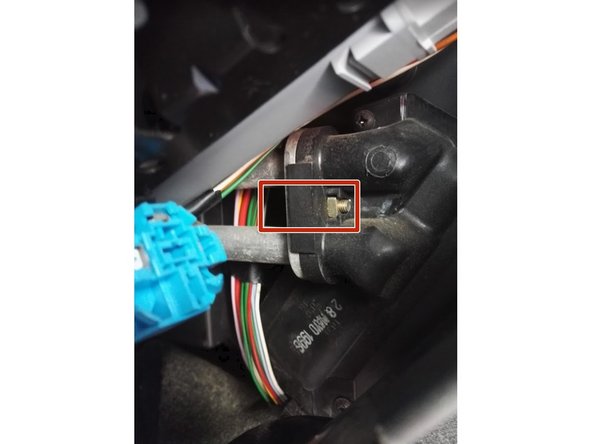
Dévisser la vis de maintiens de la bride des durites
-
Déclipser la bride en plastique
-
Extraire les durites (tirer en dehors du radiateur, puis les extraire par l'intérieur du véhicule)
-
-
-
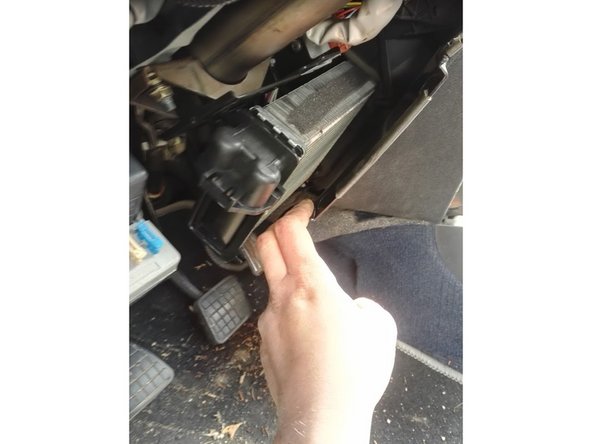
Dévisser les 2 vis de fixation du radiateur, puis l'extraire en le tirant vers vous
-
En profiter pour nettoyer l'emplacement du radiateur (souvent plein de feuilles/insectes)
-
-
-
Comparer les 2 radiateurs (en termes de dimension uniquement !)
-
Il existe 2 combinaisons différentes, du moment que vous changez l'ensemble radiateur + durite alu, l'angle de la sortie n'a pas d'importance
-
-
-
Insérer le nouveau radiateur dans son logement et revisser les 2 vis de maintiens
-
-
-
Enfiler la bride dans les durites
-
Mettre en place la durite "supérieure" (la plus courte des deux) sans oublier le joint torique
-
Visser la bride (2 vis) (en serrant progressivement des deux cotés)
-
Procéder de même pour la seconde durite
-
Terminer par le remontage des différents éléments (Bride plastique, coquille de volant, demi tableau inférieur)
-
-
-
Remettre en place le joint caoutchouc
-
Refixer la plaque de maintiens
-
Reconnecter les durites
-
Terminer par une purge de liquide de refroidissement, s'assurer également de l'absence de fuite
-


Annulation : je n'ai pas terminé ce tutoriel.
5 autres ont terminé cette réparation.
12 commentaires
Je viens de monter le nouveau radiateur avec les conduites neuve coudées, et malédiction la fuite et jtrs là! au même en endroit au niveau du joint torique…J’ais l’impression que les 2 brides de serrage ne comprime pas assez les joints, ou ces deniers ne sont pas assez épais…
Obligé de redéposer le tout…
remy.menegaz - Résolu à la publication Réponse
,belle démo bravo! mais pur la purge du radiateur comment faite vous ?
remy.menegaz - Résolu à la publication Réponse
Merci , pour la précision , avec les photos , cela aide beaucoup , parfait .
dessagne_serge - Résolu à la publication Réponse