


Introduction
Ce tuto vous montre les étapes pour changer le kit de distribution de votre Peugeot. Le modèle présenté dans le tuto est une Peugeot 306 1.8 16V phase 3
-
-
Soulevez le capot.
-
Débranchez la borne négative de la batterie.
-
Desserrez les 2 colliers de serrage et l'écrou situé derrière.
-
Retirez le filtre à air.
-
-
-
Mise en sécurité du véhicule : démontage et remontage de la roue
-
Retirez les roues avant et mettez le véhicule sur chandelle.
-
Gardez votre cric pour pouvoir levez et baisser le moteur plus tard.
-
-
-
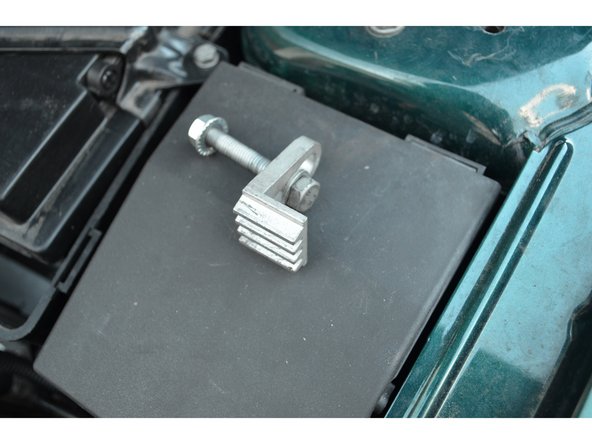
N'oubliez surtout pas de placer un cric avec une cale en bois sous le moteur pour le soutenir une fois le support moteur retiré.
-
Le support est fixé par 2 vis BTR et 3 écrous.
-
-
-
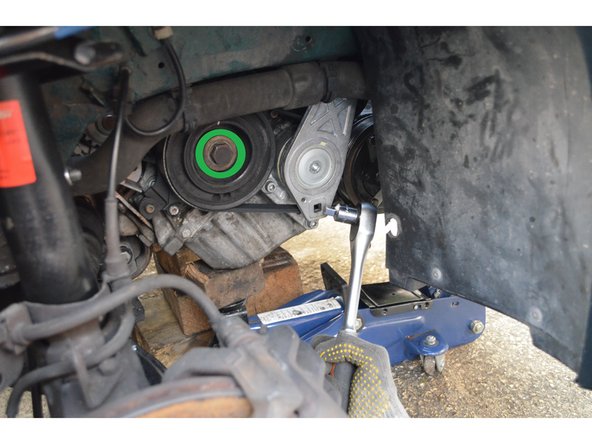
Avec un carré d'1/2 détendez la courroie d'accessoire puis retirez-la.
-
Repérez le cheminement de la courroie d'accessoire avant de la démonter.
-
-
-
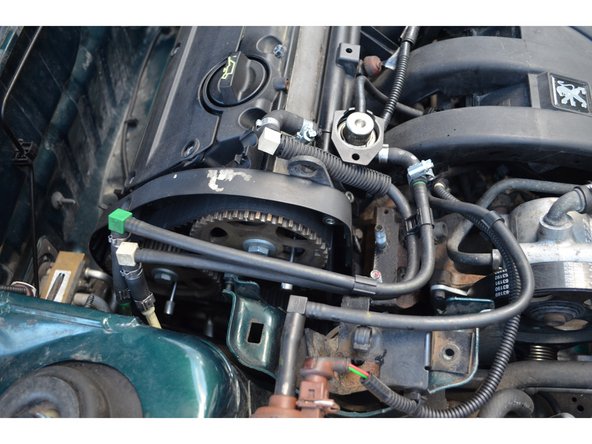
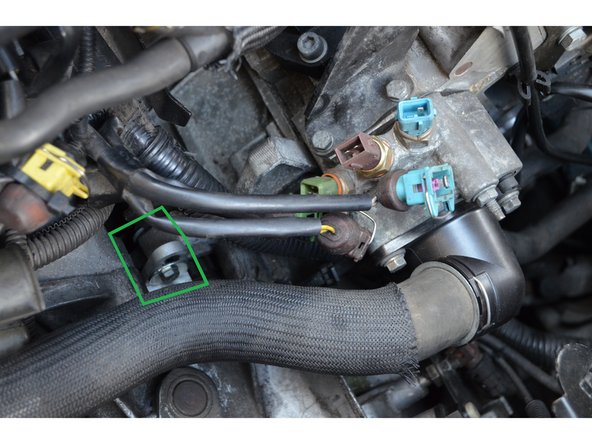
Déclipsez les durites aux endroits indiqués en desserrant les colliers de serrage et en tirant doucement dessus.
-
Pensez à mettre du papier absorbant ou des chiffons en dessous des durites pour essuyer le carburant qui va s'écouler.
-
Une fois declipsées éloignez les durites du carter de protection de distribution.
-
-
-
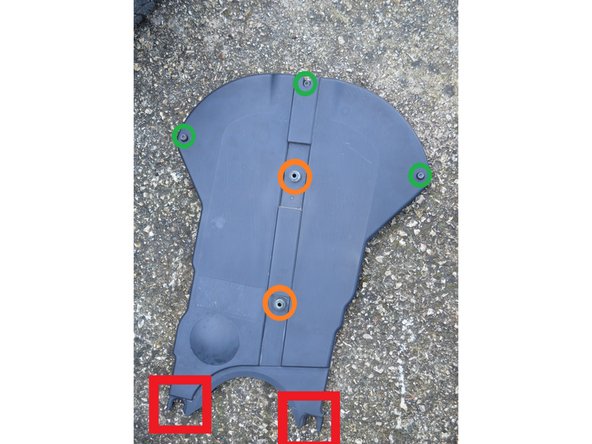
Carter supérieur de distribution
-
Vis BTR
-
Ecrous 10mm
-
Desserrez les vis et écrous puis retirez le carter.
-
Lors du remontage, assurez-vous que les 2 "pieds" du carter soient bien emboités.
-
-
-
Votre véhicule doit être au point mort.
-
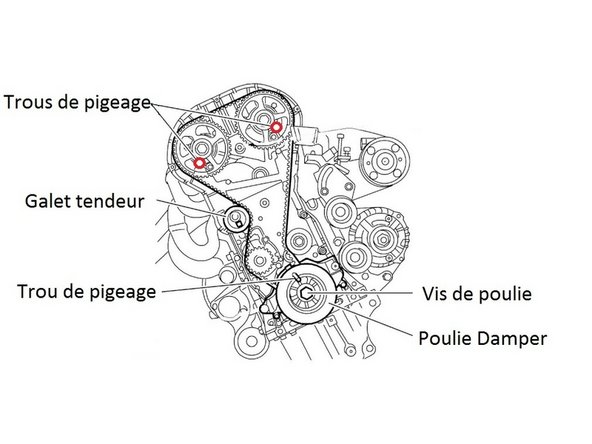
Faites tourner le moteur dans le sens horaire par la vis de la poulie de vilebrequin jusqu'à l'amener en position de pigeage (12h).
-
Ne jamais tourner le moteur dans le sens anti-horaire.
-
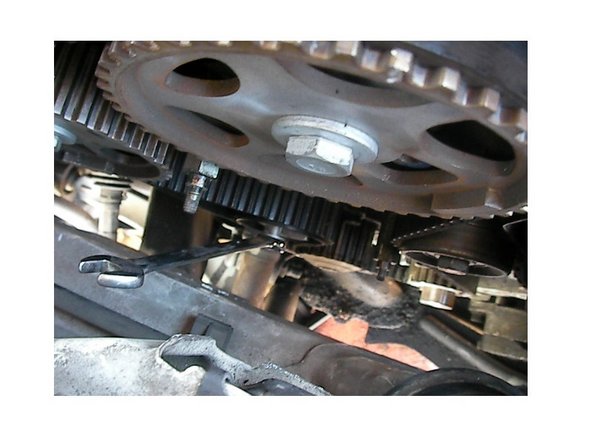
Une fois le trou de pigeage de la poulie Damper aligné avec celui du bloc moteur, pigez-le avec une pige de 8mm.
-
-
-
Puisque le vilebrequin est pigé, les AAC doivent être en bonne position. Il ne reste qu'à poser les piges de 6mm.
-
-
-
On sait maintenant que le moteur est à la bonne position.
-
Il va falloir, après avoir bloqué le volant-moteur, desserrer la vis de poulie de vilebrequin d'où la nécessité de retirer les piges.
-
-
-
Cette étape va permettre d'éviter toute rotation du moteur lors du desserrage de la vis de la poulie de vilebrequin.
-
Certains utilisent un gros tournevis plat, il est plus sûr de se servir d'un outil plus adéquat.
-
Pour bloquer le volant-moteur il faut insérer les dents de l'outil dans les dents du volant-moteur puis fixez l'outil en insérant un boulon de 6mm et en serrant l'écrou assez fort pour ne pas qu'il se desserre.
-
Une autre méthode si vous êtes 2 consiste à passer la vitesse la plus élevée et faire appuyer sur les freins très fort pour éviter la rotation du moteur.
-
Ne jamais tenter de verrouiller la poulie du vilebrequin par un foret ou une pige dans le trou de calage.
-
-
-
Vous pouvez maintenant desserrer la vis de la poulie de vilebrequin.
-
Une fois desserrée, retirez la poulie.
-
Lors du remontage il est impératif d'utiliser une vis neuve.
-
-
-
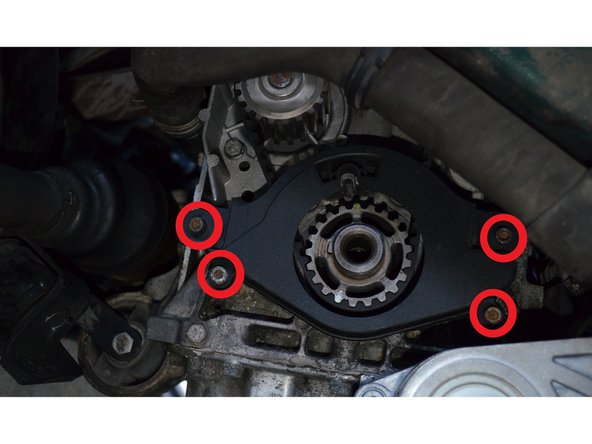
Desserrez les 4 vis à l'aide d'une clé BTR puis retirez le carter.
-
-
-
Cette étape n'est pas obligatoire, cependant si vous n'êtes pas sûr de vous, elle vous aidera.
-
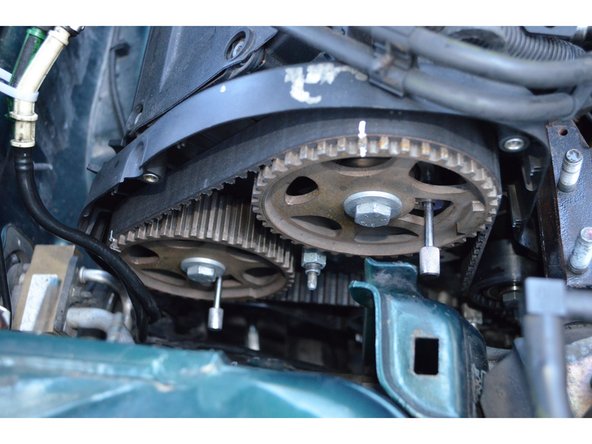
Faites des repères au blanco sur votre courroie ainsi que sur les roues du vilebrequin et des AAC.
-
-
-
Reposez la poulie de vilebrequin et sa vis.
-
Ne serrez pas trop fort la vis.
-
Reposez les 3 piges.
-
-
-
Il n'est pas facile d'accès, il faut une clé de 13 pour desserrer.
-
Une fois desserré sortez le galet tendeur.
-
-
-
Maintenant que le galet est retiré votre courroie est totalement détendue, vous n'aurez aucun mal à la sortir.
-
-
-
Le remontage s'effectue en sens inverse.
-
Recopier les repères de l'ancienne courroie sur la neuve.
-
Faites coïncider les repères de la courroie neuve avec les repères des poulies.
-
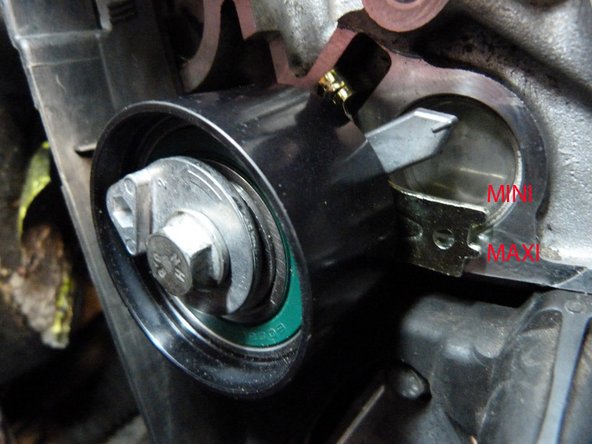
Pour régler la tension vous n'avez pas besoin d'outil spécifique puisque le galet tendeur est automatique. La tension est bonne quand l'aiguille est entre les 2 repères. Pour se faire, prenez une clé BTR de 6mm et appliquez une rotation anti-horaire jusqu'au bon positionnement de l'aiguille puis serrez la vis au couple prescrit.
-
N'oubliez pas d'utiliser une vis de poulie de vilebrequin neuve et serrez-la au couple prescrit.
-


Annulation : je n'ai pas terminé ce tutoriel.
5 autres ont terminé cette réparation.
3 commentaires
bonjour super votre tutoriel pas à pas c est génial! merci
CHANTAL BAILLEUX - Résolu à la publication Réponse