Introduction
Remplacement du kit de distribution (courroie + galet tendeur + pompe à eau) sur 1.4 injection
Outils
Pièces
-
-
Placez une bassine sous la durite inférieure du radiateur, puis déconnectez la
-
Une fois tout le liquide évacué, reconnecter la durite inférieure.
-
Ne pas oublié de déposer à la déchetterie votre vieux LDR
-
-
-
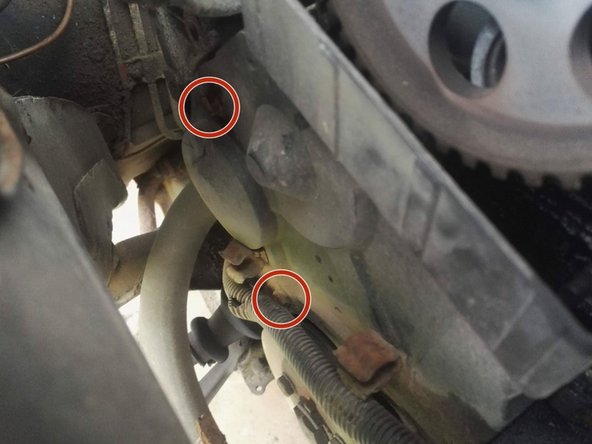
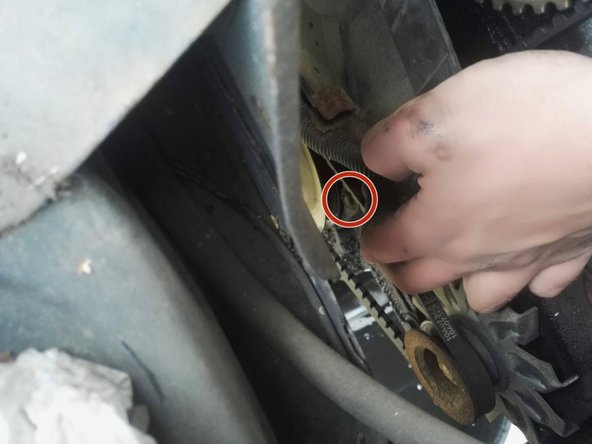
Dévissez les 2 vis de fixation du carter de distribution
Distribution faites conjointement avec le joint de culasse durant lequel tout le haut moteur a été refait…
hrmuller t - Résolu à la publication Réponse
Perso après ce tuto faites en un autre'“ comment changer votre joint de cache culbuteurs” on voit bien qu’il est fissuré, et votre moteur est sale.
guy Betting - Résolu à la publication Réponse
-
-
-
Retirez le carter en le tirant simplement ver le haut
-
-
-
Détachez la gaine électrique du carter
-
Dévissez les 3 vis de fixation du carter inférieur puis retirez le
-
-
-
Aligner approximativement le trou dans la poulie d'arbre à came (rouge) au trou de pigeage dans la culasse (vert) (rester un peu avant)
-
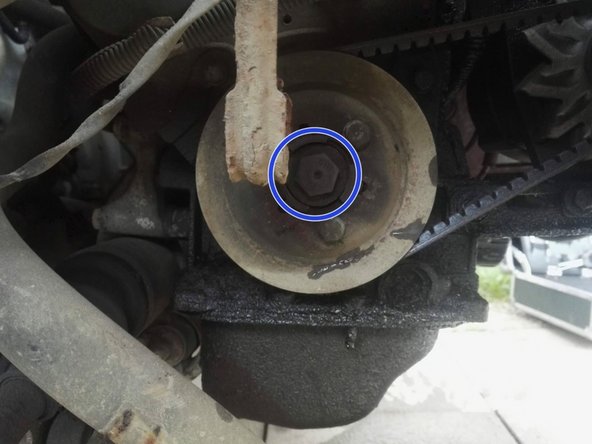
Pour se faire, faire tourner le moteur à la main à l'aide d'une clé sur l'écrou de fixation de la poulie de vilebrequin en "serrant" l'écrou, le moteur va tourner.
-
-
-
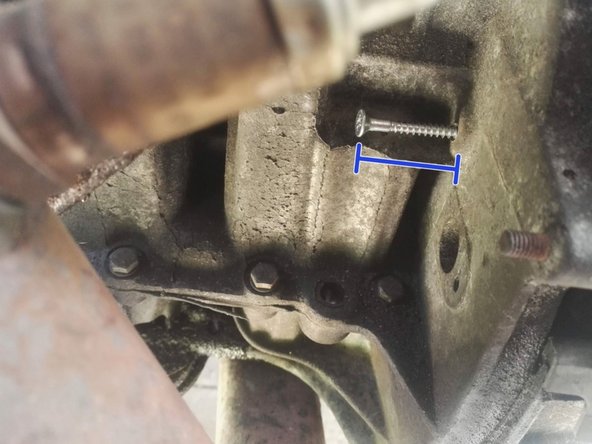
Une fois les 2 trous presque alignés, préangager la pige dans le trou du volant moteur (ici une vis de ø6mm)
-
En continuant d'essayer d'enfoncer la pige, faire doucement tourner le moteur jusqu'à ce que la pige s'enfonce et que le moteur se retrouve bloqué
Si la beauté vous importe tellement, pensez à relire vos messages et corriger la syntaxe …
En attendant, il n'y a aucun effort sur cette pige, couper un forêt reviens à encore plus de «bricolage», d'autant que l'idée derrière ce genre de tutoriel c'est de rendre le tout accessible à tout le monde, tout le monde n'a pas forcément de disqueuse pour sacrifier un foret de 6…
hrmuller t - Résolu à la publication Réponse
Quel est l'intérêt de perdre un forêt ?
De montrer un beau tutoriel, et non un bricolage avec une vis vulgaire vis à bois, que vous appelez “PIGE”.
guy Betting - Résolu à la publication Réponse
Franchement ça fait vraiment bricolo un vis, vous n’avez pas foret de 6 mm, que vous coupez s’il est trop long.
guy Betting - Résolu à la publication Réponse
-
-
-
Une fois le volant moteur bloqué, les trous de pigeages de la poulie d'arbre à came doivent être alignés, mettre également la pige en place (foret ø8mm ici)
-
-
-
Dévissez et déposez le galet tendeur (Déjà déposé sur la photo)
-
Retirez la courroie
-
-
-
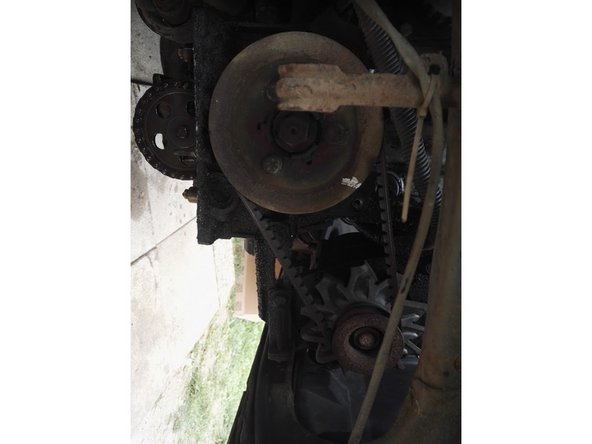
Dévissez légèrement la vis
-
Dévissez complètement l'écrou
-
Rapprocher l'alternateur du moteur afin de libérer la tension, déposez la courroie.
-
Pour une facilité d'accès on peut déposer la roue avant droite
-
-
-
Remontez le nouveau galet tendeur (sans le serrer complètement)
-
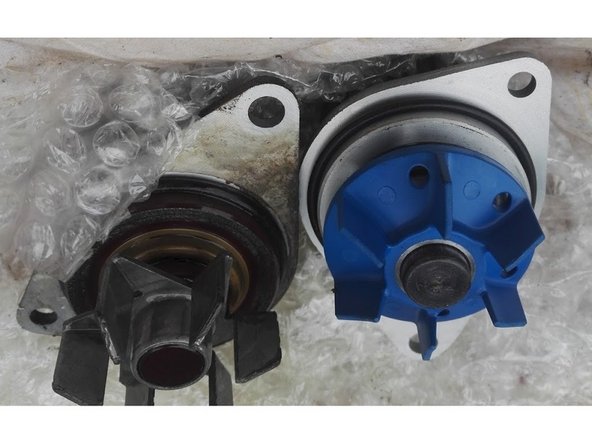
Déposez la pompe à eau
-
Vérifiez que les pompes à eau sont identiques
-
-
-
Mettre en place la courroie en commençant par le bas, puis la poulie d'arbre à came (haut)
-
La courroie doit être un minimum tendue entre les deux poulies
-
Finir par la pompe à eau puis le galet tendeur
-
-
-
Mettre le galet en appui sur la courroie, puis à l'aide d'un tournevis faire levier (Placer le tournevis dans le petit carré du galet) une fois la courroie tendue serrer le galet
-
Pour vérifier la tension de la courroie, "tordre" le brin le plus long de la courroie, vous ne devez pas faire plus d'un quart de tour
pour la tension du tendeur prendre une tige carre de 8 mm couder en L sur ca longueur placer a 10cm une ficelle avec un poid de 1.5kg pour avoir la bonne tention costructeur.
puis serrer le galet faite faire deux tour au moteur a la main puis desserer le galet avec son poid et resserer
Manuel LATAMBAS - Résolu à la publication Réponse
-
-
-
Retirez les 2 piges (Poulie d'arbre à cames et volant moteur)
-
Faire tourner le moteur à la main (Même procédé que pour la mise en place des piges) et vérifier que rien ne bloque (effectuer au moins 2 tours)
-
Remontez les différents éléments du carter de distribution (Etape 4 à 1)
-
Remplissez et purger le circuit de refroidissement
-
Annulation : je n'ai pas terminé ce tutoriel.
8 autres ont terminé cette réparation.
8 commentaires
Ya pas de sens pour metre la courroie de distribution ya pas de flèche dessus ?
betamaxx16s - Résolu à la publication Réponse
Pouvez vous me dire comment procéder pour nettoyage injecteur et ou ils sont placés dans le moteur ainsi que le débitmètres merci
fornasier stephane - Résolu à la publication Réponse
nickel ce tuto, et effectivement l’idée de la vis m’a permis de réaliser l’opération sans sacrifier un outil ou d’investir inutilement dans des piges, top =D
Gislain Morin - Résolu à la publication Réponse
Est-ce valable sur les 205 diesel ? Parce que si je peux éviter de démonter la poulie damper, et bien, ce serait top :-)
Nicolas TEODORCZYK - Résolu à la publication Réponse


