Introduction
Changement d'un roulement arrière gauche avec ABS sur une Yaris II D4D 90cv Luna de 2006.
Parts
-
-
ATTENTION CELA RESTE DANGEREUX il faut prendre ces précautions. A faire sur du PLAT
-
Mettre UNE VITESSE au vehicule
-
ENLEVER LE FREIN A MAIN. Cela parait bizarre à première vue mais si vous voulez enlever la cloche de frein plus tard, vous devez le faire.
-
Caler les roues avant avec des bois pour empêcher les mouvements sur cric.
-
Avec votre clef de roue, desserrer les 4 écrous en croix si possible.
-
Lever la voiture jusqu’à ce que la roue commencer à décoller du sol d'un centimètre ou deux.
-
il est conseillé de positionner des bois de protection sous la voiture vers le cric au cas au il lâche.
-
Enlever les 4 écrous de la roue et sortir la roue en la portant.
-
-
-
Commencer par visser les deux vis de 8 à la main dans les trous de la cloche. Cela ne doit pas forcer dès les premier tours sinon c'est que le filetage n'est pas le bon.
-
Serrer les vis de 8 l'une après l'autre petit à petit avec une clef pour écarter la cloche. Si cela fait des bruits et que cela force, vous avez oublié de desserrer le frein à main !
-
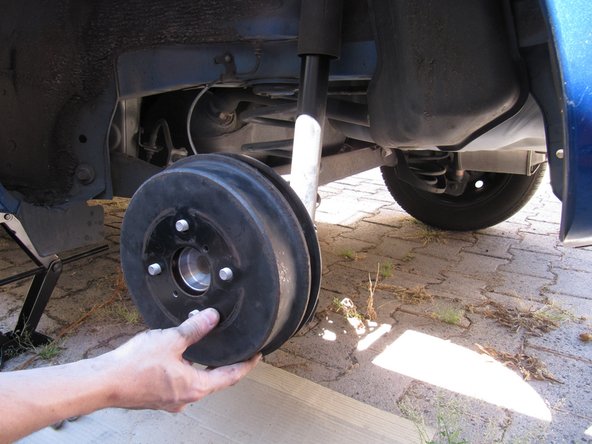
Enlèver la cloche en la portant délicatement. Attention c'est très sale.
-
-
-
Faire pivoter le roulement jusqu’à mettre les trous du roulement en face des boulons qui sont derrière.
-
A l'arrière du bras, enlever le cache du connecteur ABS en plastique, 1 clip en haut et un clip en bas. Enlever le connecteur ABS. Le clip de verrouillage est dessous et est extrêmement dur à enlever.
-
A l'aide de la clef de 14, desserrer les 4 vis à l'aide d'un levier long (dans mon cas la clef de roue). Enlever le roulement en douceur en faisant attention au systeme de freinage.
-
Si cela bloque voir étape suivante dédiée à cela.
-
-
-
Votre roulement ayant forcément quelque kilomètres au compteur il sera probablement rouillé.
-
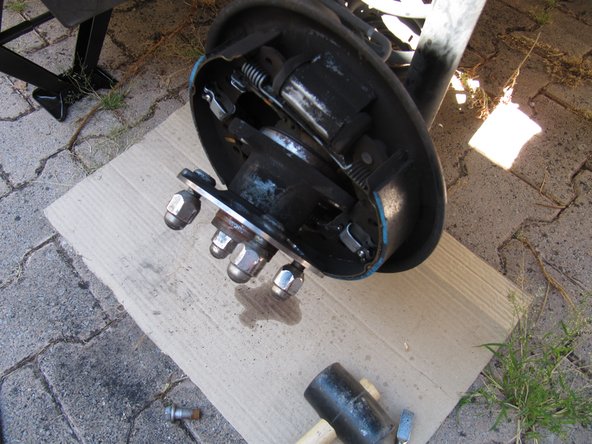
Pour débloquer le roulement, remettre les 4 vis de la roue à la main.
-
Frapper avec un marteau mou par l’arrière du vis. Effectuer la manipulation sur chaque boulon en croix. Au bout d'un moment le roulement va bouger et venir.
-
Le roulement risque de sortie avec la cloche arrière de freinage. Mettre alors du dégrippant derrière la cloche sur le roulement. La manipulation est la même pour enlever le roulement de la cloche. Si il y a nécessité de taper sur la cloche tapez uniquement à l'endroit de la flèche (photo 2) sur l'extrémité de la cloche et avec douceur.
-
-
-
Positionner le nouveau roulement en place en faisant attention au système de freinage autour. Attention au sens, il y en a un.
-
Visser doucement les 4 vis en passant par les trous avec la clef de 14. Vérifier que tout est en place. Clipser le connecteur ABS à l’arrière et son cache plastique.
-
Serrer les 4 vis en croix, à la clé dynamométrique et au couple préconisé par le constructeur dans votre carnet d'entretient . N'oubliez pas que c'est votre roulement qui tiens votre roue !
-
Remboîter la cloche de freinage à la main dans les 4 axes . Si la cloche ne tourne pas correctement c'est que vous n’êtes pas emboîté assez loin et les freins ne sont donc pas en face de leur trace d'usure sur la cloche.
-
Quand c'est en face la cloche tourne sans forcer.
-
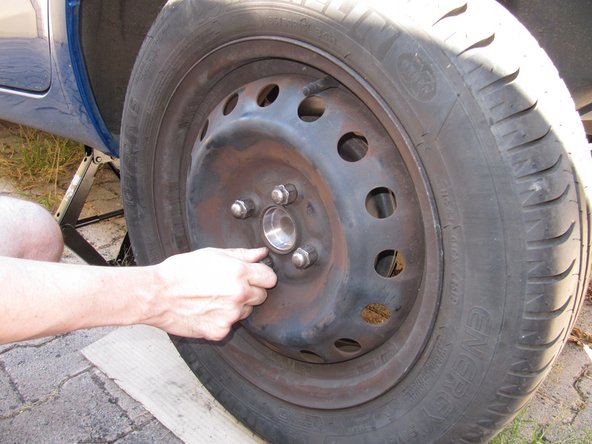
Porter la roue en face des trous et l’emboîter.
-
Visser les 4 vis à la main au maximum. Faire descendre la voiture pour qu'elle touche le sol, puis serrer en croix. Vérifier que la roue tourne normalement.
-
Remettre l'enjoliver et c'est FINI !
-
Ne pas commencer sans la clef de 14 pipe ou tube et les vis de 8 car indispensable au demontage
Ne pas commencer sans la clef de 14 pipe ou tube et les vis de 8 car indispensable au demontage
Annulation : je n'ai pas terminé ce tutoriel.
9 autres ont terminé cette réparation.
9 commentaires
Très bon post
Je l'ai changé sur ma yaris vvti 100ch de 2014
Pour Débrancher le connecteur ABS , j'ai commencé par declipser son câble pour lui donner du mou, puis j'ai sorti le roulement de son logement afin d'y voir plus clair.
J’ai posé le roulement sur une cale à hauteur et j'avais toute la visibilité pour débrancher le connecteur ABS.
Pour le remontage du roulement neuf,j'ai commencé par rebrancher le connecte5 ABS avant de remonter l'ensemble
Très bon tuto. J'ai fait mes 2 roulements arriérés. Côté gauche : 30 mns démontage, remontage. Côté droit : alors là j'ai galéré. Plus de 3 h00 pour retirer le roulement qui était soudé avec la rouille. J'ai dû démonter la flasque du tambour et le système freinage. Et même comme ça c'était soudé. Seul moyen, marteau sur l'arrière du roulement et avec bien du mal.
Bonjour,
cela fait 2 jours que je suis dessus et le roulement est complètement grippé sur la cloche… j’ai mis des tonnes de W40 depuis 48h mais il ne bouge pas. Une solution à me proposer svp ?
Bonjour , j'ai mis 2 h pour effectuer cette opération car il m'a fallu enlever les mâchoires de frein pour pour pouvoir passer un burin et taper jusqu'à désolidariser le vieux roulement .
Attention que les ressorts ne vous sautent pas dessus comme pour moi car il m'a fallu remonter la roue du côté réparation , la redescendre du cric et remonter l'autre côté pour observer le montage ; on est quand même avec des freins donc faut faire attention.
J'ai aussi utilisé une douille de 13 et non du 14 pour ma part . Il faut prévoir du temps et les jours où les garages sont ouverts au cas où rien n'irait .
Sinon c ’ est une bonne expérience de mecano du dimanche et mise à part de prévoir du temps , des outils et un bon savon pour se laver les mains, ce sera une énorme partie de plaisir … après ça vous aurez droit à une bonne bière .
Bon courage .
Bonjour,
Je suis au stade pour démonter le roulement qui est grippé. Je ne comprends pas la partie il faut frapper avec un marteau mou l'arrière du vis. Serait-il possible m'expliquer svp. Merci d'avance.


