Difficulté
Facile
Étapes
9
Temps nécessaire
00:20:00

Ce tutoriel a été créé par la communauté
User contributed
Introduction
Ce tutoriel montre comment changer la bobine d'allumage sur Clio 2 1.2 16v (moteur D4F).
Sur moteur 1.2 16v (D4F), la bobine est dite jumostatique et les faisceaux sont intégrés. On change tout l'ensemble.
On travaille contact coupé bien entendu. On peut débrancher la batterie si on le souhaite mais je ne pense pas que ça soit absolument nécessaire.
Pièces
-
-
Débrancher votre batterie
-
retirer le cache moteur (il est simplement clipsé)
-
la bobine et les faisceaux sont maintenant accessibles
-
-
-
tirer sur la tête du faisceau
-
pour le déconnecter
-
procéder de la même façon pour les 3 autres cylindres
-
-
-
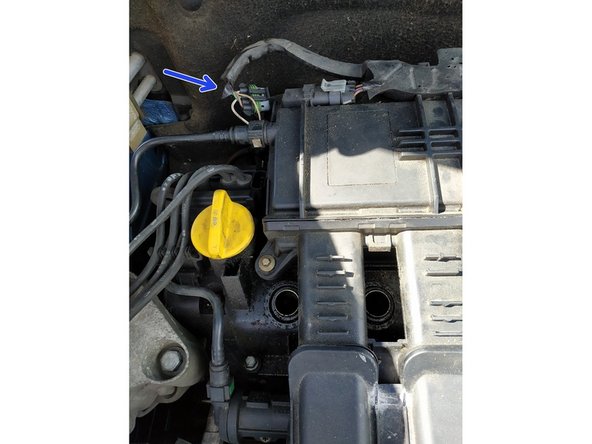
pousser la languette de la prise vers l'extérieur
-
soulever la prise pour déconnecter
-
mettre la prise en attente sur le côté
-
-
-
dévisser les 3 vis de maintien de la bobine à l'aide d'une clé torx T30
-
retirer la bobine
-
-
-
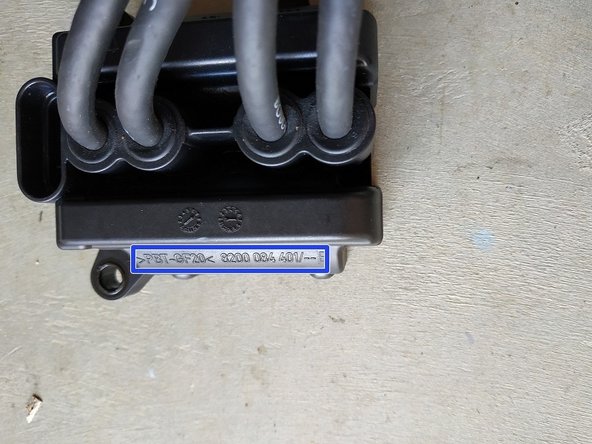
comparer l'aspect général des deux bobines (la bobine défectueuse et la bobine de remplacement)
-
comparer la référence de l'ancienne bobine
-
avec celle de la nouvelle
-
Seules les références nous renseignent réellement quant à la compatibilité.
-
-
-
présenter la bobine sur le moteur
-
et visser ses 3 vis de fixation, clé torx T30
-
-
-
Il va absolument falloir brancher les faisceaux dans le bon ordre.
-
les cylindres se suivent sur le moteur
-
Le cylindre 1 est celui côté boîte de vitesses.
-
mais pas sur la bobine (le 3 et le 4 sont inversés)
-
je n'ai pas repéré l'ordre car les longueurs des faisceaux correspondent parfaitement aux cylindres : le faisceau le plus long va au cylindre le plus éloigné de la bobine et ainsi de suite
-
-
-
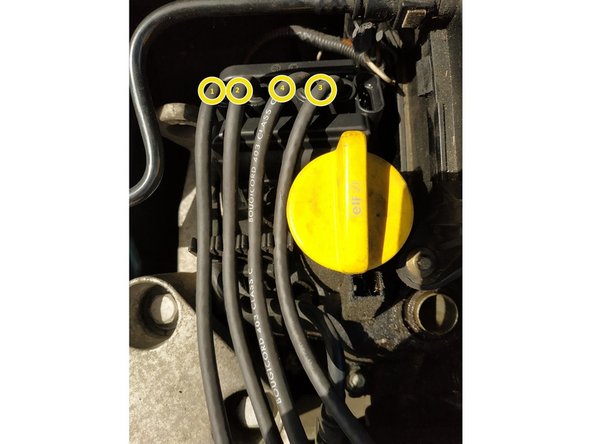
brancher les faisceaux correctement (on peut appliquer un peu de graisse di-électrique si on le souhaite)
-
clipser les faisceaux dans les encoches sur le collecteur d'admission : il n'y a pas de règle précise, on essaie juste de faire en sorte que ça soit propre
-
brancher la prise de la bobine (on doit entendre un "clic")
-
clipser les faisceaux, il y a des emplacements à côté du bouchon de remplissage d'huile
-
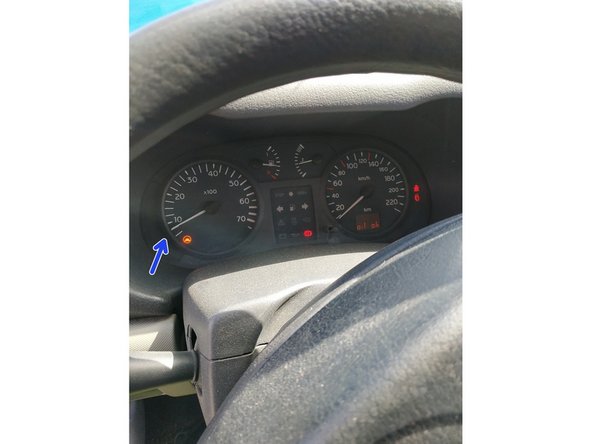
démarrer et vérifier que tout fonctionne
-
-
-
s'assurer que tout est correctement branché et clipsé
-
poser le cache moteur
-