


Introduction
Tutoriel réalise sur Peugeot 307 CC - 2.0 i 16V 138cv
Symptômes et causes associées. En cas de claquements au passage de bosses il faut vérifier le bon serrage des 2 vis de fixation hautes du support de l'amortisseur. J'ai eu ce soucis: une des 2 vis était mal plaquée.
-
-
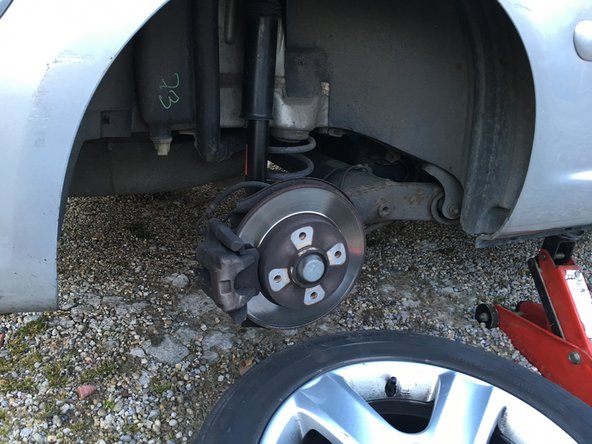
Choisir de préférence un terrain plat et par sécurité caler les roues avant car les freins de parking sont a l’arrière. Débloquer sans les enlever les 4 vis de fixation de la roue. Lever le véhicule à l'aide d'un cric hydraulique et positionner une chandelle de sécurité. Mettre en appui la caisse sur la chandelle. Déposer les vis et la roue. un cric hydraulique'''
-
Mise en sécurité du véhicule : démontage et remontage de la roue
-
-
-
A l'aide du cric ou d'un levier relever le bras de façon a comprimer suffisamment le ressort de suspension. L'objectif est de relâcher la tension du ressort intégré dans l'amortisseur. Une autre méthode consiste à faire descendre la voiture sur des cales en bois. Toujours securiser par la chandelle qui doit supporter la caisse. la chandelle
-
-
-
L'amortisseur n'est plus en tension, il n'y a plus d'efforts sur les vis de fixation.
-
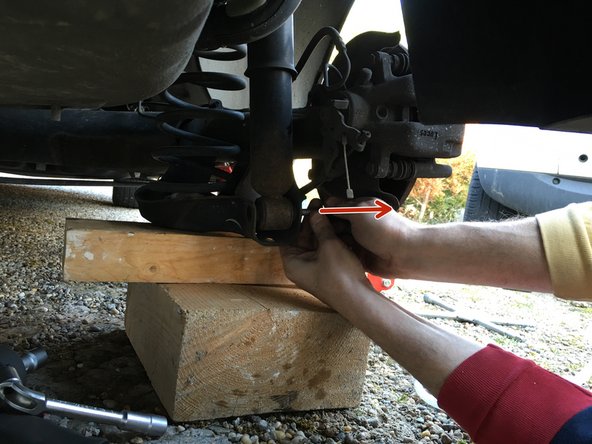
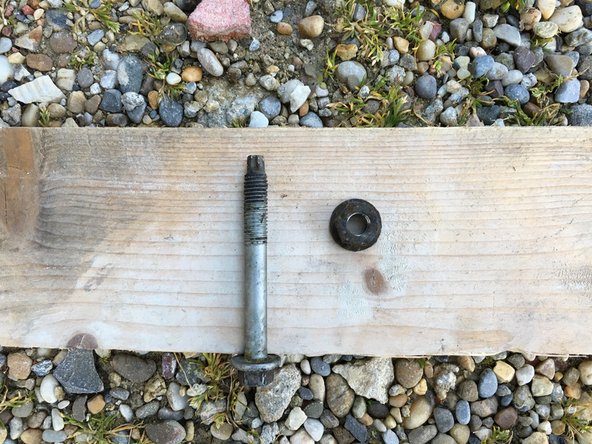
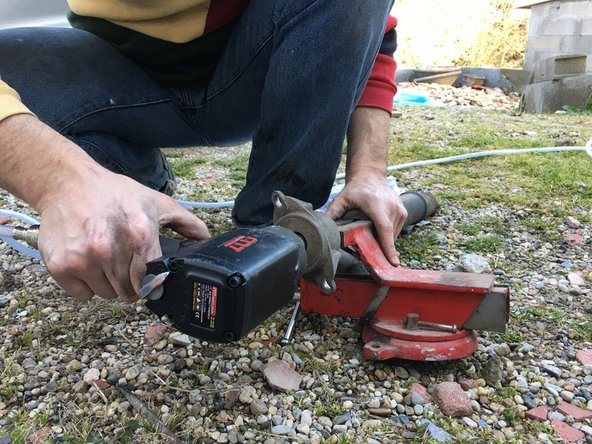
A l'aide de la clé plate de 13 (coté axe) et la douille de 13, dévisser l'écrou et extraire l'axe de fixation bas.
-
Sortir l'amortisseur de son logement afin de le détendre
-
-
-
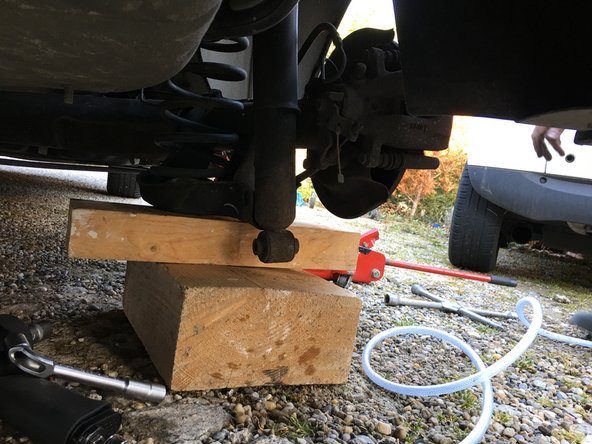
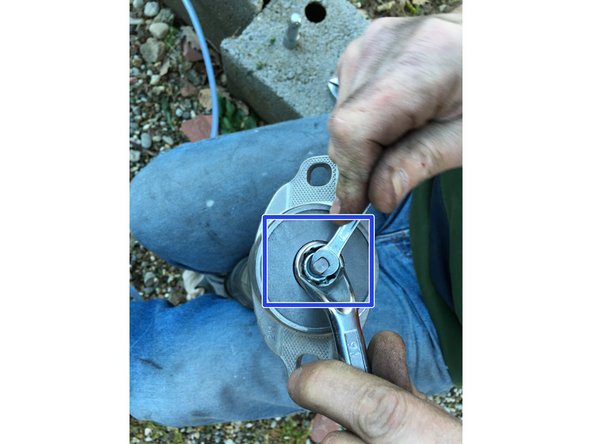
L'amortisseur est fixé en partie haute sur la butée d'amortisseur qui est fixée au châssis par 2 vis de 13.
-
déposer les 2 vis (clé de 13)
-
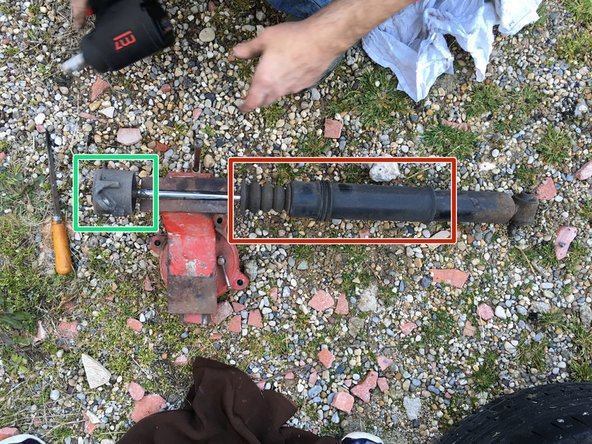
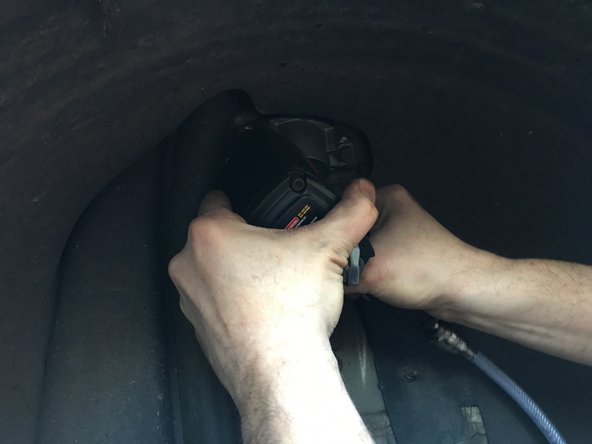
Extraire l'amortisseur et sa butée
-
-
-
Le soufflet doit être récupéré et sera reposé sur le nouvel amortisseur s'il est en bon état. (Sinon en prévoir un neuf et passer directement à l'étape suivante).
-
Pour cela, il faut déposer la vieille butée afin d'extraire le soufflet.
-
Dans certains cas l’écrou de la butée est difficile à desserrer il faut parfois serrer l'axe de l’amortisseur dans un étau pour l’empêcher de tourner lors du desserrage sinon utiliser une clé de 9 pour desserrer l’écrou avec la clé de 16
-
-
-
Repositionner le soufflet récupéré, après l'avoir correctement nettoyé, sur l'axe du nouvel amortisseur (ou en mettre un neuf s'il est abimé).
-
Mettre la nouvelle butée d'amortisseur (attention au sens : cloche en bas comme sur la photo) en bout de l'axe fileté et viser l'écrou à la main, jusqu'à plus pouvoir.
-
Il faut serrer l'écrou pour immobiliser la butée sans abimer l'axe de l'amortisseur : Ne pas utiliser l'étau cette fois !
-
Glisser la clé à oeil coudée de 16 dans le logement de la butée, autour de l'écrou. Insérer la clé plate de 9 sur les 2 méplats en bout de l'axe fileté afin d'empêcher sa rotation lors du serrage.
-
Serrer très fort l'écrou frein nylstop, jusqu'à l'immobilisation totale de la butée sur l'axe de l'amortisseur. La butée ne doit pas tourner ni osciller en bout de l'axe. Elle doit être complètement bloquée.
-
Le nouvel ensemble amortisseur-butée-soufflet est prêt à être remonté.
-
-
-
Procéder en sens inverse de la dépose
-
Fixer la butée d'amortisseur au châssis à l'aide des 2 vis de 13. Commencer le vissage à la main, puis continuer avec la clé à cliquet jusqu'au serrage complet. Compléter par un serrage final
-
Remettre le soufflet correctement en place : glisser le haut dans le logement de la butée et l'immobiliser.
-
-
-
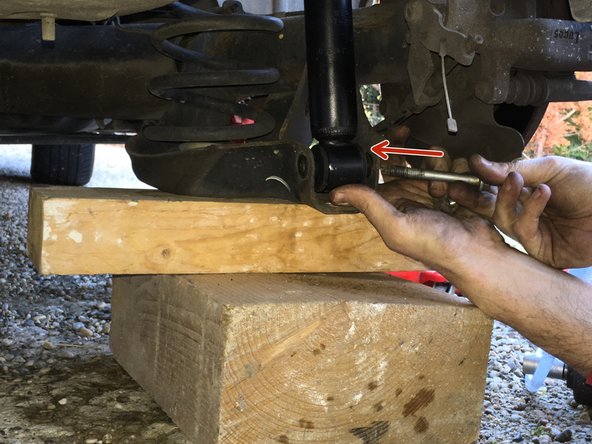
Compresser l'amortisseur à la main et le glisser dans son logement.
-
Remettre en place la vis et serrer l'écrou à la main pour le positionner correctement.
-
A l'aide de la clé plate de 13 et de la douille de 13, terminer le serrage jusqu'au blocage complet.
-
-
-
Selon la méthode utiliser pour comprimer le ressort , décomprimer le ressort, remonter la roue.
-


Annulation : je n'ai pas terminé ce tutoriel.
19 autres ont terminé cette réparation.
12 commentaires
J’ai oublié de vous dire que j’ai une 3008 peugeot année 2009 ses pour mais amortisseur arrière je ne ses pas comment tiens le soufflé de protection merci
andrejourno716 - Résolu à la publication Réponse
Comment tiens le soufflé en position haute pour ne pas qui glisse merci
andrejourno716 - Résolu à la publication Réponse
Bonjour je detien une 307 jai acheter des amortiseur et pour demonter les coupelle arriere imposible un des deux boulons tourne dans vide coment fair svp
nonobrickler - Résolu à la publication Réponse