


Difficulté
Facile
Étapes
3
Temps nécessaire
00:10:00

Ce tutoriel a été créé par la communauté
User contributed
-
-
Dévisser et retirer le bouchon de remplissage d'huile (entouré en rouge)
-
Dévisser à l'aide de la douille de 10 et du cliquet les 4 vis
-
Retirer le cache moteur
-
Remettre en place le bouchon de remplissage d'huile pour éviter que des impuretés ne tombent dedans
-
-
-
Dévisser les 2 vis (entourées en bleu photo n°1) à l'aide de la douille de 15 et du cliquet. Si l'effort à fournir sur le cliquet est trop important se munir d'une rallonge et d'une clés à pipe de 15 et desserrer.
-
Sortir le support en tirant côté moteur dans un premier temps (photo n°2 flèches rouge)
-
Extraire le support en tirant dans le sens de la flèche bleu (photo n°3)
-
-
-
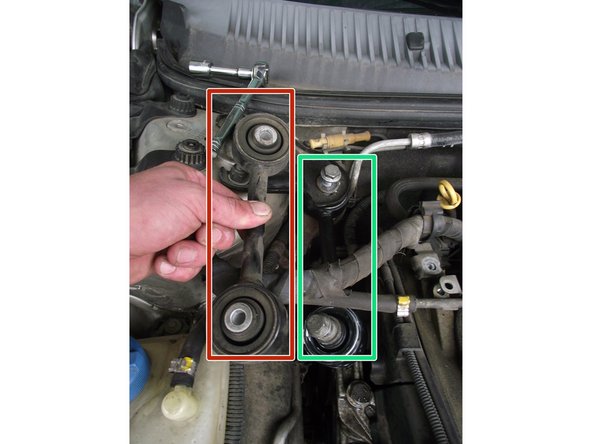
Mettre en place le support neuf. Photo n°1= comparaison du support neuf (encadré en vert) avec le vieux (encadré en rouge). Enduire au préalable de pâte de montage les vis et l'intérieur des passages de vis du support
-
Approcher les vis à l'aide de la douille de 15 et du cliquet. Finir de serrer à la clés dynamométrique entre 4.2 et 5.1 daN.m.
-
Remonter le cache moteur dans le sens inverse du démontage de l'étape n°1
-


Annulation : je n'ai pas terminé ce tutoriel.
3 autres ont terminé cette réparation.
