


Difficulté
Modérée
Étapes
15
Temps nécessaire
02:00:00

Ce tutoriel a été créé par la communauté
User contributed
Introduction
Remplacement du kit de distribution (courroie + galet tendeur + pompe à eau) sur 1.4 injection
Pièces
-
-
Placez une bassine sous la durite inférieure du radiateur, puis déconnectez la
-
Une fois tout le liquide évacué, reconnecter la durite inférieure.
-
Ne pas oublié de déposer à la déchetterie votre vieux LDR
-
-
-
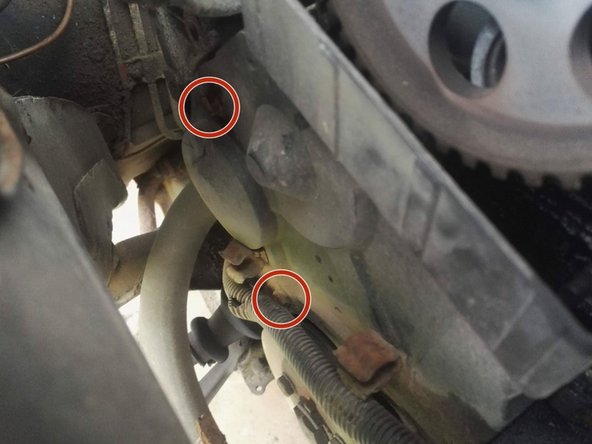
Dévissez les 2 vis de fixation du carter de distribution
-
-
-
Retirez le carter en le tirant simplement ver le haut
-
-
-
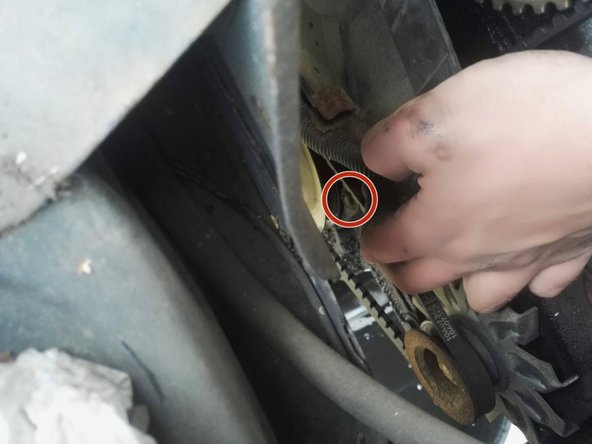
Détachez la gaine électrique du carter
-
Dévissez les 3 vis de fixation du carter inférieur puis retirez le
-
-
-
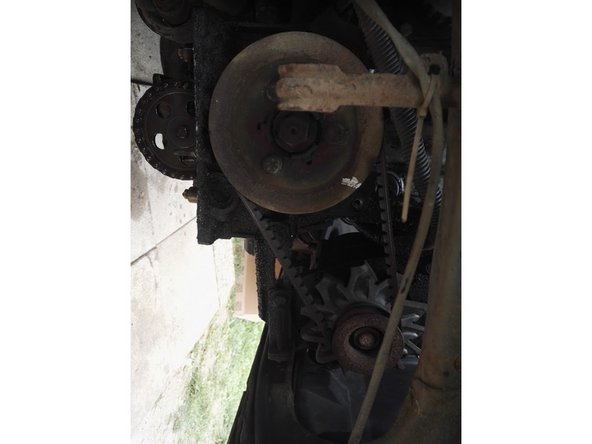
Aligner approximativement le trou dans la poulie d'arbre à came (rouge) au trou de pigeage dans la culasse (vert) (rester un peu avant)
-
Pour se faire, faire tourner le moteur à la main à l'aide d'une clé sur l'écrou de fixation de la poulie de vilebrequin en "serrant" l'écrou, le moteur va tourner.
-
-
-
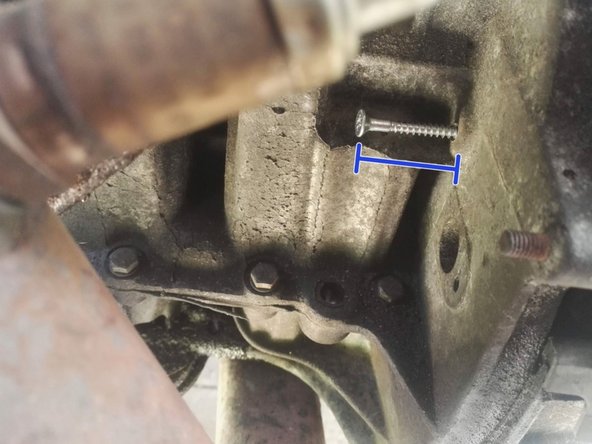
Une fois les 2 trous presque alignés, préangager la pige dans le trou du volant moteur (ici une vis de ø6mm)
-
En continuant d'essayer d'enfoncer la pige, faire doucement tourner le moteur jusqu'à ce que la pige s'enfonce et que le moteur se retrouve bloqué
-
-
-
Une fois le volant moteur bloqué, les trous de pigeages de la poulie d'arbre à came doivent être alignés, mettre également la pige en place (foret ø8mm ici)
-
-
-
Dévissez et déposez le galet tendeur (Déjà déposé sur la photo)
-
Retirez la courroie
-
-
-
Dévissez légèrement la vis
-
Dévissez complètement l'écrou
-
Rapprocher l'alternateur du moteur afin de libérer la tension, déposez la courroie.
-
Pour une facilité d'accès on peut déposer la roue avant droite
-
-
-
Remontez le nouveau galet tendeur (sans le serrer complètement)
-
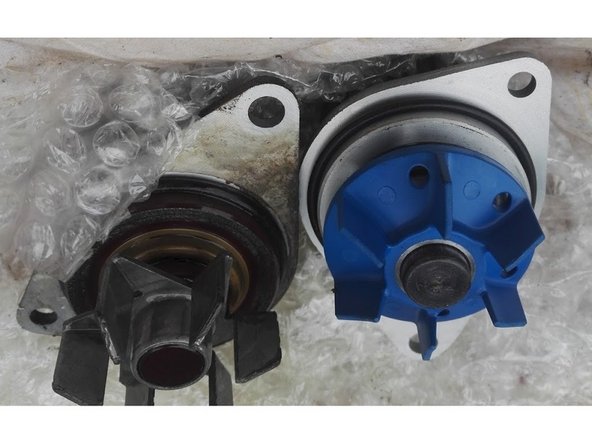
Déposez la pompe à eau
-
Vérifiez que les pompes à eau sont identiques
-
-
-
Mettre en place la courroie en commençant par le bas, puis la poulie d'arbre à came (haut)
-
La courroie doit être un minimum tendue entre les deux poulies
-
Finir par la pompe à eau puis le galet tendeur
-
-
-
Mettre le galet en appui sur la courroie, puis à l'aide d'un tournevis faire levier (Placer le tournevis dans le petit carré du galet) une fois la courroie tendue serrer le galet
-
Pour vérifier la tension de la courroie, "tordre" le brin le plus long de la courroie, vous ne devez pas faire plus d'un quart de tour
-
-
-
Retirez les 2 piges (Poulie d'arbre à cames et volant moteur)
-
Faire tourner le moteur à la main (Même procédé que pour la mise en place des piges) et vérifier que rien ne bloque (effectuer au moins 2 tours)
-
Remontez les différents éléments du carter de distribution (Etape 4 à 1)
-
Remplissez et purger le circuit de refroidissement
-


Annulation : je n'ai pas terminé ce tutoriel.
8 autres ont terminé cette réparation.
8 commentaires
Ya pas de sens pour metre la courroie de distribution ya pas de flèche dessus ?
betamaxx16s - Résolu à la publication Réponse
Pouvez vous me dire comment procéder pour nettoyage injecteur et ou ils sont placés dans le moteur ainsi que le débitmètres merci
fornasier stephane - Résolu à la publication Réponse
nickel ce tuto, et effectivement l’idée de la vis m’a permis de réaliser l’opération sans sacrifier un outil ou d’investir inutilement dans des piges, top =D
Gislain Morin - Résolu à la publication Réponse