


Difficulté
Modérée
Étapes
9
Temps nécessaire
00:05:00 - 00:10:00
- Changer le thermostat sur Ford Ka I 9 étapes

Tutoriel complet
Ce tutoriel contribué par la communauté est complet et prêt pour l'examen de l'équipe Oscaro.

En cours
Ce tutoriel est en cours de création. Revenez de temps en temps pour voir les modifications.
Introduction
Le modèle présenté est une Ford Ka phase 1 1.3 60ch.
Pensez à utiliser un liquide de refroidissement conforme aux préconisations du constructeur.
Assurez-vous avant de commencer que le joint du thermostat est bien fourni.
J'ai décidé de changer la bride mais ce n'est pas obligatoire si elle est en bon état.
-
-
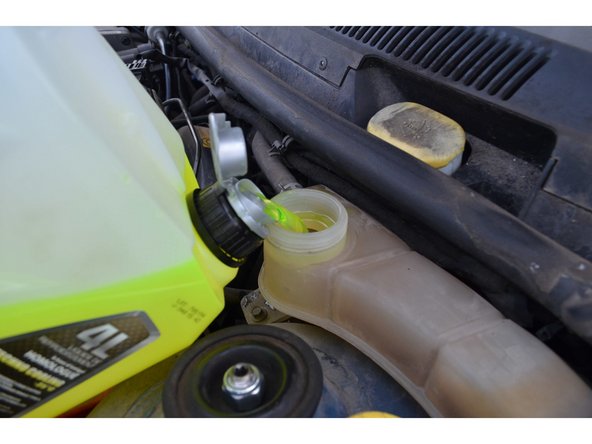
Bocal de remplissage
-
Durite de vidange
-
Collier de serrage
-
-
-
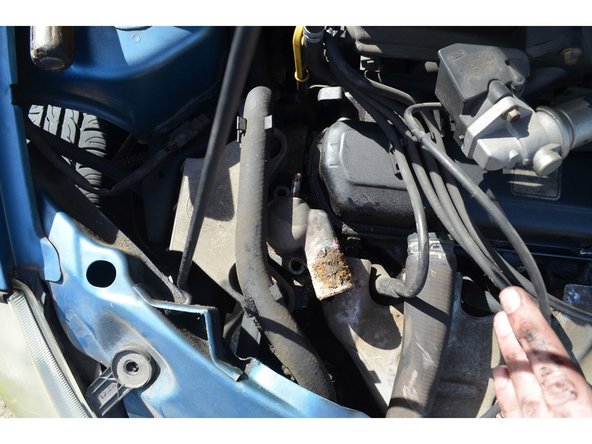
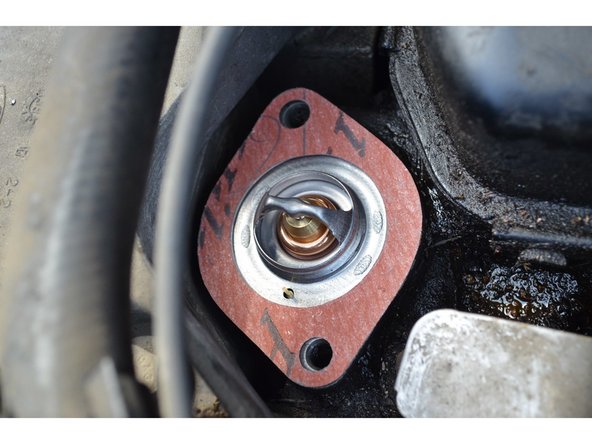
Le thermostat est dans la bride qui se trouve entre le couvre-culasse et le support moteur.
-
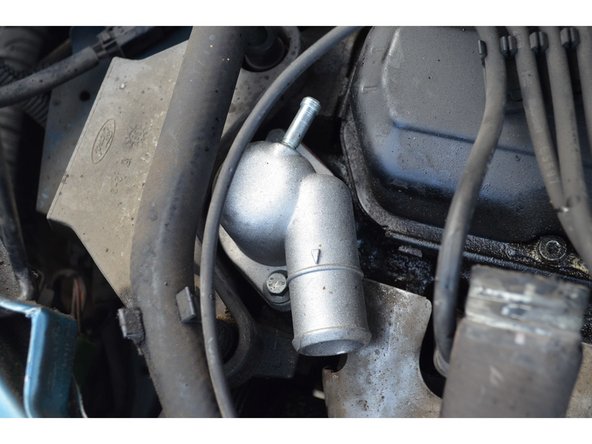
Bride
-
Durites d'eau
-
Colliers de serrage
-
Vis de fixation de la bride
-
-
-
Retirez le bouchon du bocal de remplissage.
-
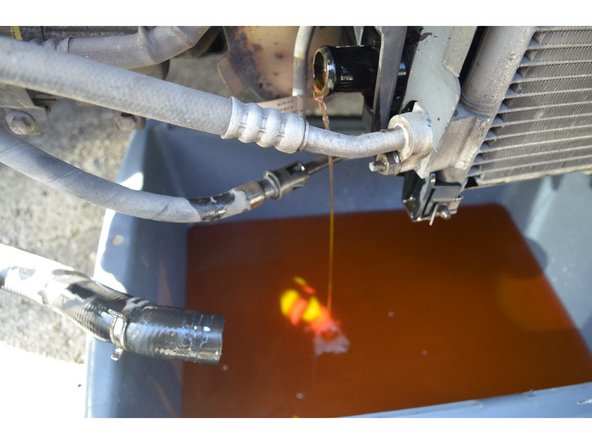
Placez une bassine sous la durite de vidange.
-
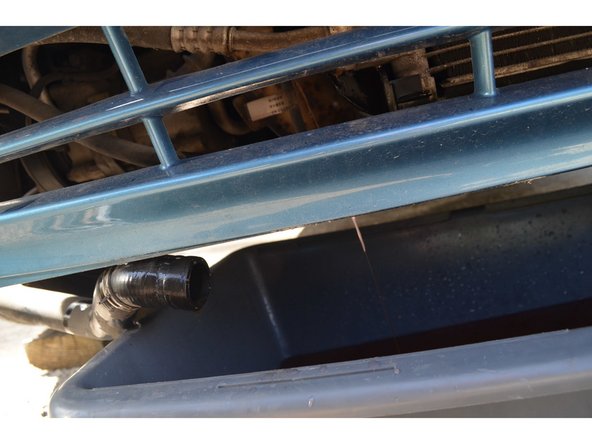
Retirez le collier de serrage de la durite de vidange puis tirez sur la durite pour la retirer.
-
Laissez le liquide s'écouler.
-
-
-
Retirez les colliers des durites puis retirez les durites.
-
Retirez les vis de fixation de la bride puis retirez la bride.
-
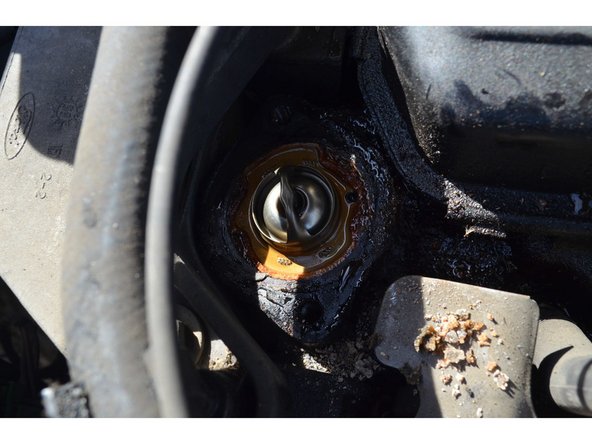
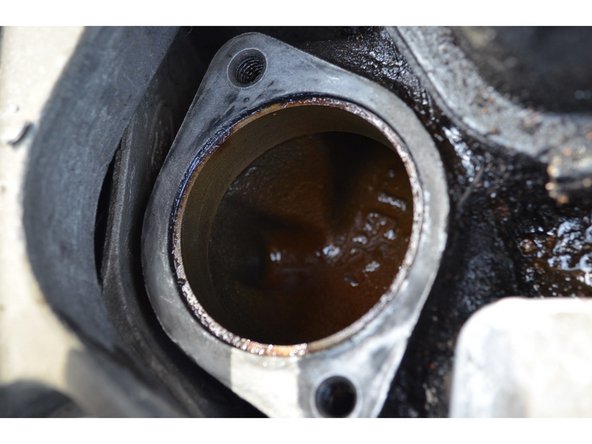
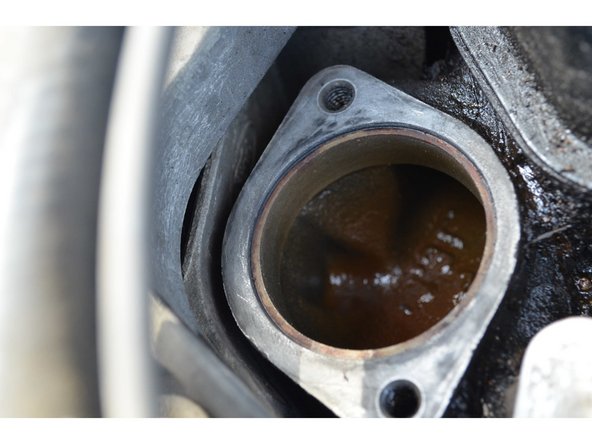
Laissez l'ancien thermostat en place et nettoyez le plan de joint à l'aide d'une lame de cutter.
-
-
-
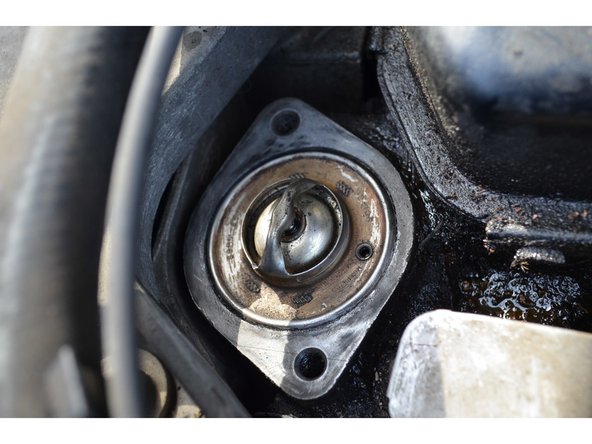
Retirez le thermostat et nettoyez la portée du thermostat.
-
Faites attention à ne rien faire tomber dans le puits.
-
-
-
Repositionnez la durite de vidange avec son collier.
-
Il n'y a pas de vis de purge sur ce modèle. Le vase d'expansion étant le point le plus haut l'air s'échappe par le tuyau de retour.
-
Remplissez le bocal jusqu'au bon niveau.
-
Vérifiez qu'il n'y a pas de fuite au niveau de la durite de vidange, des durites de la bride et au niveau de la bride sur le plan de joint.
-
Démarrez le moteur et laissez-le tourner.
-
Maintenant que le liquide est en pression et qu'il circule, vérifiez à nouveau qu'il n'y a pas de fuite au niveau de la durite de vidange, des durites de la bride et au niveau de la bride sur le plan de joint.
-
Laissez monter en température jusqu'au déclenchement du ventilateur de refroidissement.
-
Attendre que le moteur refroidisse puis faire l'appoint.
-
-
-
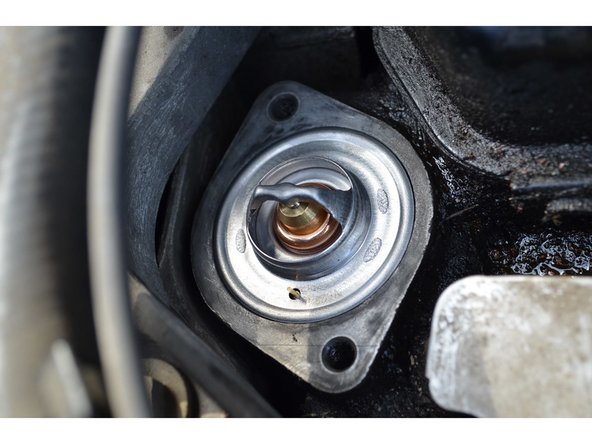
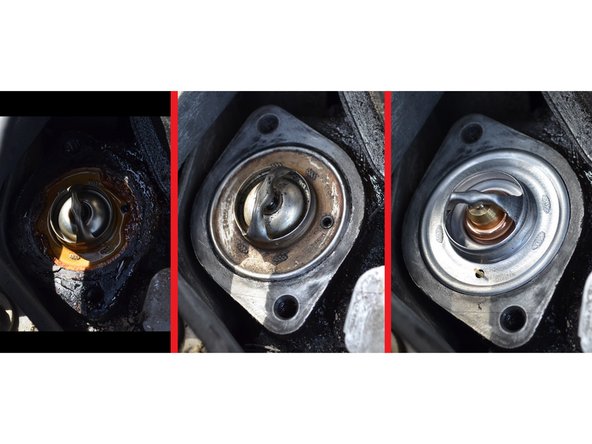
Photo qui montre l'ancien thermostat avant nettoyage puis après nettoyage et enfin le thermostat neuf
-


Annulation : je n'ai pas terminé ce tutoriel.
7 autres ont terminé cette réparation.
Un commentaire
sur ma FORD KA 1.2 ess le joint de section carrée neuf du nouveau boitier de thermostat QH acheté chez Oscaro s extrude par le petit usinage de la gorge de joint qui doit servir de fusible en cas de surpression; ceci lors des derniers 0,5 mm de serrage des 2 vis.
que dois je faire.
tel O6 15 49 17 85
MARC ZARIFIAN - Résolu à la publication Réponse