


Difficulté
Difficile
Étapes
11
Temps nécessaire
02:00:00

Ce tutoriel a été créé par la communauté
User contributed
Introduction
Tutoriel realise sur Clio II 1.5DCI 65ch
Pièces
-
-
ATTENTION: Il faut changer les 2 roulements à chaque fois !
-
Si possible, caler le véhicule sans avoir eu à vous servir de votre frein à pied et frein à main ! Cela sera plus facile pour enlever le tambour.
-
Devisser les écrous de roues
-
Lever et caler la voiture
-
Enlever la roue
-
-
-
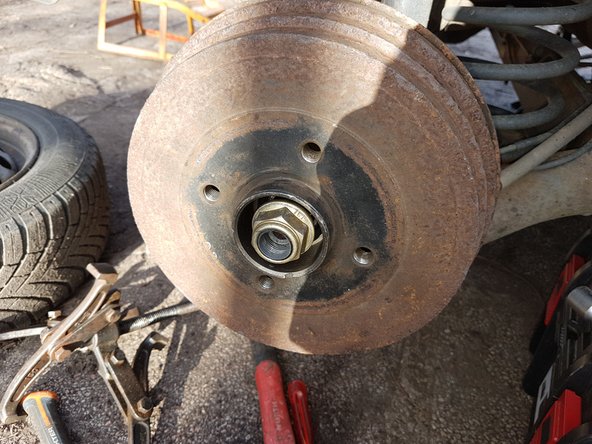
Enlever le cache écrou
-
Dévisser l'écrou de 30 (serré à 17.5kg dans mon cas 1.5dci65ch)
-
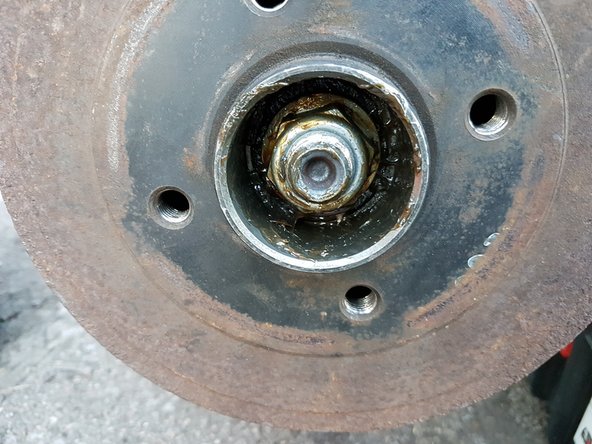
Vous verrez apparaitre le circlip une fois l'écrou enlevé
-
-
-
Enlever le tambour en tapotant autour et sur le tambour afin de faire décoller un peu les garniture.
-
Tirer vers vous pour enlever le tambour. Cela peut etre plus ou moins difficile.
-
Vous pouvez essayer avec un tournevis également (en faisant attention de ne pas tordre le tambour).
-
Et si cela ne fonctionne pas, vous pouvez prendre un extracteur.
-
-
-
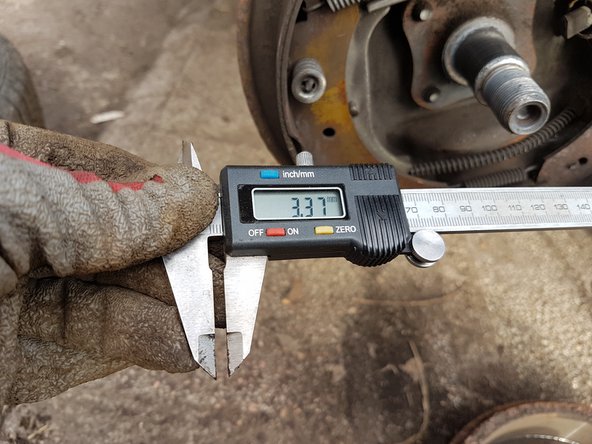
Une fois le tambour enlevé, profité en pour vérifier l'épaisseur des garnitures.
-
-
-
Enlever le circlip avec une pince à bec ou pince à circlip.
-
-
-
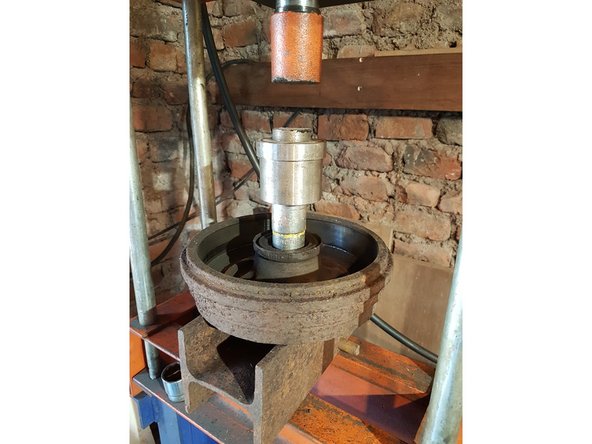
Enlever le roulement à la presse en s'aidant d'une pièce métallique du diamètre intérieur exact du roulement.
-
Quand la presse appuyera, il faudra qu'elle soit exactement vertical sur le roulement pour ne pas endommager le tambour.
-
Il faut presser pas mal jusqu'à entendre un gros bruit.
-
On peut alors sortir ensuite le roulement sans trop de problème.
-
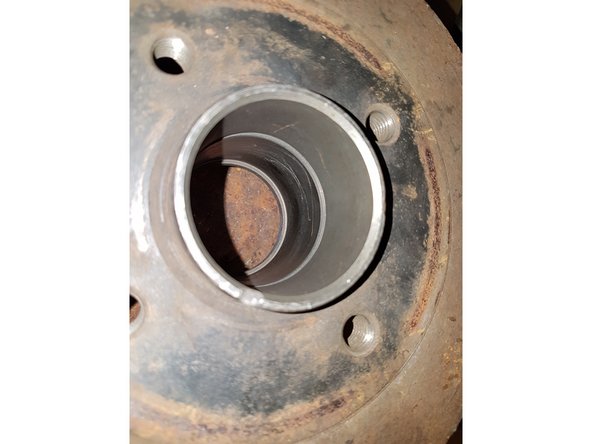
Une fois enlevé, nettoyer l'intérieur pour enlever les éventuelles poussières ou sable.
-
-
-
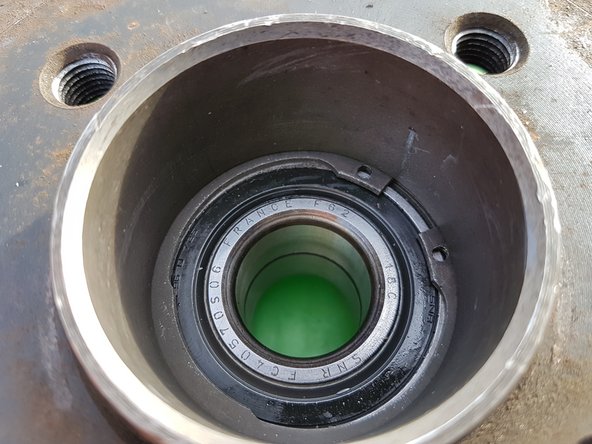
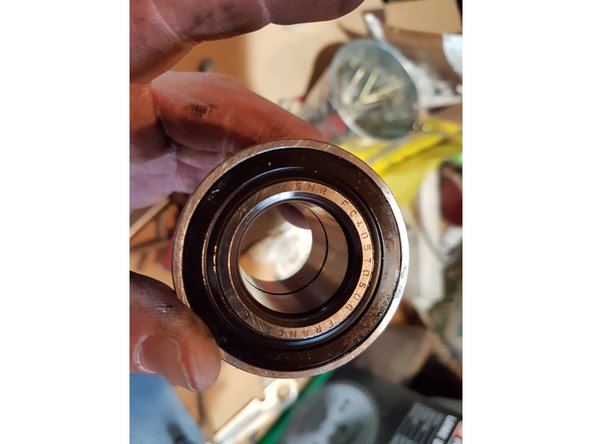
On vérifie que le roulement neuf correspond bien au roulement enlevé.
-
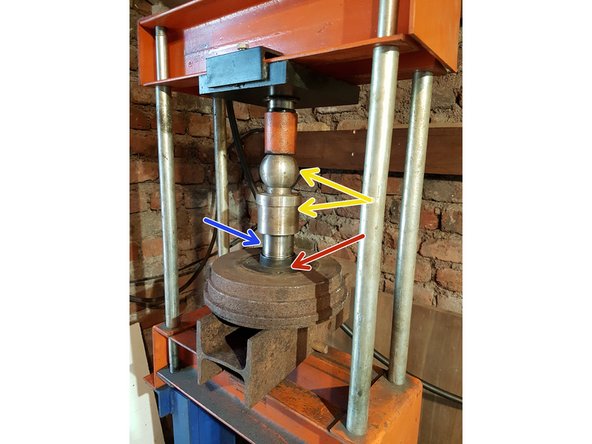
Ensuite on met le roulement neuf par le coté extérieur du tambour (indiqué par la fleche rouge, il dépasse de 4mm).
-
On met par dessus le roulement ancien (fleche bleue).
-
Puis on ajoute des pièces metalliques pour utiliser la presse (fleche jaune).
-
De cette manière, la presse appuyera sur l'ancien roulement qui appuyera sur le nouveau et le centrera parfaitement.
-
ATTENTION a ne pas aller trop loin lors de la mise en place du roulement ! Il y a un joint de l'autre coté et vous risquez de l'abimé si vous rentrer le roulement trop profondement! Vérifier de temps en temps de l'autre coté pour voir où en est le roulement.
-
Une fois que le roulement est en place, vous pouvez retirer l'ancien roulement sans soucis.
-
-
-
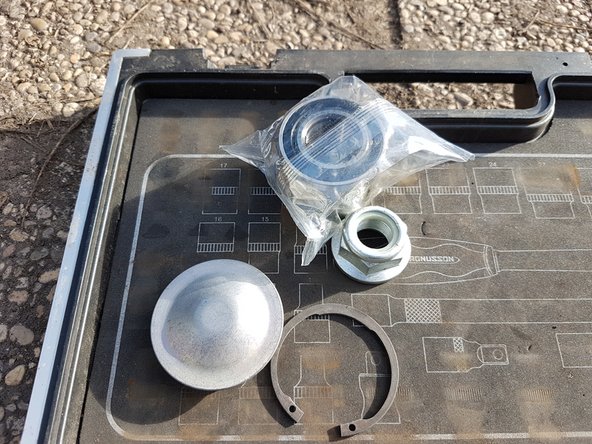
Le kit de roulement fournit l'écrou, le circlip et le cache.
-
On change donc le circlip.
-
Et on le met dans la gorge.
-
-
-
On remet le tambour en remettant l'ancien écrou.
-
Cela permet de placer le tambour correctement à fond.
-
Ensuite on enleve l'ancien écrou et on revisse en mettant le nouvel écrou.
-
On serre l'écrou au couplé préconisé dans votre doc technique (dans mon cas 17kg).
-
-
-
Avant de remettre le capuchon neuf du tambour, on met de la graisse autour de l'écrou.
-
On remet ensuite le cache écrou.
-


Avec une presse et un extracteur, on met 2h pour changer les 2 roulements tranquillement.
Avec une presse et un extracteur, on met 2h pour changer les 2 roulements tranquillement.
Annulation : je n'ai pas terminé ce tutoriel.
6 autres ont terminé cette réparation.