


Introduction
Remplacement d'un moyeu roulement sur Audi A3 II - 2.0 TDi 16V 140cv (8P1)
Vous allez démonter les plaquettes, disque de frein, support étrier, rotule inférieure, cardan coté roue pour pouvoir enlever le moyeu avec sont roulement et remonter tous l'ensemble étape par étape.
Outils
Pièces
-
-
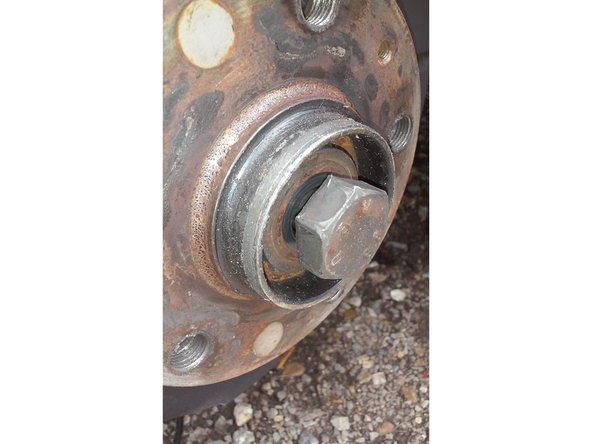
Retirer l'enjoliveur du centre de la roue
-
Insérer un tournevis plat sur un bord et faite levier.
-
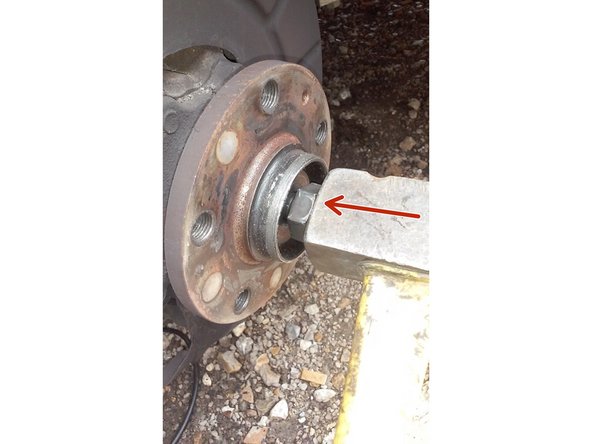
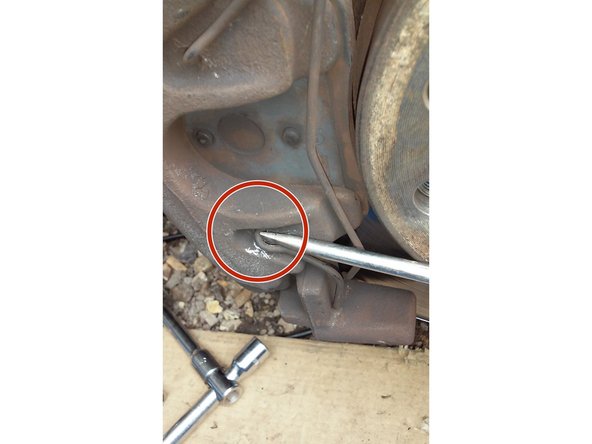
Tête du boulon, il vous faudra une douille de 27mm
-
Insérer votre douille de 27 mm avec votre rallonge et aidez vous d'un tube de 1,50 m à 2 m cela serra pus facile pour le débloquer.
-
-
-
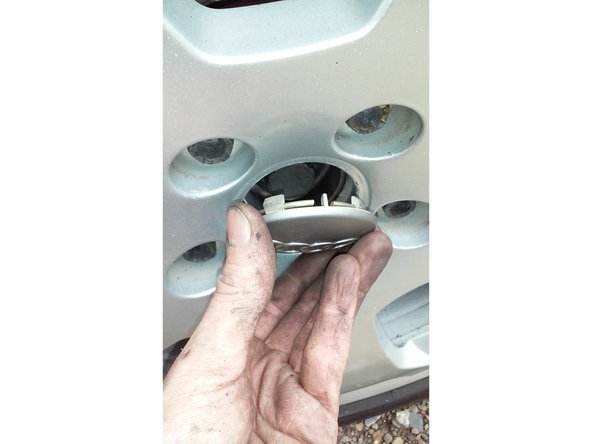
Retirer les caches des écrous de roue
-
Avec la pince présente dans le coffre du véhicule (ou une pince à bec plat) allez chercher le cache, faite la même opération pour les 5 trous.
-
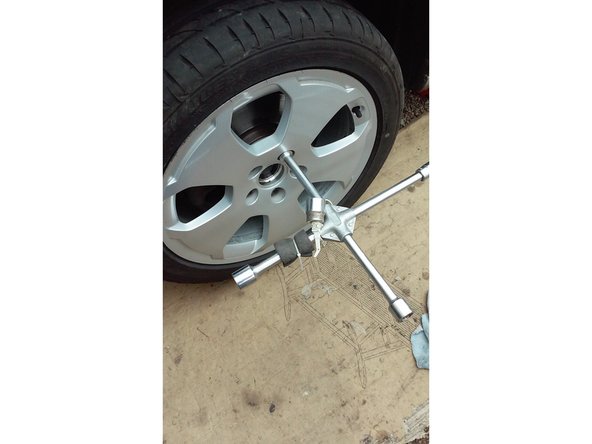
Avec votre croix débloquer la roue .
-
-
-
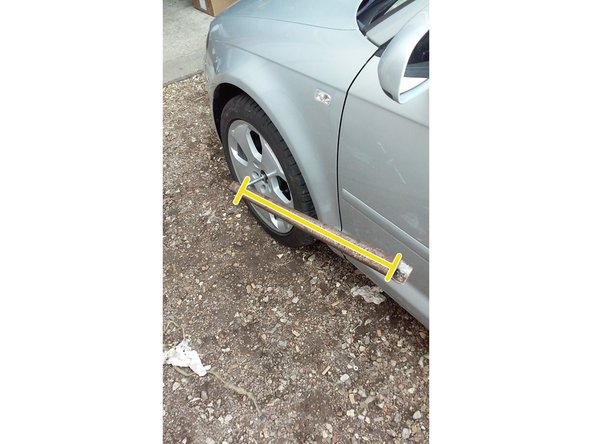
Placer un crique et lever votre véhicule Mise en sécurité du véhicule : démontage et remontage de la roue
-
Toujours placer une chandelle par sécurité sous le véhicule.
-
Retirer les 5 goujons et votre roue
-
-
-
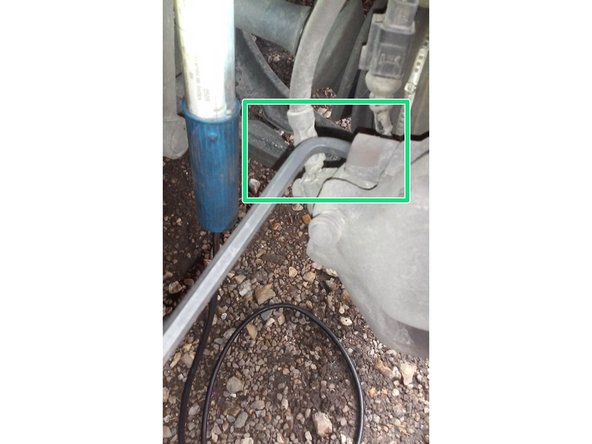
A la main décrocher le fil des deux supports.
-
-
-
Avec un tournevis plat insérer le sous l'agrafe et faite levier en bas et en haut.
-
Retirez le avec la main
-
-
-
Avec le tournevis plat retirer les capuchons du haut et du bas.
-
-
-
A l'intérieur du capuchon
-
La vis
-
Avec une clé Allen de 7 mm désserrer les deux vis
-
-
-
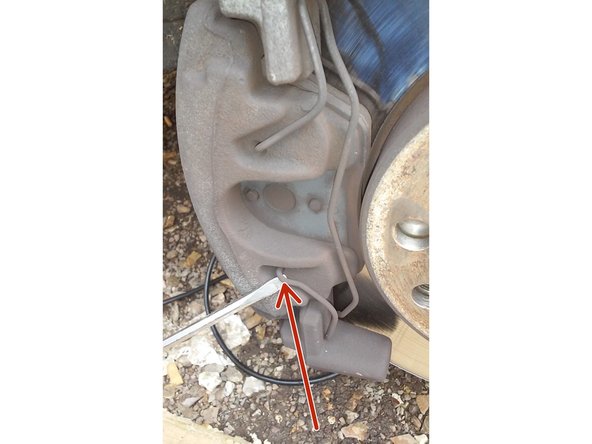
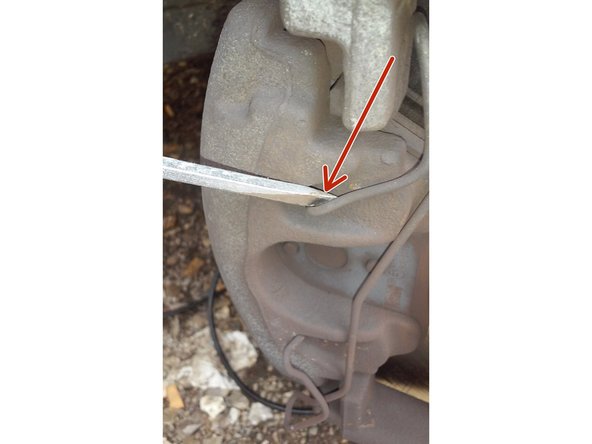
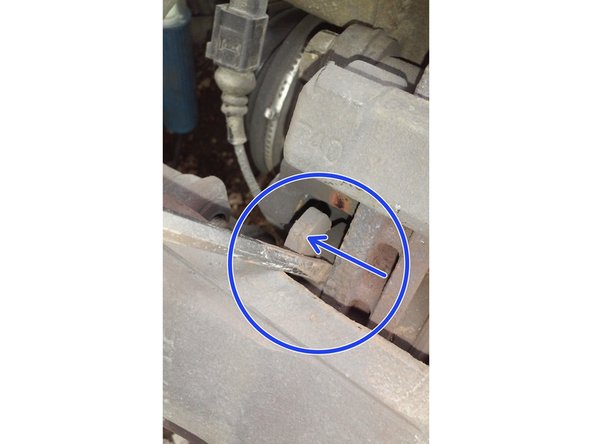
Avec un tournevis plat insérer le en haut et faites levier.
-
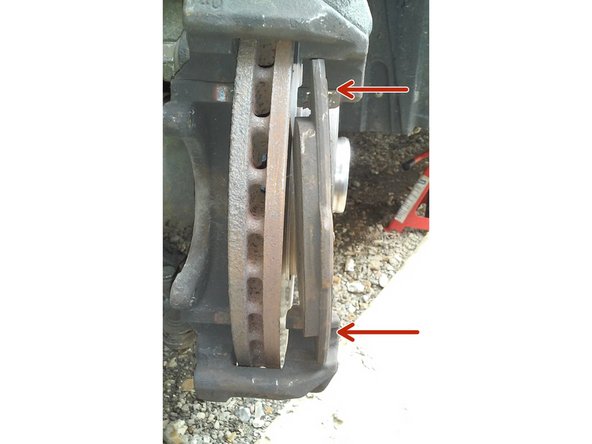
Repousser les plaquettes du disque avec le tournevis plat pour dégager l’étrier
-
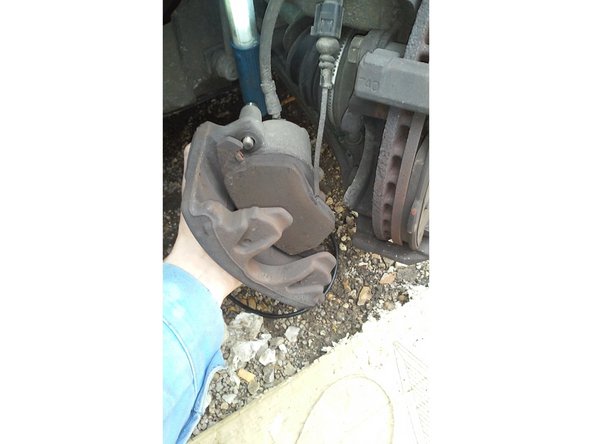
Retirer l'étrier de frein.
-
-
-
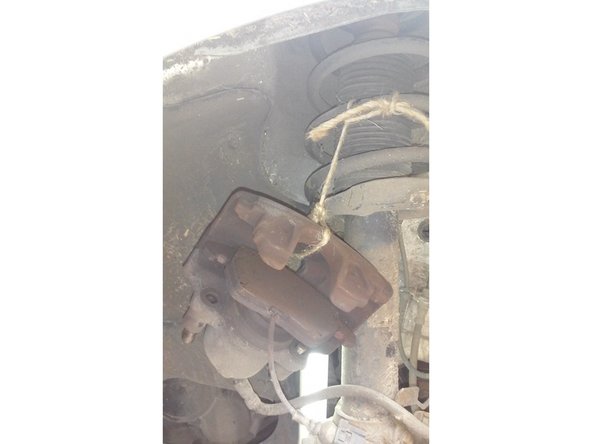
Avec une ficelle ou fil de fer attacher l'étrier de frein au ressort de l'amortisseur.
-
-
-
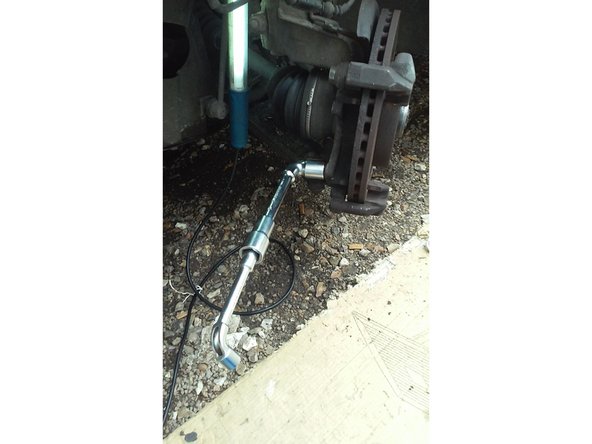
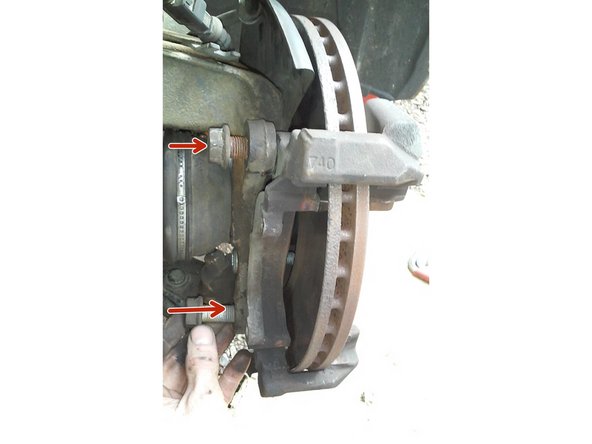
Desserrer et enlever les deux boulons avec une clé de 18 mm
-
-
-
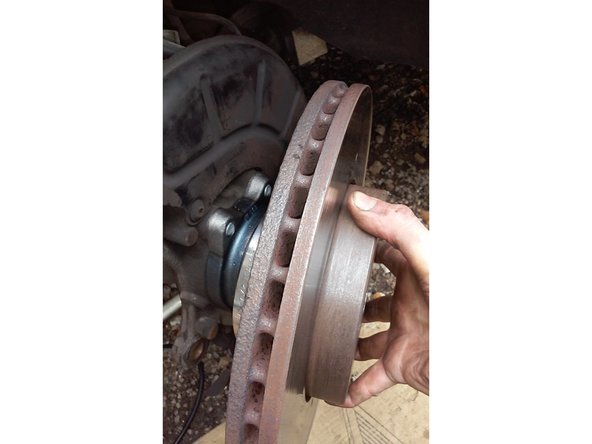
Avec un tournevis cruciforme desserré la vis et enlever le disque de frein
-
Si la vis est trop dure à desserrer il vous faudra un tournevis à frapper
-
-
-
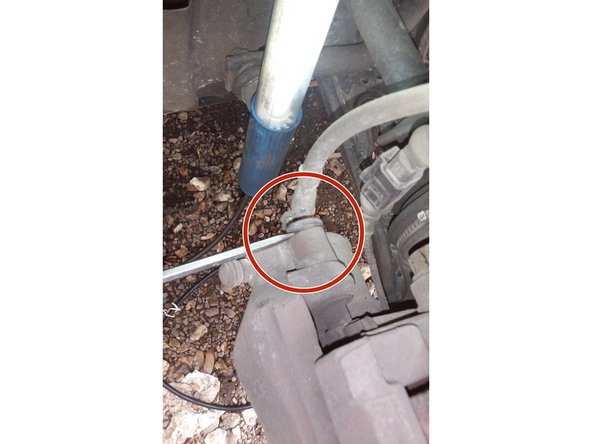
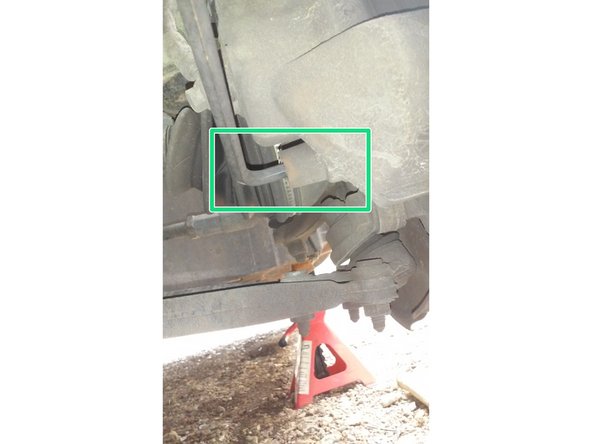
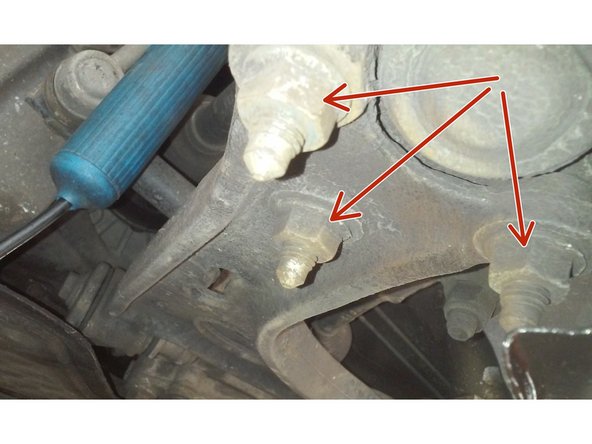
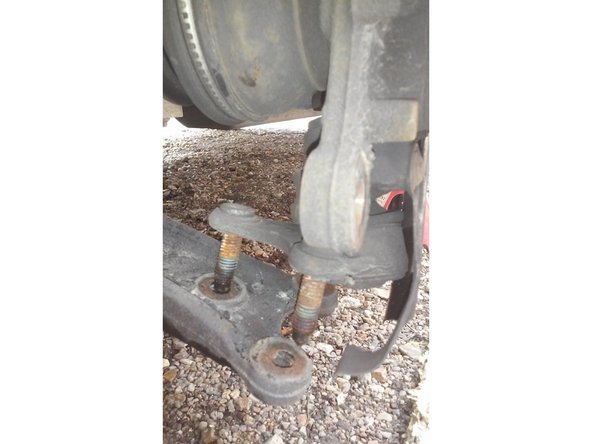
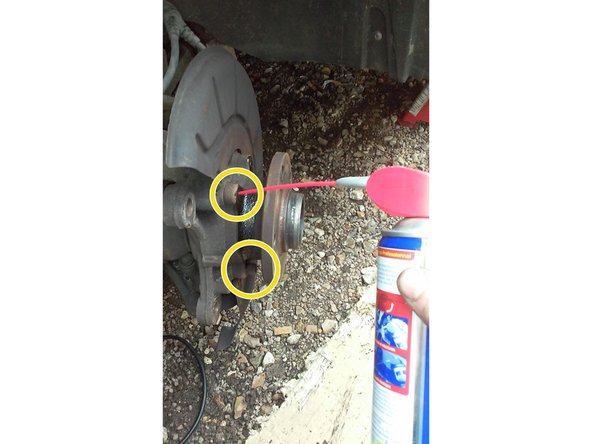
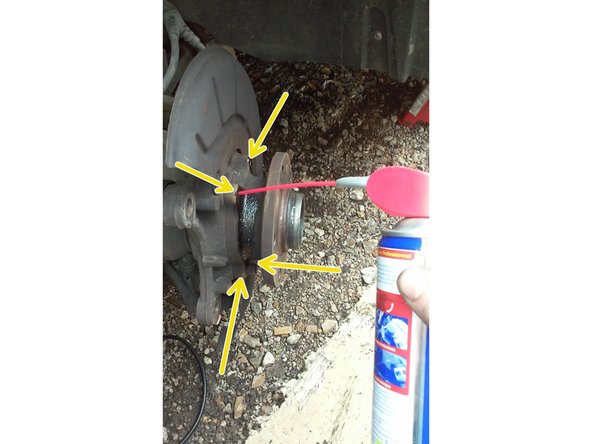
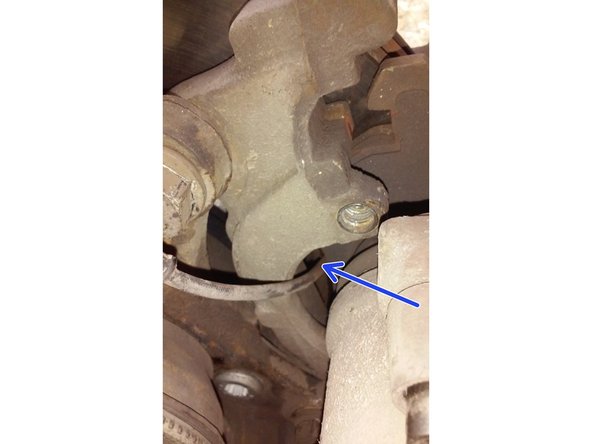
Débloquer avec une clé de 16 mm les trois écrous de la rotule.
-
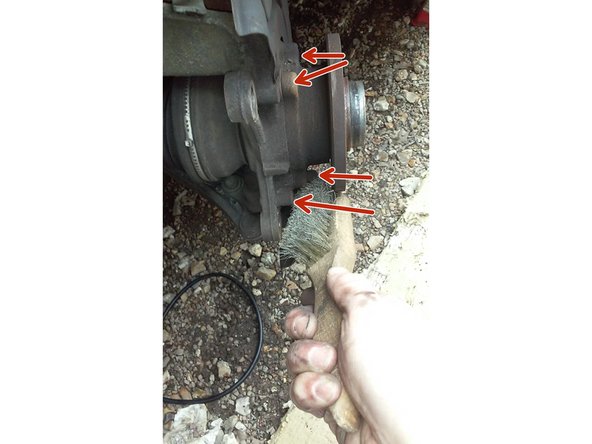
Passer un coup de brosse métallique sur les écrous et mettez du dégrippant
-
-
-
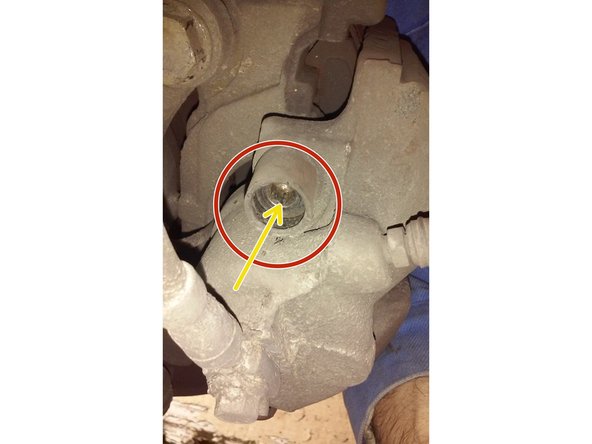
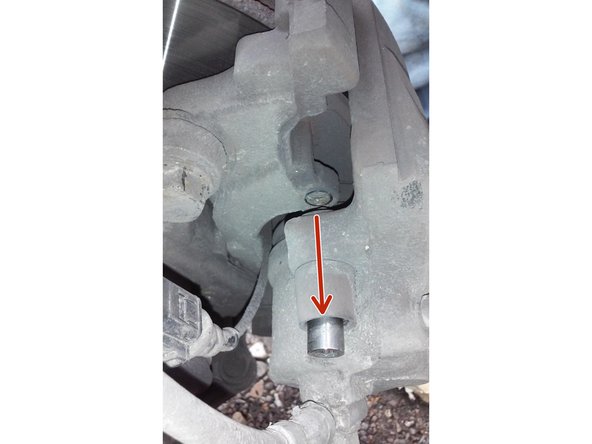
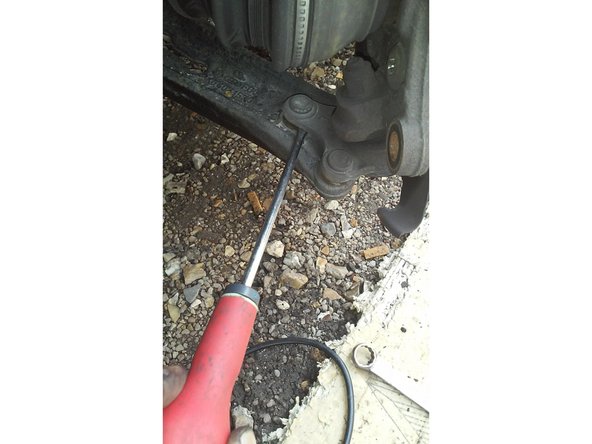
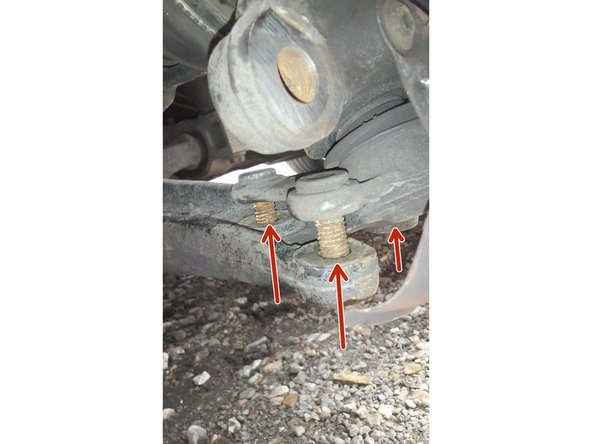
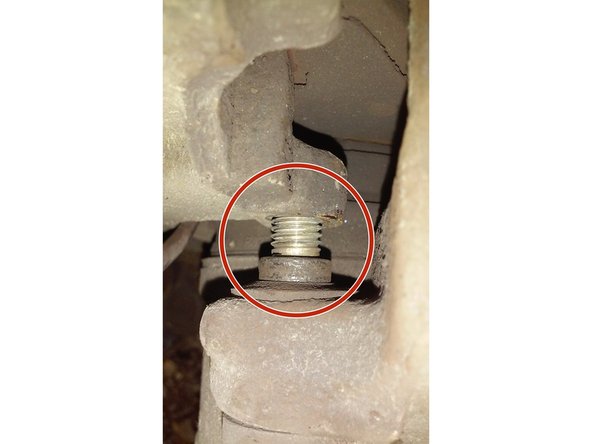
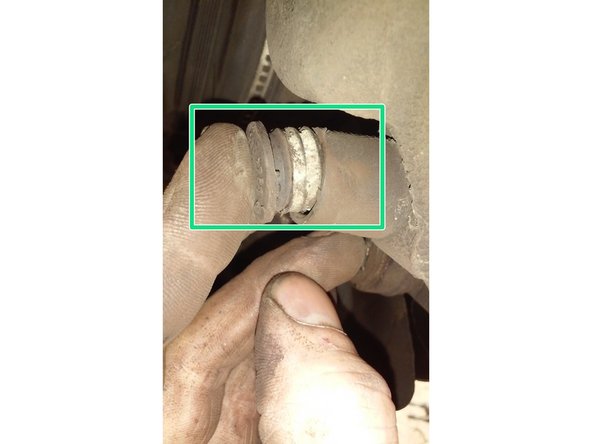
Si besoin donner un coup de marteau sur la tête du boulon pour décoller le cardan
-
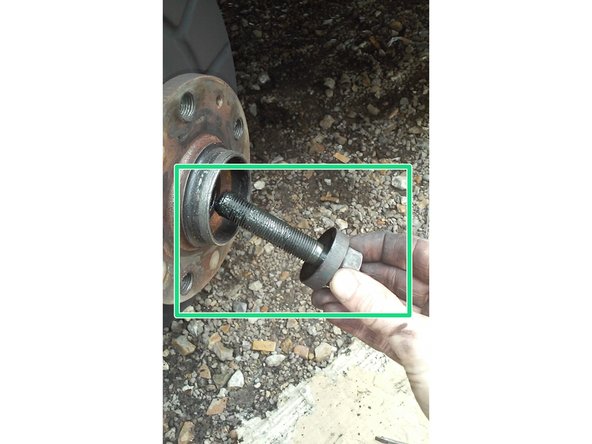
Desserrer et enlever entièrement le boulon.
-
-
-
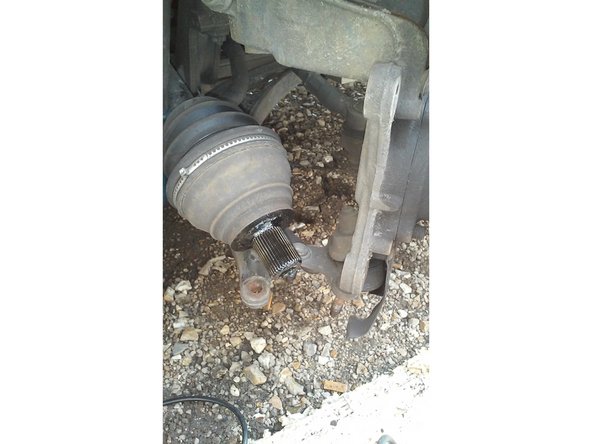
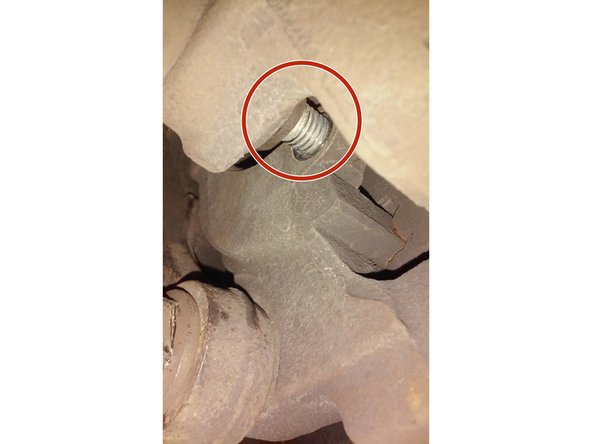
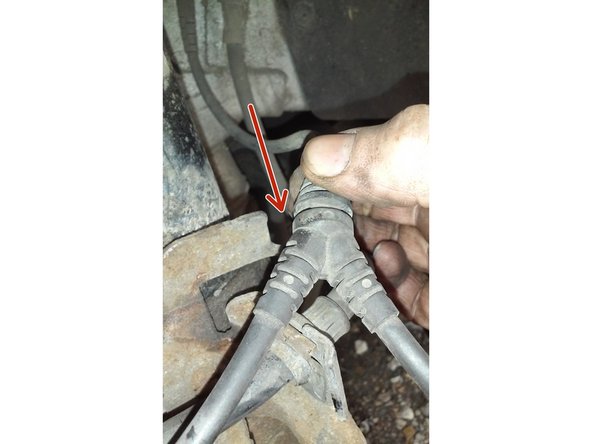
Tirer sur le moyeu
-
Pousser sur le cardan pour le dégager du moyeu.
-
-
-
Bien nettoyer le filetage des quatre vis avec une brosse métallique
-
Mettre du dégrippant sur le bout des 4 vis
-
Vous aurez besoin d'un embout T55
-
Cette étape est très importante pour faciliter le desserrage du moyeu
-
-
-
Chauffer avec un décapeur thermique le moyeu à l’emplacement des vis là où vous avez mis le dégrippant
-
Mettre l' embout bien droit pour ne pas abîmer les têtes de vis
-
Avec votre embout (M12 - 12 pans allongé), débloquer les vis et les enlever.
-
-
-
Déballage du moyeu neuf
-
Roulement indissociable du moyeu
-
Moyeu
-
Boulonnerie neuve
-
-
-
Placer le moyeu dans son emplacement en alignant les trous de fixation
-
Fixer le moyeu avec les vis neuve et bloquer les avec l’embout T 55.
-
-
-
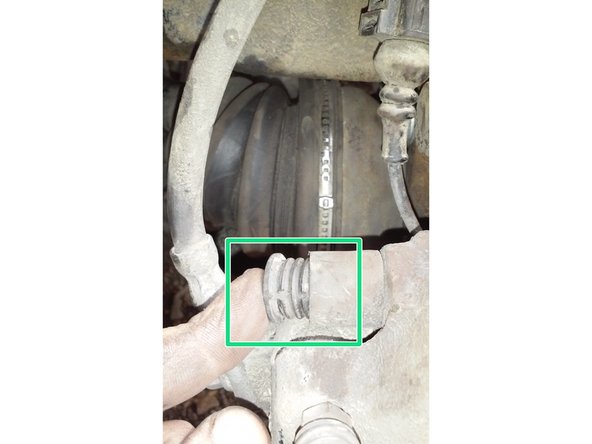
Emboîter la tête du cardant dans le moyeu, faite un mouvement de rotation vers la droite ou la gauche pour faire correspondre les cannelures.
-
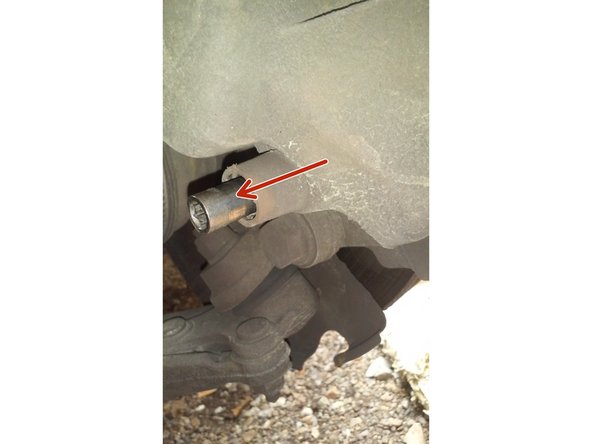
Rapprocher au maximum le boulon du cardant pour le faire vous aurez besoin d'une douille de 24 mm douze pans
-
-
-
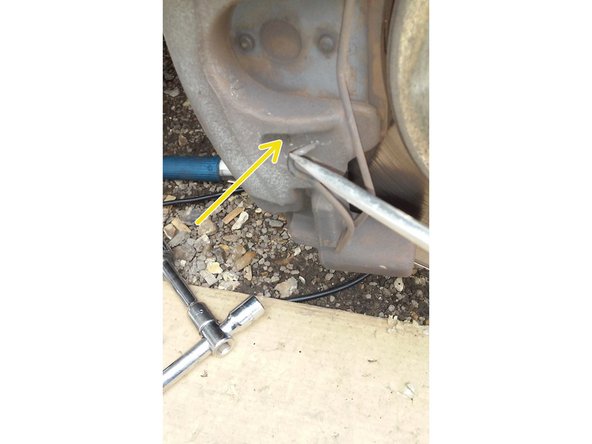
Faire levier avec un pied de biche, appuyer sur le triangle et pousser sur le moyeu pour aligner les vis avec les trous de fixation.
-
Une fois alignée relâcher le triangle
-
Repositionner les écrous et bloquer l'ensemble avec une clé de 16 mm.
-
-
-
Positionner le disque à son emplacement
-
Remettre la vis de fixation et bloquer la
-
-
-
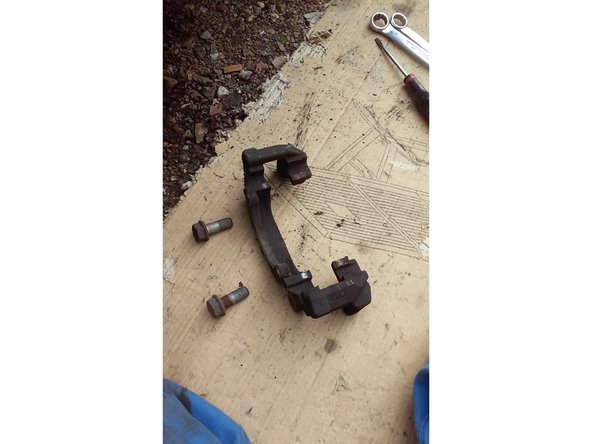
Positionner le support, placer une vis puis l'autre vis avant de bloquer les deux avec la clé de 18 mm.
-
-
-
Repositionner la plaquette applique la contre le disque.
-
-
-
Positionner l'étrier en bas
-
Attention à bien positionner le fil de témoin de plaquette de frein
-
Pousser le haut de l'étrier vers le disque
-
-
-
Faire sortir les vis et les faire prendre dans l'emplacement.
-
Bloquer les vis avec la clé Allen de 7 mm
-
-
-
Repositionner les deux caches sur les têtes de vis en haut et en bas
-
-
-
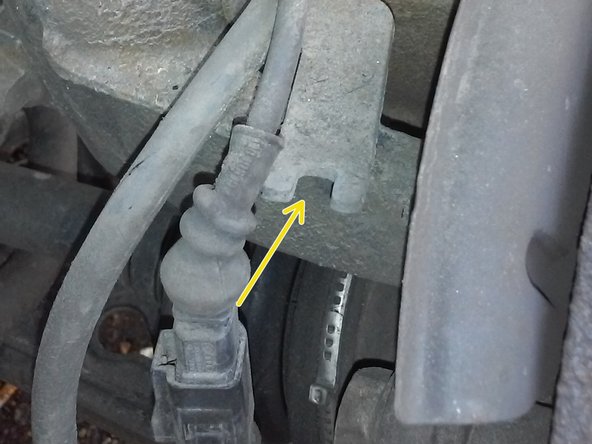
Repositionner les deux câbles à leur emplacement.
-
Le câble de témoin d'usure
-
-
-
Repositionner l'agrafe dans le trou du haut
-
Avec un tournevis plat pousser la pointe de l'agrafe du bas dans son trou,maintenez la avec votre pouce en même temps que vous poussez.
-
Cette opération ne se réalise pas toujours du premier coup.
-
Bien vérifier que les pointes sont bien enfoncées dans les trous.
-
-
-
Enlever la chandelle et descendre le cric
-
Bloquer votre roue
-
Avec la barre de 1,5 à 2 m bloquer le boulon du cardant
-
-
-
Replacer l'enjoliveur central à la main.
-
Remettre les cabochons sur les écrous de roue.
-
Mettre le moteur en route et pomper trois fois sur la pédale de frein pour remettre les plaquettes en appui contre le disque de frein
-


En effet il vaut mieux utiliser un embout M12 (12pans) L'embout Torx 55 a seulement (6 pans).
En effet il vaut mieux utiliser un embout M12 (12pans) L'embout Torx 55 a seulement (6 pans).
Annulation : je n'ai pas terminé ce tutoriel.
22 autres ont terminé cette réparation.
13 commentaires
Bonjour
Très bon tutoriel un grand merci.
Après un changement de roulement avant gauche ou droit ou les deux doit on faire un parallélisme,
emmanuel.azai - Résolu à la publication Réponse
Bonjour couple de serrage les 4 boulons du roulement 70 nm 2/ support étrier 65 nm 3/ étrier 35 nm 4/ les trois écrous du triangle 55 nm 6/ la roue 120 nm et 7/ le cardant 80 nm
emmanuel.azai - Résolu à la publication Réponse
Bonsoir,
mon mécano a changer deux moyeux complet, après 200 kms environ bruit ,boulon central qui relie le cardan se desserre et roulement bleuie donc a chauffé.
Pourquoi ce boulon se desserre t il? Merci
Sauveur
salvatore bertolino - Résolu à la publication Réponse
perso j ai changé la rotule egalement!prevoir un burin plat pour sortir le roulement(le mien s est séparé en deux quand j ai tapé au marteau) ainsi qu une vis pour le disque que j ai du percer
Michel MARTINS - Résolu à la publication Réponse