


Difficulté
Modérée
Étapes
11
Temps nécessaire
01:00:00

Ce tutoriel a été créé par la communauté
User contributed
Introduction
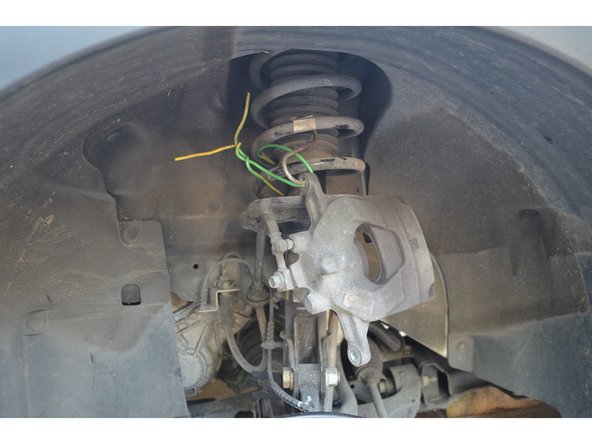
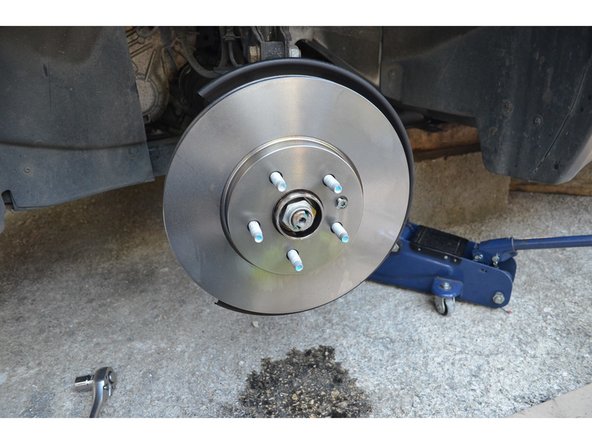
Ce tutoriel vous aide à changer les disques et plaquettes de frein avant sur Opel mokka 1.6 CDTI 4x2 16V S&S 110 cv
-
-
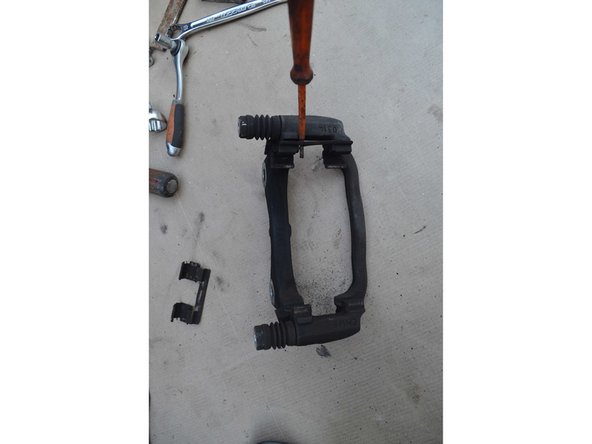
Etrier
-
Support d'étrier
-
L'étrier est fixé par 2 vis de 10mm.
-
Bloquez l'écrou avec une clé de 18mm et desserrez la vis avec une douille de 10mm.
-
-
-
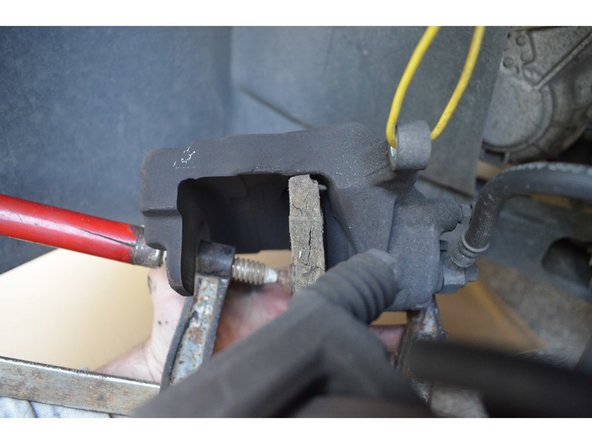
Une fois les 2 vis retirées l'étrier n'est plus retenu.
-
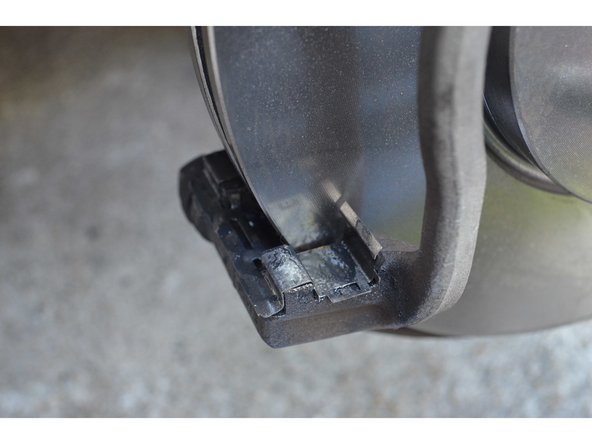
flexible de frein
-
L'étrier ne doit pas reposer sur le flexible de frein et le flexible de frein ne doit pas être pincer.
-
Reliez l'étrier au ressort de suspension à l'aide d'un câble.
-
-
-
En repoussant le piston le niveau du liquide de frein va monter. Veillez à ce qu'il ne déborde pas en retirant le surplus avec une seringue.
-
Avec un serre-joint et une cale en bois repoussez le piston au maximum.
-
-
-
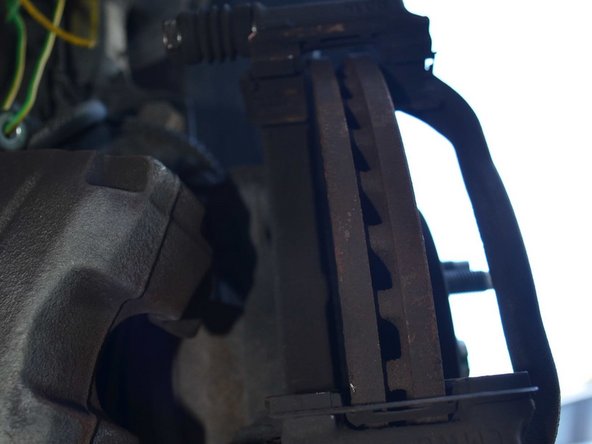
Plaquettes
-
Guides
-
Pour retirer les plaquettes il suffit de tirer dessus pour les faire coulisser dans leurs guides.
-
-
-
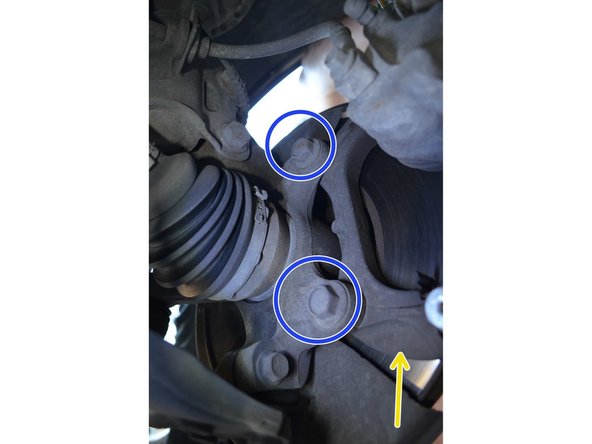
Support d'étrier
-
Retirez les vis de fixation avec la douille de 18mm.
-
Préférez une douille 6 pans à une 12 pans pour éviter de riper et d'abîmer la tête de la vis.
-
Les vis sont enduites de frein-filet rouge (résistance élevée). Au besoin faites chauffer à l'aide d'une lampe à souder.
-
-
-
Certains jeux de plaquettes de frein fournissent les agrafes,
-
Insérez un petit tournevis plat entre le support d'étrier et l'agrafe puis faites levier pour les retirer.
-
-
-
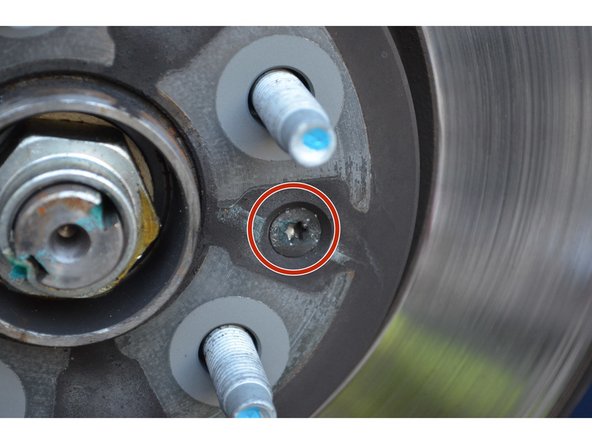
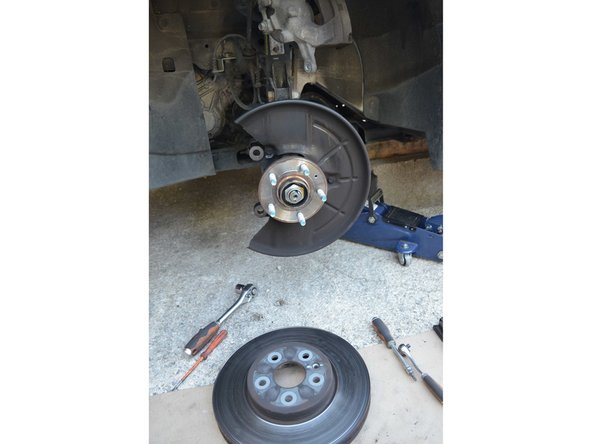
Avec un embout Torx T30 retirez la vis de maintien puis retirez le disque.
-
-
-
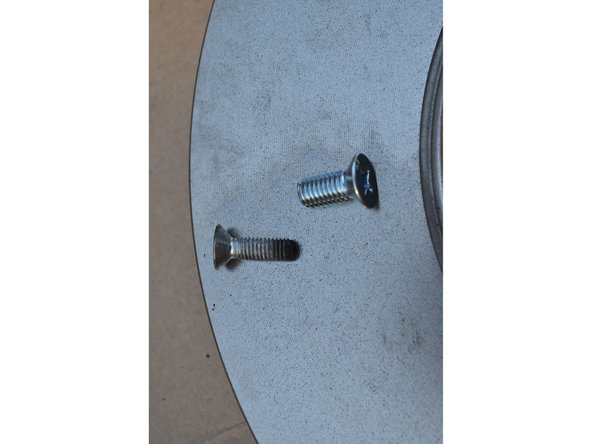
Les vis de fixation du disque fournies avec les disques neufs ne sont pas bonnes (il faut un M6 et c'est un M8). J'ai donc réutilisé l'ancienne vis.
-
-
-
Avec une brosse métallique nettoyez le support d'étrier et l'étrier en évitant les soufflets en caoutchouc.
-
Le remontage s'effectue en sens inverse.
-
Pulvérisez du nettoyant frein sur les 2 faces du disque pour retirer la paraffine avant de le remonter.
-
Vous pouvez pulvérisez de l'anti-bruit sur les surfaces d'appui des plaquettes afin d'éviter les futurs sifflements.
-
Ne mettez surtout pas d'anti-bruit sur le disque ou les surfaces de frottement des plaquettes.
-
-
-
Une fois le remontage terminé, enfoncez plusieurs fois la pédale de frein pour mettre les plaquettes en appui contre les disques.
-
Vérifiez le niveau de liquide de frein dans le bocal. S'il y en a trop, retirez le surplus à l'aide d'une seringue.
-
Le bocal se trouve derrière le calculateur.
-
Le niveau doit se situer entre le min et le max.
-
Pour le rodage des plaquettes neuves, ne pas effectuer de freinages brusques lors des premiers 200 km.
-
L'efficacité des premiers freinages peut être réduite.
-


Annulation : je n'ai pas terminé ce tutoriel.
6 autres ont terminé cette réparation.
6 commentaires
Bonjour, excellent tutoriel, merci à ceux qui se dévoue pour les réaliser, qui save partager, ce qui n'est pas fréquent dans ce monde de bruts.
andher2020 - Résolu à la publication Réponse
Super tuto, avec cela c’est un jeu d’enfant. Manque juste le frein filet à rajouter au remontage. Tuto très précis jusqu’au diamètre de vis qui effectivement n’est pas le bon avec les disques. Merci pour ce gros travail.
Sébastien Faillon - Résolu à la publication Réponse
Attention tout de même : NE JAMAIS METTRE UN PARPAING CIMENT SOUS LA VOITURE POUR SECURISER - IL PEUT CASSER A CHAQUE INSTANT !!! Privilégier un calage bois .
Sinon super TUTO Merci !!
THIERRY BARAT - Résolu à la publication Réponse
Merci beaucoup pour ce tuto. C’est la première fois que je changeais des plaquettes et disques de frein sur ma voiture. Facile à réaliser quand on suit les étapes et avec l’outillage. Opel Mokka 1.7CDTI Auto.
Pour compléter le tuto : Pour le remplacement des plaquettes et disques pour l’arrière. Suivre les étapes comme pour l’avant. Seul petite précision, avant de procéder au démontage, détacher le câble de frein à main (fixé par 2 vis le long du châssis et qui pend en dessous du moyeu, utiliser 1 douille de 12 mm) afin de lui donner du lest et pouvoir ainsi démonter l’étrier.
Petite précision encore, pour repousser le piston, à l’arrière, il faut impérativement un repousse-piston car celui-ci doit être repoussé et vissé en même temps.
Frédéric PIRET - Résolu à la publication Réponse
merci pour le tuto, je change les plaquettes sur un mokka essence
francis.minaroli - Résolu à la publication Réponse