


Introduction
Procédure de dépose des disques et plaquettes de frein usagées et montage des pièces neuves sur une Alfa Romeo 147 1.9 JTD 115cv
-
-
Débloquer (sans les dévisser) les vis des roues et lever l'avant du véhicule à l'aide d'un cric. Placer une chandelle de chaque coté. Pour plus de sécurité il est possible de placer des cales de bois aux roues arrières.
-
Déposer les roues avant.
-
-
-
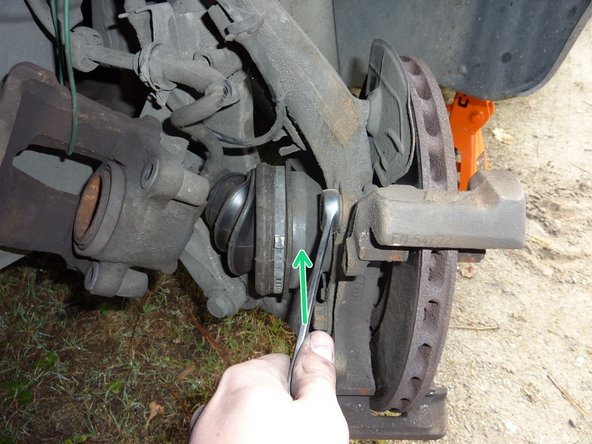
Déposer le ressort de l'étrier à l'aide d'un gros tournevis plat.
-
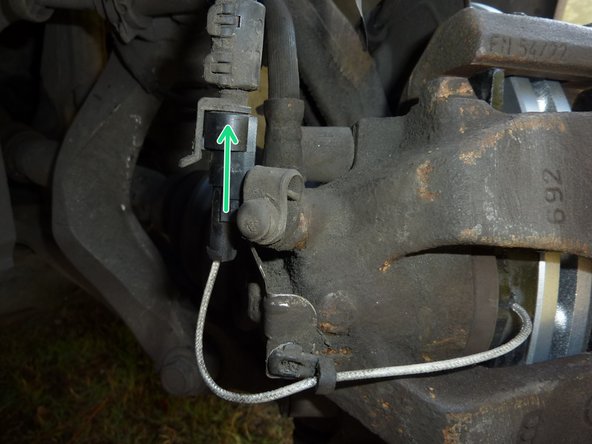
Débrancher le connecteur du témoin d'usure plaquette.
-
Placer un gros tournevis plat entre le support métallique de la plaquette de frein et le piston. Faire levier pour repousser celui-ci. Du fait de l'épaisseur des plaquettes de frein neuves, Il est important de repousser le piston au maximum.
-
Vérifier le niveau de liquide de frein, il risque de monter pendant l'opération.
-
-
-
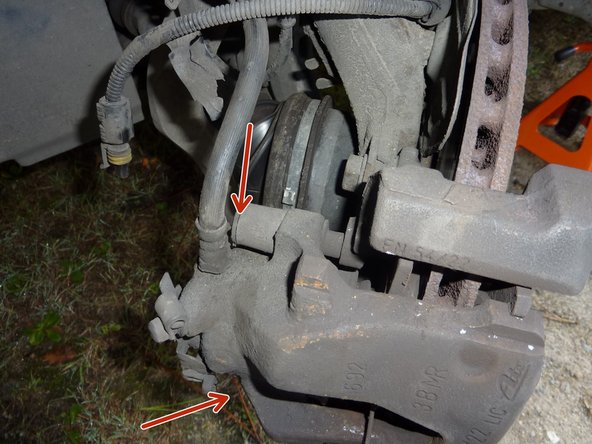
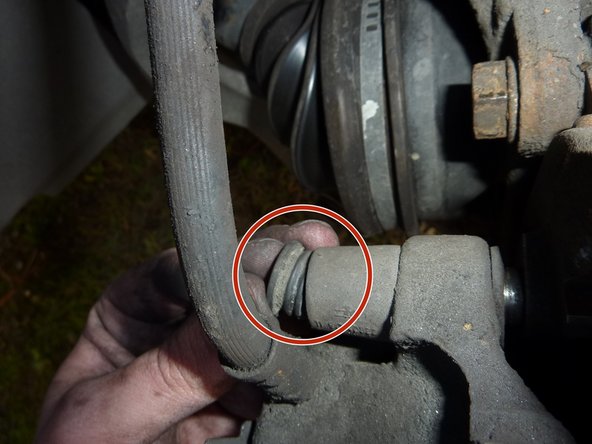
Repérer les 2 colonnettes de fixation de l'étrier. Il y en a une en haut et une en bas.
-
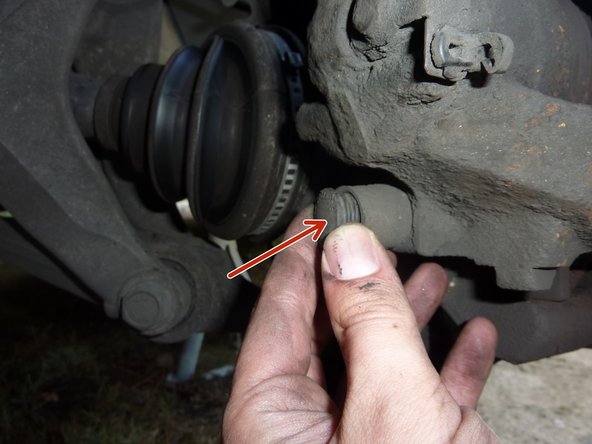
Retirer les 2 cabochons de protection.
-
-
-
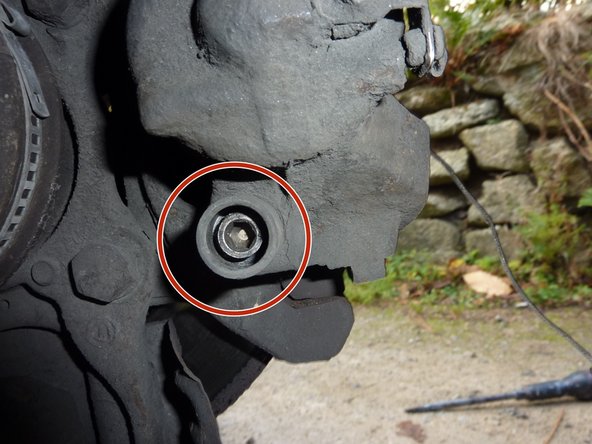
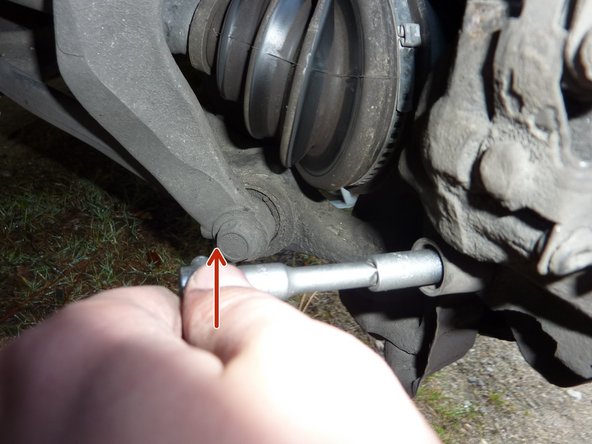
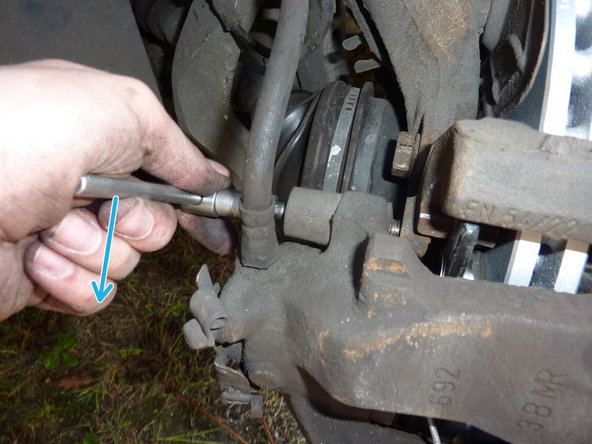
Débloquer et dévisser les 2 colonnettes à l'aide d'une clé 6 pans male de 7.
-
Sortir l'étrier de frein en le tirant vers l’extérieur.
-
Ne pas laisser "pendre" l'étrier de frein. Cela risque de détériorer le flexible de frein. Il convient de le suspendre à l'aide d'un fil de fer au ressort de suspension.
-
-
-
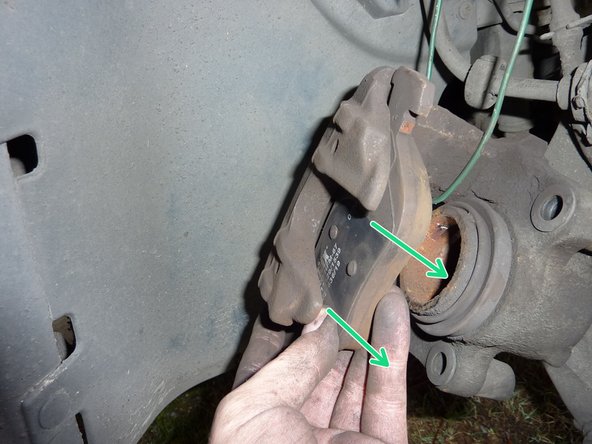
Démonter la plaquette intérieure en sortant les clips de celle-ci du piston. Puis la tirer vers l’extérieur de l'étrier.
-
Démonter la plaquette extérieure en la tirant vers soi.
-
-
-
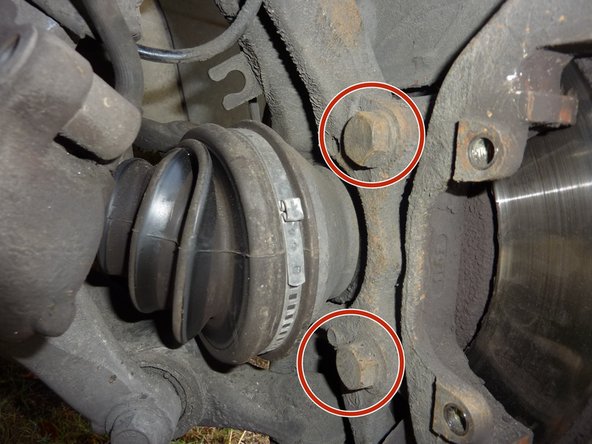
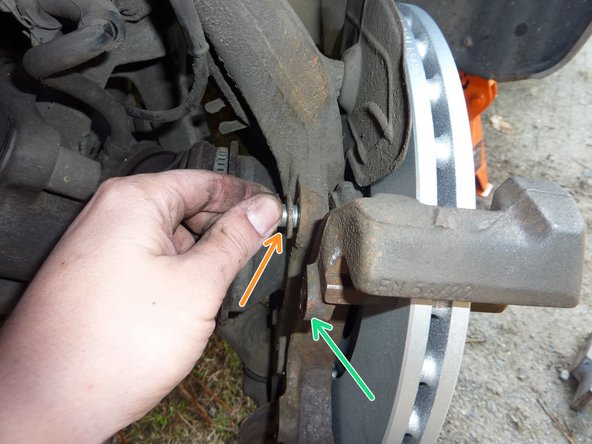
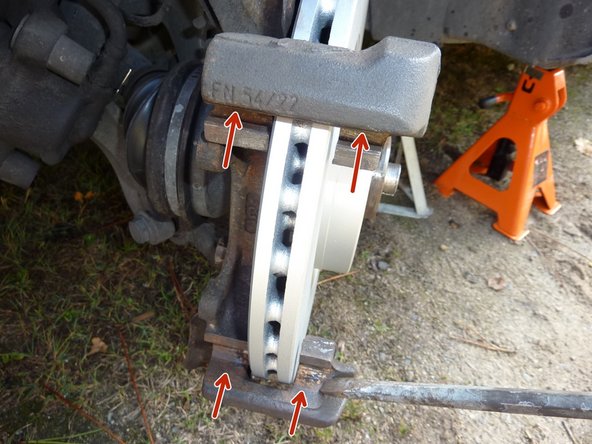
Repérer les 2 vis de fixation du support.
-
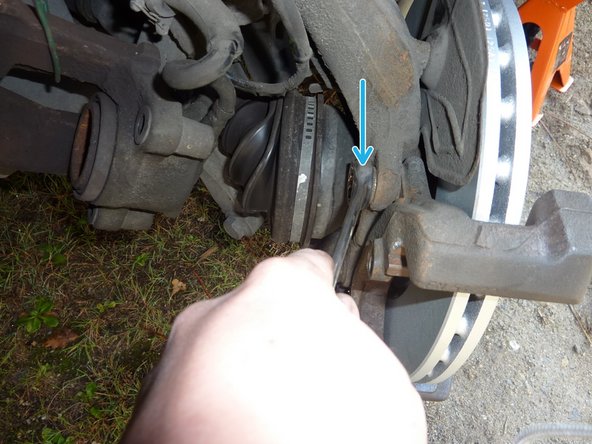
Débloquer et dévisser les vis à l'aide d'une clé plate ou à œil de 19.
-
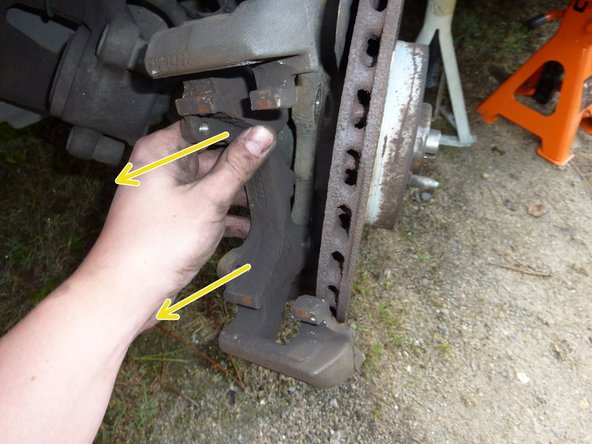
Déposer le support.
-
-
-
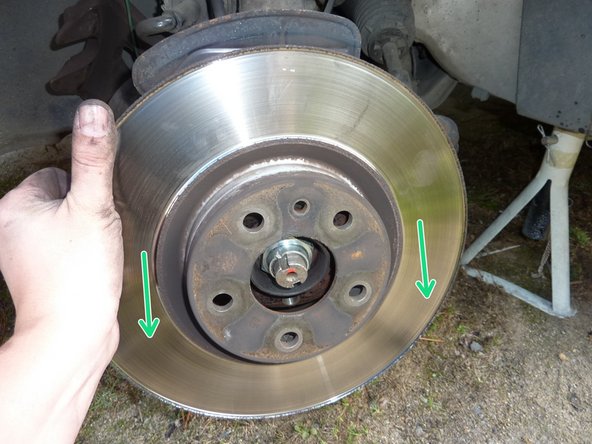
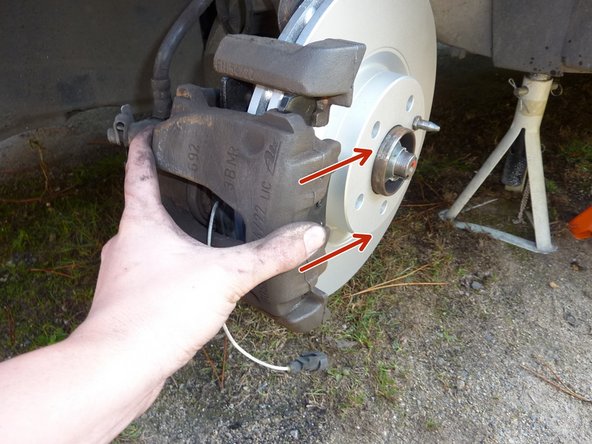
Repérer, débloquer et dévisser la vis de fixation du disque de frein à l'aide d'une clé plate ou à œil de 12.
-
Déposer le disque usagé en tirant vers l'avant.
-
Nettoyer le moyeu à l'aide d'une brosse métallique.
-
-
-
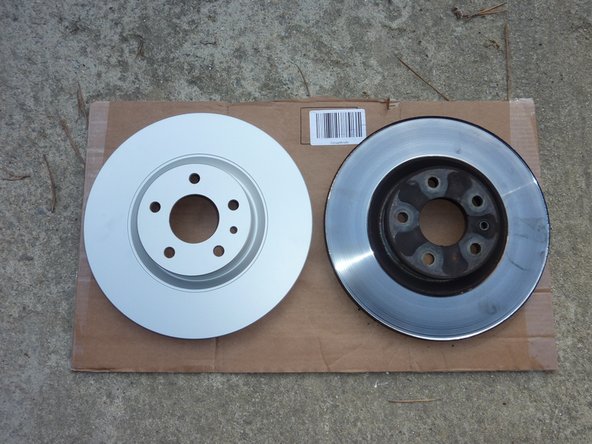
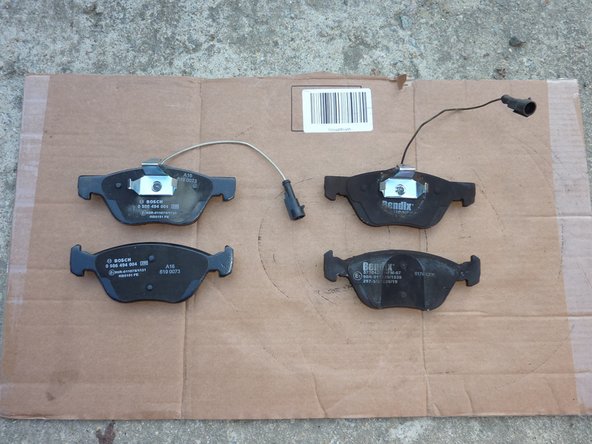
Vérifier la correspondance de la nouvelle pièce.
-
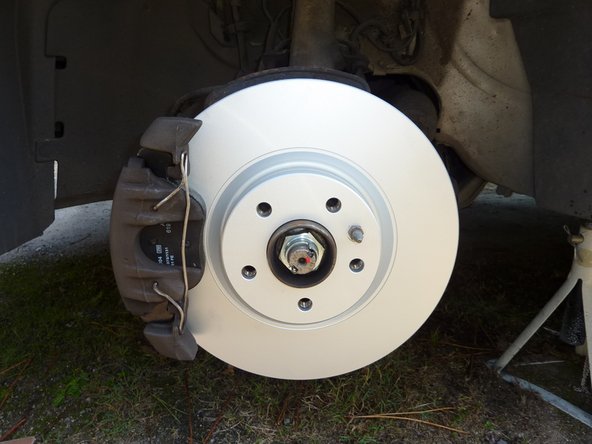
Mettre le disque en place et visser et bloquer la vis de fixation du disque à l'aide d'une clé plate ou à œil de 12.
-
Dans ce cas précis il n'est pas nécessaire de dégraisser le disque de frein, celui-ci recouvert d'un revêtement anti corrosion.
-
Le revêtement anti corrosion s'en ira aux premiers freinages
-
-
-
Mettre du frein filet sur les 2 vis de fixation du support d'étrier.
-
Mettre le support d'étrier en place.
-
Approcher les 2 vis de fixation du support à la main.
-
Bloquer les 2 vis à l'aide d'une clé plate ou à œil de 19.
-
-
-
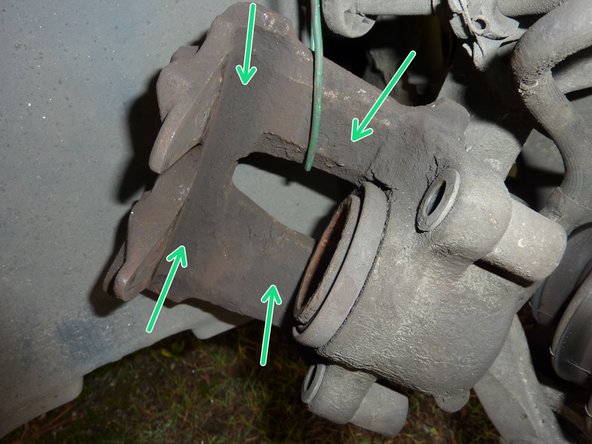
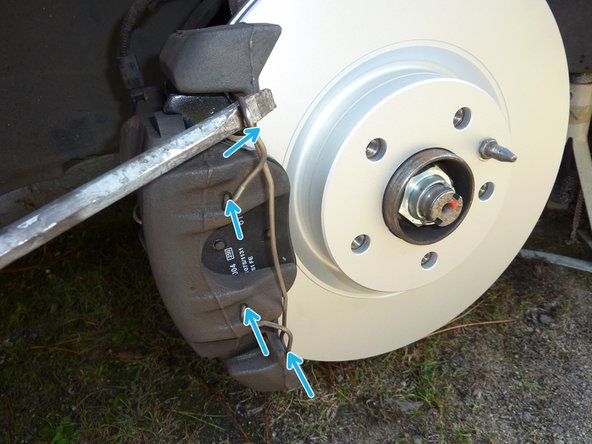
Nettoyer les quatre points de contact des plaquettes sur l'étrier à l'aide un tournevis plat.
-
Nettoyer également l’intérieur de l'étrier.
-
Vérifier la correspondance des nouvelles plaquettes de freins.
-
-
-
Monter la plaquette intérieure en insérant les clips de celle-ci dans le piston. La pousser jusqu'au fond.
-
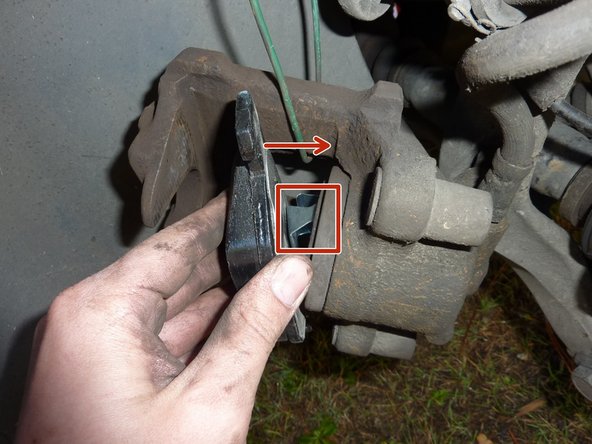
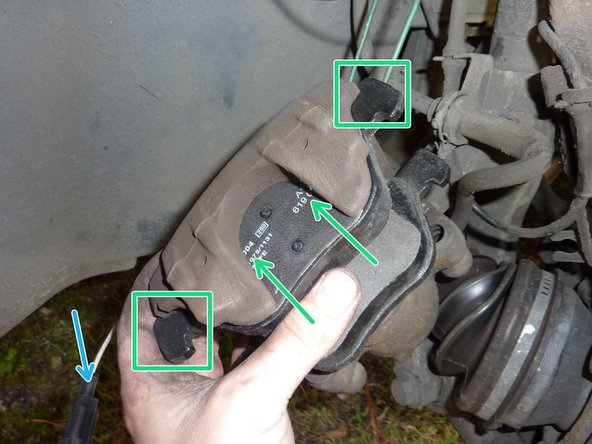
Insérer la plaquette extérieure, les deux ergots de la plaquette doivent bien être en place sur l'étrier.
-
Bien veiller à ce que le fil du témoin d'usure soit sorti au milieu de l'étrier.
-
-
-
Insérer l'étrier de frein. Vérifier la bonne position des plaquettes.
-
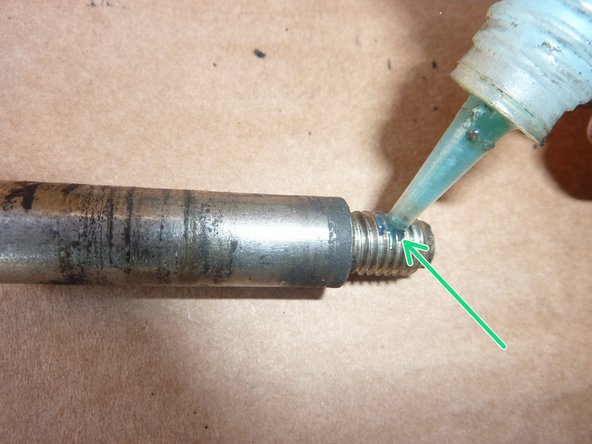
Mettre du frein filet sur les colonnettes. Ne pas hésiter à graisser légèrement celle-ci.
-
Mettre en place les 2 colonnettes. Visser et bloquer celles-ci à l'aide d'une clé à 6 pans male de 7.
-
-
-
Remettre les 2 cabochons de protection des colonnettes.
-
Mettre en place et rebrancher le connecteur du témoin d'usure plaquette.
-
Mettre en place le ressort d'étrier à l'aide d'un gros tournevis plat.
-
Repartir à l'étape n°2 pour réaliser l'autre coté du véhicule.
-
-
-
Replacer les roues et revisser les vis au maximum. Abaisser le véhicule et bloquer les vis des roues.
-
Etape très importante! Pomper plusieurs fois sur la pédale de frein afin que les pistons reprennent une bonne position et arrêter lorsque la pédale est dure. Ne pas oublier de vérifier le niveau de liquide de frein, en ajouter si nécessaire.
-
Les nouvelles plaquettes et les nouveaux disques ont besoin d'une période de rodage, il faut donc éviter tout freinages intensifs les 300 premiers kilomètres.
-


Annulation : je n'ai pas terminé ce tutoriel.
9 autres ont terminé cette réparation.
3 commentaires
bonjour, nettoyage et poncage et graissage des colonettes est quasi imperatif, graisse cuivrée, ainsi que la partie en contacte du moyeux, ca evite que la rouille envahisse la cavité, et perso nettoyage des vis du porte etrier avant le nouveau loctite et un coup de nettoyant frein sur le tout, sinon bon tuto
francois klein - Résolu à la publication Réponse
moi je mettrais de la graisse cuivrée, mes plaquettes ont grincées pendant longtemps avant que j’en mette.
Unknown altobelli - Résolu à la publication Réponse
Bonjour, pour ma part j'aurais nettoyé les colonnettes. Vu leur état les poncer avec de l'abrasif grain 600 puis 1000 leur aurai fait du bien ;)
Si non très bon tuto !
+30 ;)
sebthekiller - Résolu à la publication Réponse