


Difficulté
Modérée
Étapes
10
Temps nécessaire
02:00:00

Ce tutoriel a été créé par la communauté
User contributed
Introduction
Tutoriel realisé sur Volkswagen Polo 2008 1.2 essence 44kW (60cv) code moteur BBM mais valable pour tous les modèles essence et diesel
Composants spécifiques à ce modèle disponibles ici:
Facultatif:
Butée aluminium (assez rare à changer)
Butée elestique (Peut se déchirer ou s’effriter donc à contrôler)
Périodicité de remplacement:
80 000 km
Diagnostic:
Bruit similaire à une balle de tennis qui rebondit dans le coffre dès le moindre choc, comportement hasardeux dans les virages, perte du pouvoir amortissant et choc plus important ressenti
-
-
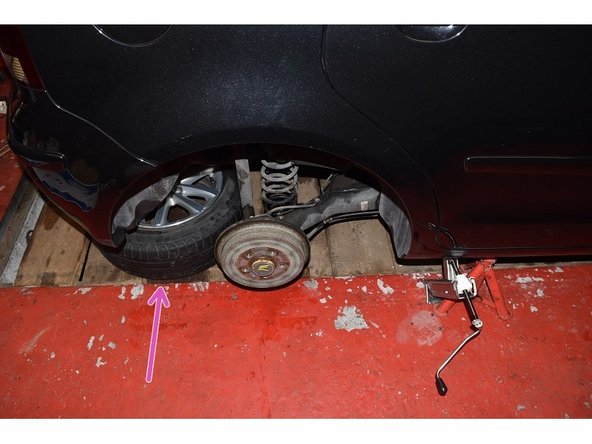
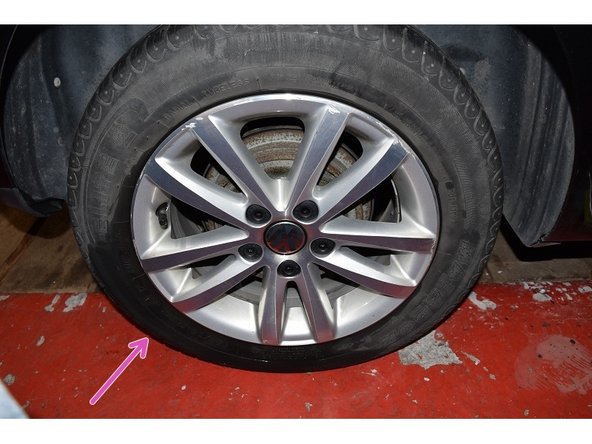
L'exercice sera fait sur la roue arrière droite (passager) et sera identique pour l'autre coté. Placer le cric à l'endroit indiqué et le mettre au contact
-
À l'opposé de la zone de travail, càd la roue avant gauche (conducteur) placer une cale de roue
-
-
-
Utiliser le crochet adéquat pour enlever les capuchons de protection (présent dans le coffre dans le matériel constructeur nécessaire au changement d'une roue)
-
Si vous possédez des boulons antivol utilisez la douilles appropiée
-
Desserrez tous les boulons de roues de plus ou moins 1/8 de tour
-
-
-
Levez le véhicule, placez une chandelle à coté du cric puis abaissez le véhicule pour que ce soit la chandelle qui reprenne la charge et non le cric
-
Enlever la roue et la placer sous le véhicule, et oui la sécurité ça ne se néglige pas et on est jamais trop prudent!
-
-
-
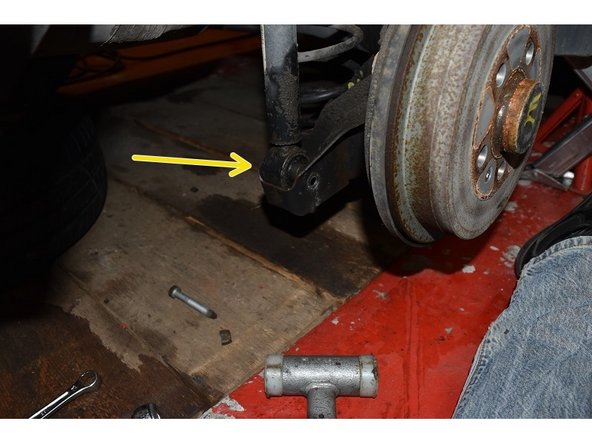
L'amortisseurs est le "tube" parcourant l'image de haut en bas. Il est fixé au châssis par les deux vis en haut d'image
-
Et au train arrière par un assemblage vis-écrou
-
-
-
Desserrer d'abord l'assemblage vis-écrou de l'essieu à l'aide d'une clé à cliquet et d'une clé à œillet tous les deux de 16mm
-
Enlever la vis et détacher l'amortisseur de son logement
-
Desserrer les vis de fixation au châssis à l'aide d'une clé à cliquet, d'une rallonge et d'une douille de 16mm et déposer l'amortisseur
-
-
-
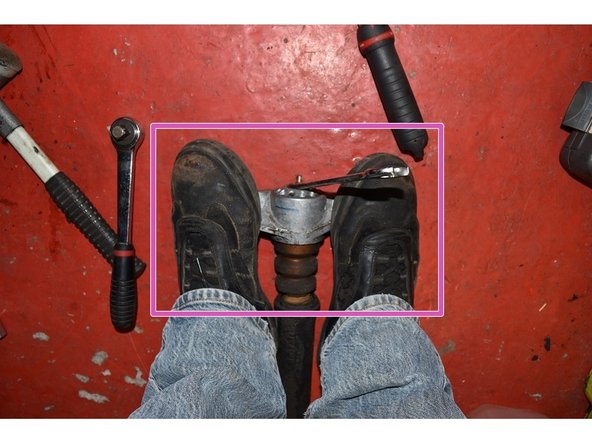
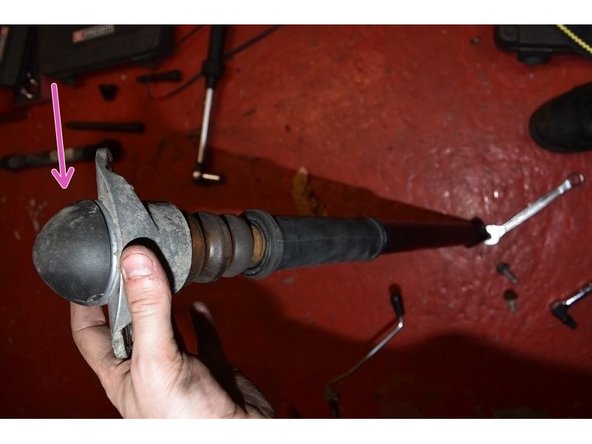
L’amortisseur est vissé à son support en aluminium + butée/capot de protection, nous allons devoir démonter ce support pour les remonter sur le nouvel amortisseur
-
La tige de l'amortisseur est fixée au support par un écrou autobloquant. Cette tige n'ayant pas de retenue elle est libre de rotation. C'est pourquoi afin d’empêcher la rotation de la tige durant le desserrage il faut la bloquer, pour se faire utiliser une clé plate de 6mm (ou une clé anglaise)
-
Étant donné qu'il n'est pas facile de tenir 3 choses en même temps vous pouvez maintenir le support en aluminium dans un étaux... ou... entre vos pieds ça fonctionne pas mal aussi!
-
-
-
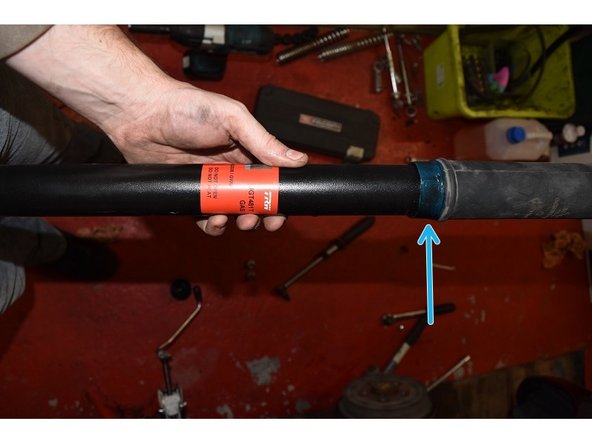
Nettoyez la butée en aluminium ainsi que celle en mousse. Si cette dernière est trop effritée ou cassée remplacez là. Dans mon cas tout était encore bon
-
Étant donné que le corps de l'amortisseur et le plastique de protection son en contact, il est préférable de mettre un peu de graisse entre ces deux éléments. Ceci aura pour but d'empêcher l'arrachement de la butée élastique ainsi que de renforcer l'étanchéité entre les deux éléments
-
-
-
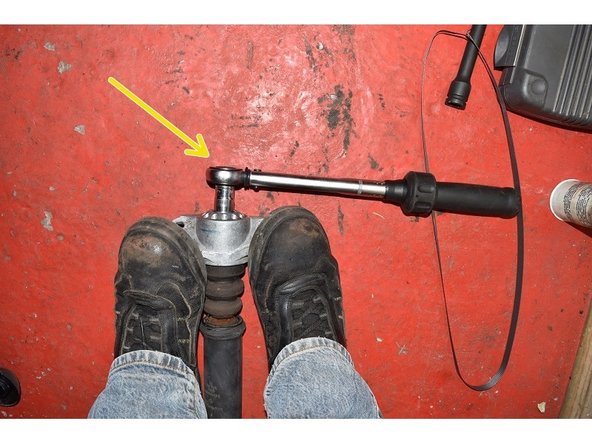
Replacez le support sur l'amortisseur en renouvelant l'écrou (fourni avec les nouveaux amortisseurs). Utiliser la clé de 6 et de 16mm comme lors du démontage
-
Une fois la tige serrée assez fort (pas trop non plus) elle ne tournera plus grâce au serrage, vous pourrez donc serrer à un couple de 25Nm
-
Ne pas oublier le petit chapeau de protection
-
-
-
Replacer l'amortisseur dans son logement (châssis et train arrière) et placer les vis/écrou. Les renouveler est un plus mais n'est pas obligatoire s'ils sont dans un bon état
-
Serrez les vis au châssis. Sur ce point je ne suis pas d'accord avec la documentation VW, ils recommandent un couple de serrage de 30Nm + 90° or appliquer ce serrage serait beaucoup trop serré! Appliquez donc un couple de serrage de 30Nm + un léger coup en plus (approximativement 20°)
-
Serrez l'assemblage vis-écrou au train arrière. Idem que le précédent point, VW recommande un couple de serrage de 40Nm + 90° or appliquer ce serrage serait beaucoup trop serré! Appliquez donc un couple de serrage de 40Nm + un léger coup en plus (approximativement 20° à 30°)
-
-
-
Replacer la roue et serrer les boulons au contact
-
Déposer le cric, la chandelle et serrer les boulons au couple de 120Nm
-
Replacer les capuchons de protection
-


Annulation : je n'ai pas terminé ce tutoriel.
4 autres ont terminé cette réparation.
4 commentaires
Bonjour , j’ai trouvé votre tuto très intéressant .
Avec une mention particulière pour la correction du couple de serrage , préconisé par VW , de la tête d’amortisseur .
Bravo & merci
Paul
Bonjour Paul, avec grand plaisir :) Content de voir qu’il est utilisé et un retour fait toujours plaisir
Bonne continuation