Difficulté
Facile
Étapes
8
Temps nécessaire
00:30:00

Ce tutoriel a été créé par la communauté
User contributed
Introduction
Les étapes 1 à 4 concernent le changement du feu uniquement. Pour changer une ampoule, suivre les étapes du tutoriel dans l'ordre suivant:
1 à 2 (démontage du feu)
5 à 8 (remplacement d'une ampoule)
3 à 4 (remontage du feu)
Outils
Non tools spécifié.
Pièces
-
-
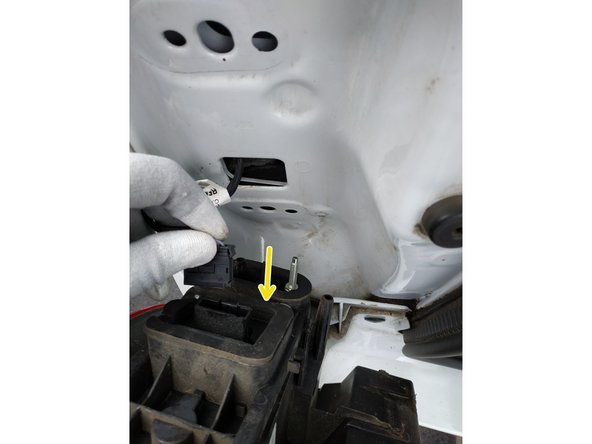
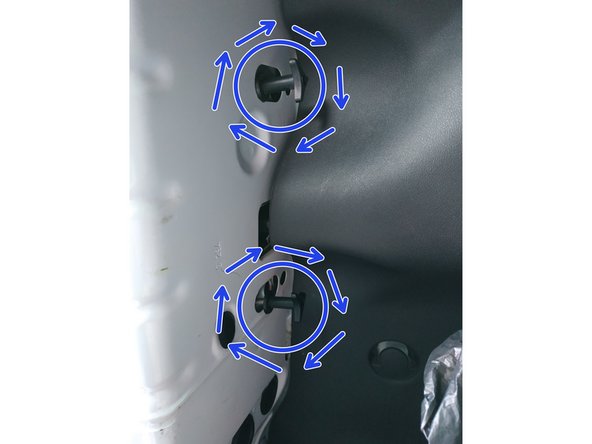
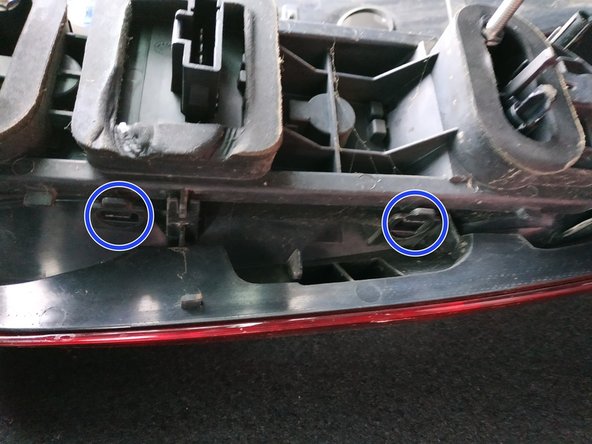
à l'intérieur de la voiture, dévisser les 2 écrous en plastique qui maintiennent le feu
-
pour déloger le feu, tirer vers soi la partie haute
-
puis la partie basse
-
Le feu est encore branché, ne pas essayer de l'enlever.
-
-
-
faire venir le feu vers soi sans tirer sur le fil électrique
-
débrancher la prise du feu en appuyant sur la languette du milieu
-
tout en tirant sur la prise
-
-
-
nettoyer la carrosserie
-
brancher le nouveau feu en appuyant sur la prise (on doit entendre un "clic")
-
S'assurer que toutes les ampoules fonctionnent avant d'aller plus loin
-
-
-
présenter le feu : il va falloir insérer les 3 ergots du haut et les 3 ergots du bas dans leur logement dans la carrosserie, c'est très simple à faire
-
appuyer pour mettre le feu en place
-
visser les deux écrous de fixation
-
-
-
Retirer la platine en écartant les 4 clips
-
et en tirant vers le haut
-
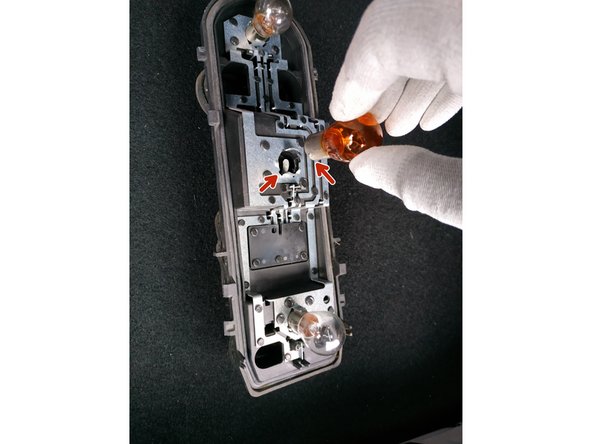
Repérer l'ampoule à changer
-
feu stop / feu de position
-
clignotant
-
feu antibrouillard
-
Feu antibrouillard pour le feu arrière gauche, feu de recul pour le feu arrière droit.
-
-
-
Eviter de toucher les ampoules avec les doigts. Il est préférable d'avoir des gants pour éviter de laisser des traces grasses sur le verre.
-
appuyer légèrement sur l'ampoule
-
puis faire 1/4 de tour dans le sens anti-horaire
-
et retirer l'ampoule
-
-
-
Les ampoules du feu arrière ne sont pas toutes les mêmes. On remplacera chaque ampoule défectueuse par une ampoule absolument identique.
-
insérer l'ampoule en présentant ses ergots dans dans les logements de la platine
-
appuyer légèrement
-
et faire 1/4 de tour dans le sens horaire
-
-
-
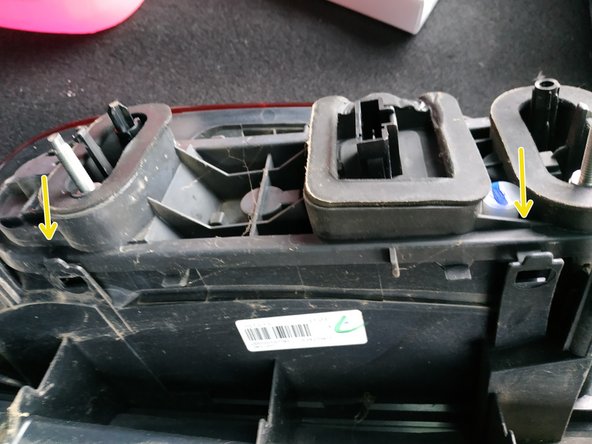
présenter la platine sur le feu
-
et appuyer pour enclencher les clips
-
s'assurer qu'ils sont tous verrouillés
-