


Difficulté
Modérée
Étapes
9
Temps nécessaire
02:00:00

Ce tutoriel a été créé par la communauté
User contributed
Pièces
-
-
Véhicule au sol, débloquer l'écrou du cardan
-
Lever ensuite le véhicule et mettre une chandelle pour assurer votre sécurité.
-
Déposer la roue, puis terminer de dévisser l'écrou de cardan.
-
-
-
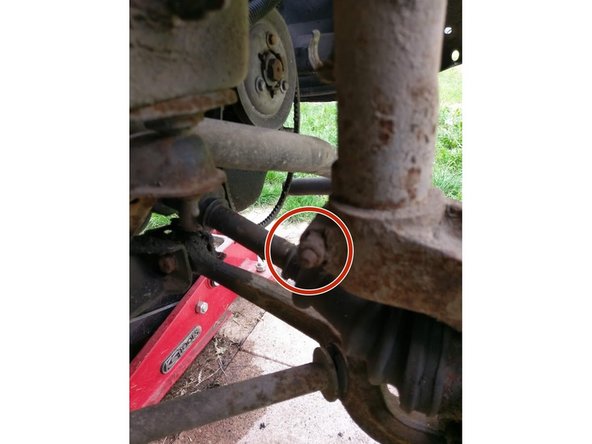
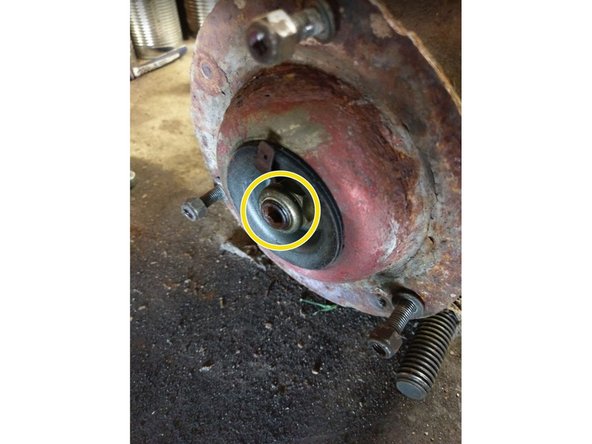
Dévisser l'écrou de la rotule de direction
-
A l'aide d'un arrache rotule, extraire la rotule de direction.
-
Ensuite vous déposez vos plaquettes de frein, ainsi que l'étrier de frein.
-
-
-
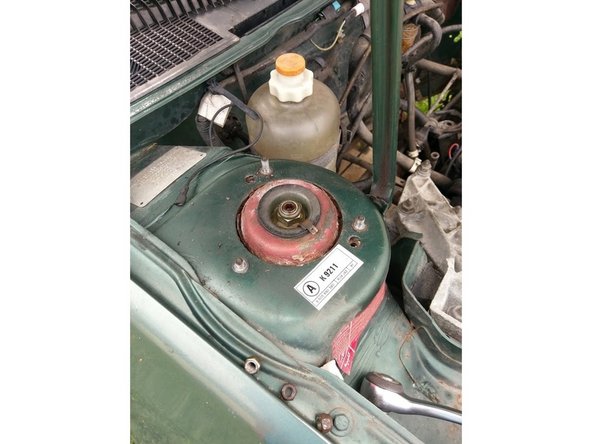
Débloquer l'écrou (Ne pas le dévisser complètement !!) supérieur de l'amortisseur
-
-
-
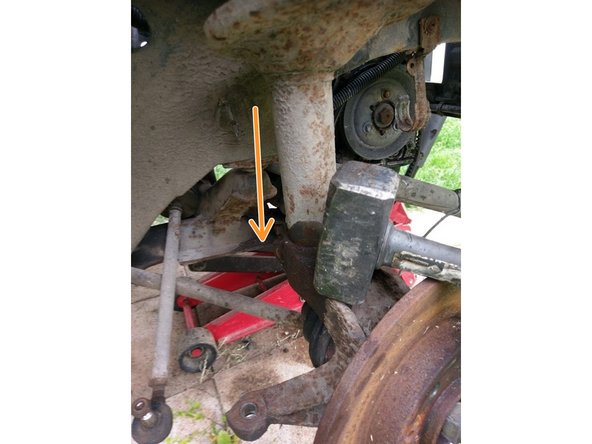
Dévisser l'écrou de serrage inférieur de l'amortisseur
-
A l'aide d'une masse taper fermement sur la fusée pour l'extraire de l'amortisseur
-
Il est peut-être nécessaire de déposer l'étrier pour que la fusée soit suffisamment libre, voir l'étape 1 de ce tutoriel
-
-
-
Dévisser les 3 écrous de fixation de la coupelle
-
Extraire ensuite la jambe de force au complet
-
-
-
Placer les griffes de compression et comprimer le ressort
-
Une fois le ressort suffisamment comprimé (sans tension sur la coupelle), terminer de desserrer l'écrou supérieur de l'amortisseur
-
Retirer ensuite la coupelle, et le ressort
-
-
-
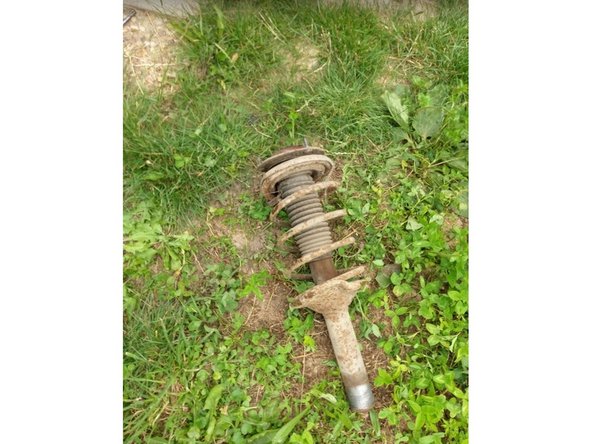
Comparez les deux amortisseurs
-
Récupérer (ou monter en un neuf suivant l'état) le cache poussière
-
Mettre en place le ressort sur le nouvel amortisseur
-
-
-
Résassembler la coupelle et la remettre en place sur l'amortisseur en serrant l'écrou de quelques filets (Jusqu'à ce que ça ne soit plus possible à la main)
-
Libérez le ressort en dévissant le compresseur, s'assurer que le ressort est bien en place dans son logement au fur et à mesure du desserage (en "butée" contre le support inférieur et supérieur)
-
-
-
Procéder au remontage de la jambe de force sur le véhicule dans l'ordre inverse de la dépose.
-
Ne pas oublier de terminer le serrage de l'écrou de la tête d'amortisseur une fois l'ensemble remonté sur le véhicule.
-
Je conseille fortement d'aller faire contrôler la géométrie du véhicule après cette opération
-


Annulation : je n'ai pas terminé ce tutoriel.
3 autres ont terminé cette réparation.
2 commentaires
Bonjour et si on arrive pas a désserer l'écrou de tête (grippé) comment faire sans avoir de chalumeau svp merci
Valérie Demuysere - Résolu à la publication Réponse
Bonjour
Je vous conseille de le debloquer (1/2 tour) lorsque la jambe de force est encore en place. Vous pouvez utiliser du degripant fort et une clef rallongée par un tube. Sinon debouloneuse pnematique ou électrique toujours pour debloquer.
Bon courage