


Difficulté
Modérée
Étapes
5
Temps nécessaire
01:00:00

Ce tutoriel a été créé par la communauté
User contributed
Introduction
Opération effectuée sur Toyota Yaris 1.0 VVTi 68ch
Il n'y a pas de galet tendeur, la tension se fait par l'alternateur.
-
-
La courroie est située sur votre gauche quand vous vous tenez devant le moteur.
-
-
-
La tension se fait par ce système de rail situé sous l'alternateur.
-
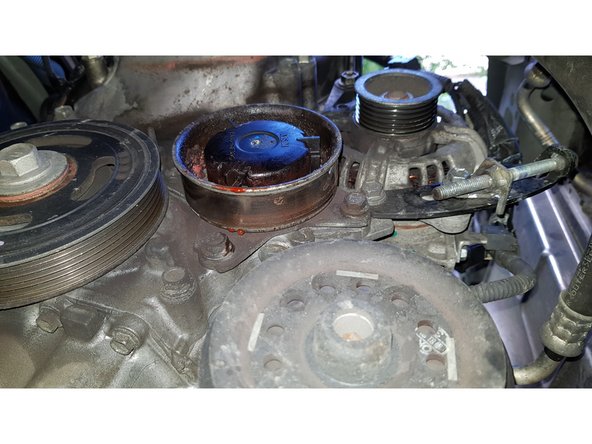
Vis de réglage de la tension
-
Vis de blocage de la tension
-
Vis supérieure de l'alternateur
-
-
-
Avec du blanco faites un repère sur le rail ET sur l'écrou par dessous.
-
Avec du blanco faites un repère sur le rail ET sur l'écrou par dessus.
-
J'ai aussi fait un repère au niveau de la face de la vis de blocage.
-
Pour créer un peu de jeu desserrez légèrement la vis supérieure de l'alternateur.
-
Attendez que le blanco ait séché avant d'attaquer les étapes suivantes.
-
Dévissez la vis de blocage de la tension.
-
Dévissez la vis du réglage de la tension.
-
-
-
Maintenant que la courroie est totalement détendue il va être facile de la sortir.
-
Regardez une dernière fois le cheminement de la courroie.
-
Sortez la courroie.
-
-
-
Le remontage s'effectue en sens inverse.
-
Pour le réglage de la tension il suffit d'aligner les repères.
-
Je n'ai pas fait de photos pour comparer l'ancienne courroie avec la neuve. Mais il suffit de prendre les références notées sur l'ancienne pour commander une neuve identique. Pour mon cas c'était une 6PK1210 ce qui signifie que c'est une courroie à 6 sommets (5 rainures) pour une longueur totale de 1210mm.
-


Annulation : je n'ai pas terminé ce tutoriel.
6 autres ont terminé cette réparation.
7 commentaires
Bonjour,
Merci beaucoup pour ce tuto, c’est vrai qu’il est très explicite.
Est ce similaire sur la Yaris III phase 2, hybrid de 2016 svp?
Merci
Jum’s
Bonjour,
Merci pour ce tuto très bien illustré avec des explications claires.
Pour information, il y a une erreur sur le lien pour acheter la courroie.
Le lien revoie à une courroie 6PK1200 au lieu de 6pk1210.
En plus, Oscaro m’a conseillé une mauvaise référence de courroie (une 6pk853) qu’il a fallu que je renvoie.
Cdlt, Julien.
Bonjour,
il s’agit ici du moteur 1KRFE, et non pas du moteur D4D 90Cv de la Yaris 2.
Bien à vous,
L’équipe Oscaro