Introduction
Ce tutoriel est realisé sur Peugeot 107 1.0i 12v
Il n'y a pas vraiment d'intervalle de changement de bobine d'allumage. On remplace une bobine lorsqu'elle est défectueuse. Même si cela est préférable, il n'est pas primordial de changer toutes les bobines à la fois.
Passer un outil de diagnostic peut permettre de savoir quelle bobine est incriminée. Le code défaut obtenu indiquera le numéro du cylindre. On aura typiquement un défaut commençant par P03XX .
Il est préférable d'effacer les défauts en fin d'intervention avec ce même outil diagnostic.
Outils
Pièces
-
-
déclipser les 4 agrafes de la boîte à air
-
pincer le collier inférieur du reniflard d'huile et le placer vers le haut
-
libérer la boîte à air du manchon de boîtier papillon en tirant vers le haut
-
retirer la boîte à air
-
-
-
passer un coup de soufflette ou d'apirateur autour des bobines pour enlever les saletés
-
Il vaut mieux placer un chiffon sur le boîtier papillon pour éviter de faire entrer des impuretés dans le moteur.
-
-
-
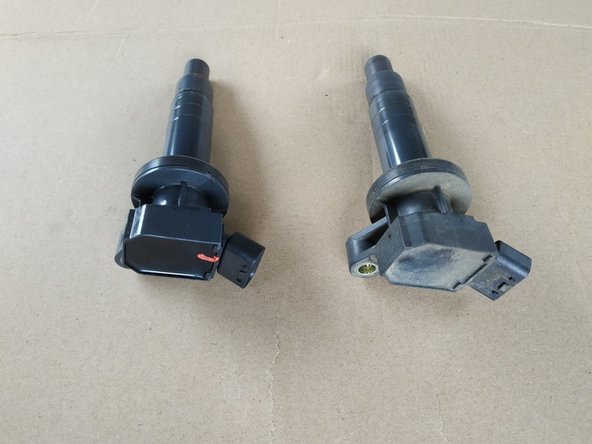
comparer l'ancienne bobine avec la nouvelle pour s'assurer de la compatibilité
-
-
-
positionner la bobine neuve sur la bougie
-
On peut appliquer une fine couche de graisse diélectrique sur la partie céramique de la bougie pour empêcher l'humidité.
-
visser la vis de maintien de la bobine modérément (couple préconisé 10Nm)
-
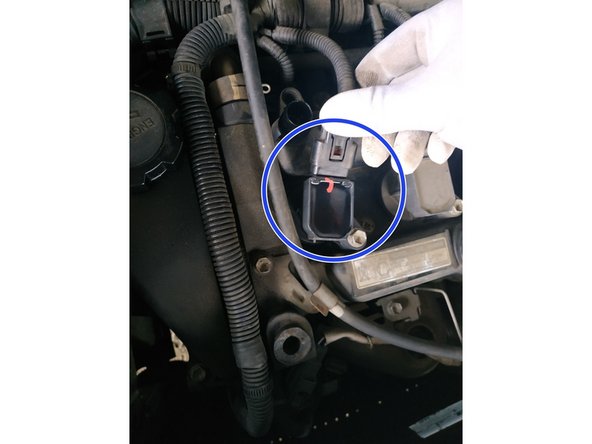
reclipser la fiche de la bobine
-
On doit entendre un petit "clic" quand la fiche est bien engagée.
-
-
-
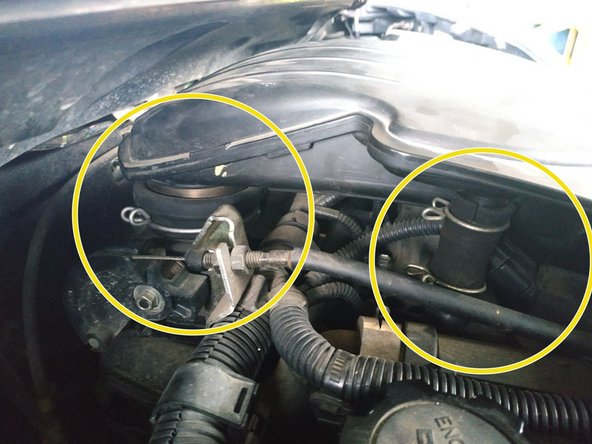
présenter la boîte à air sur le boîtier papillon et le reniflard d'huile
-
renfoncer la durite de reniflard d'huile (flèche de droite sur la photo), pincer le collier et le replacer vers le bas
-
rengager la boite à air dans le manchon de boîtier papillon en appuyant dessus (flèche de gauche sur la photo)
-
On peut légèrement huiler pour faciliter la mise en place.
-
vérifier que tout est bien en place
-
clipser les 4 agrafes de la boite à air
-
Annulation : je n'ai pas terminé ce tutoriel.
2 autres ont terminé cette réparation.
5 commentaires
Connaissez vous la marque bougicord en bobine ,car j ai commander des bobines bosch chez oscaro est il mon mis des bougicord sont tel aussi fiables
loulou29.09.19 - Résolu à la publication Réponse
Difficile de trouver l’information de l’ordre des cylindre sur le moteur. Le 1 à gauche ou à droite lorsque l’on est face au moteur capot ouvert? Ou même au milieu?
Le code P03XX est bien utile pour cibler le cylindre en question mais sans la RTA impossible de savoir où se trouve le cylindre incriminé…
pierre.darlot - Résolu à la publication Réponse
Le cylindre n⁰1 est toujours celui qui est contre la boîte de vitesses. Le 2 au milieu et le 3 côté
Bjr! Il aurait été bien de préciser quelle bobine est n°1, n°2, et n°3
andre AUGUSTINE - Résolu à la publication Réponse
Je ne comprends pas ce commentaire. Les bobines sont toutes identiques et interchangeables. Il n’y a pas de bobine n°1, 2 ou 3.
Concernant le faisceau en revanche, il y a bien un ordre. Ceci dit, le câblage est disposé de telle sorte que l’ordre de branchement est absolument évident (regardez la photo en étape 5). Le câblage étant tellement court, je ne suis même pas sûr qu’il soit possible de faire une erreur de branchement.


