Introduction
Ce tutoriel explique pas à pas, le montage de l'attelage BRINK 608700 sur un Touran III.
Attention, ce tutoriel ne présente pas la pose du faisceau.
-
-
Démonter les feux :
-
Commencer par retirer les obturateurs en plastique, dans le coffre
-
Dévisser l'écrou blanc à la main
-
Débrancher le connecteur à la main (un petit tourne-vis peut être utilsé pour libérer le crochet)
-
Dévisser les 10 vis Torx (T15 et T25) pour libérer le pare-chocs.
-
-
-
Dévisser les vis qui maintiennent le longeron à l'aide d'une clé de 13 (3 à gauche + 4 à droite)
-
Une fois le longeron déposé, remettre les vis en place afin de ne pas les perdre (les bloquer sans serrer fort)
-
-
-
Mettre en place grossièrement l'attelage en entrant les 2 bras dans les 2 logements prévus à cet effet
-
Mettre les 4 vis en place sans les serrer à l'aide d'une clé de 17. Les vis les plus au fond viennent dans un taraudage. Des contre-écrous (clé de 15) viennent maintenir les vis les plus accessibles.
-
Serrer les vis les plus accessibles à 45 Nm et les plus profondes à 65 Nm, comme indiqué sur la notice de montage.
-
Pour les véhicules équipés de l'Add-Blue, le serrage des vis à droite est rendu difficile par la présence du réservoir d'Add-Blue, voir l'étape suivante pour contourner le problème.
-
-
-
Le réservoir d'Add-Blue masque l'accès pour le serrage des vis de droite de l'attelage. Il est nécessaire de le déplacer légèrement pour avoir un accès correct
-
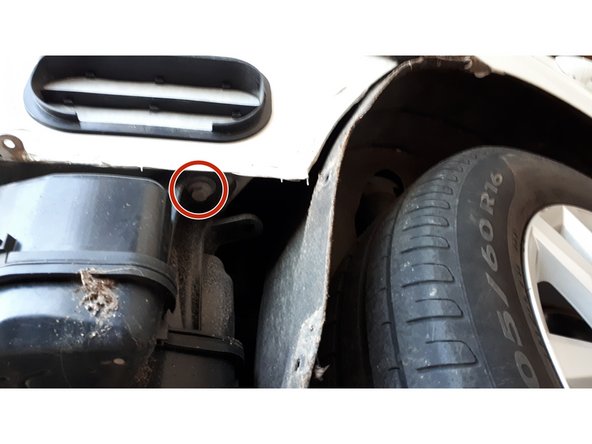
Il suffit de dévisser ses 3 vis à l'aide d'une clé de 13 afin de le libérer et le laisser descendre de quelques cm.
-
Il est inutile de le débrancher et de le déposer complètement. Il suffit de le faire reposer sur un support plus bas.
-
-
-
Remonter le pare-chocs (comme lors du démontage)
-
Remonter les feux (fixation par l'écrou en plastique, le connecteur et l'obturateur en plastique dans le coffre)
-
-
-
Installer le col de cygne sur l'attelage :
-
Mettre en place les 2 vis et utiliser 2 clés de 19 (ou 1 clé de 19 + 1 clé à molette) pour serrer très fort.
-
Annulation : je n'ai pas terminé ce tutoriel.
2 autres ont terminé cette réparation.
2 commentaires
Bonjour,
Merci pour votre tuto. Avez-vous monté le faisceau ?
Cdt
Bonjour,
Non, je n’ai pas monté le faisceau.
Cdlt,


