


Introduction
Le modèle présenté est une Honda Civic VIII - 2.2 i-CDTi 16V 140cv
Nous allons nettoyer la vanne EGR avec du nettoyant frein. La vanne s'encrasse car les gaz d'échappement laissent un dépôt sur les conduits.
-
-
Ouvrir le capot
-
Démonter le cache moteur en dévissant les 4 vis (douille de 10)
-
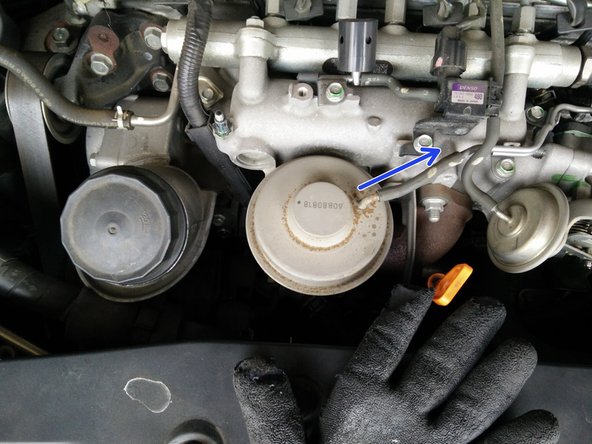
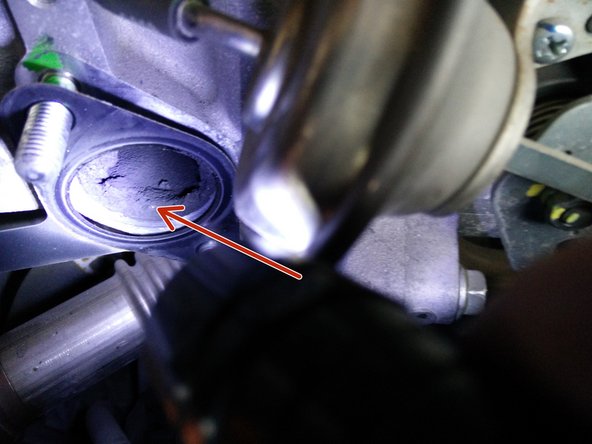
Localiser la vanne EGR
-
-
-
x2 boulons (l'autre est en dessous symétriquement à la conduite d'admission) (douille de 12)
-
(conduite d'admission)
-
x2 vis longue (douille de 12)
-
x2 vis (douille de 12) l'autre est à coté symétriquement
-
-
-
Les 2 vis du dessous sont accessible mais il est difficile de tourner le cliquet si vous celui-ci est trop imposant.
-
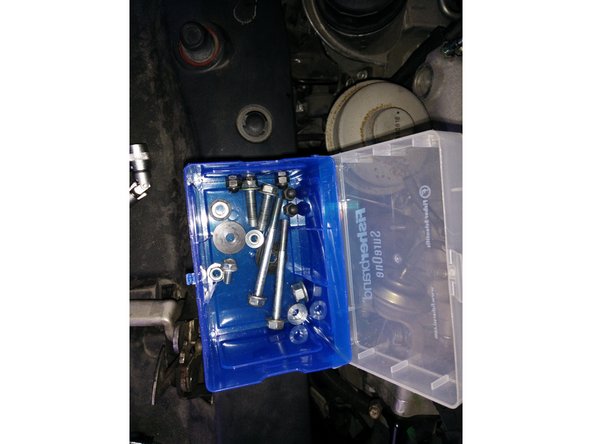
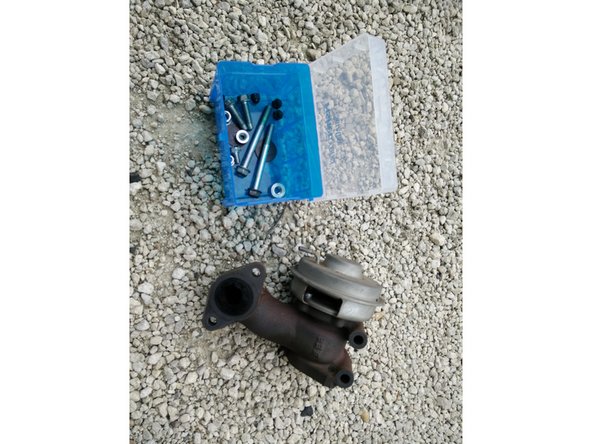
Dans la boite il y d'autres écrous mais ils ne font pas partie du démontage, il n'y a que 2 écrous à démonter.
-
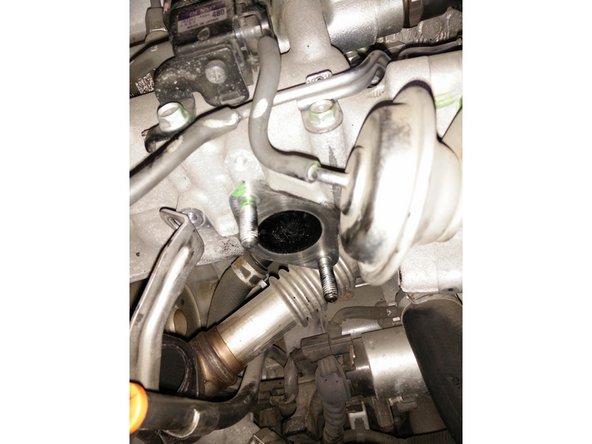
Débrancher la durite (il suffit de tirer dessus)
-
-
-
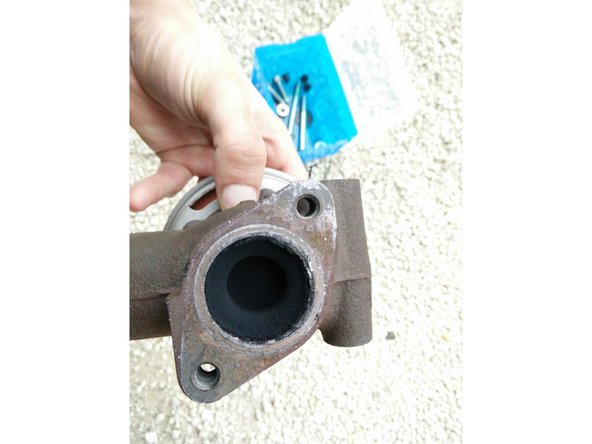
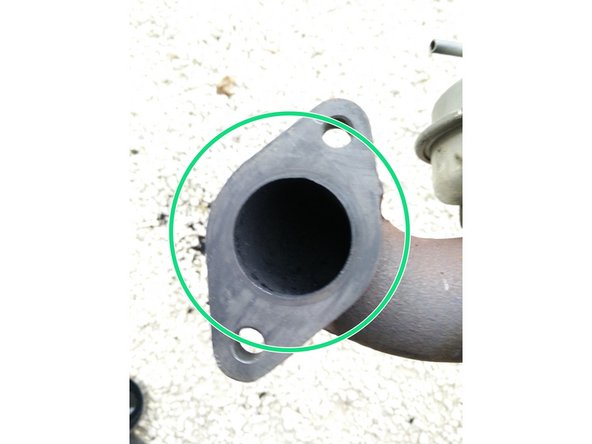
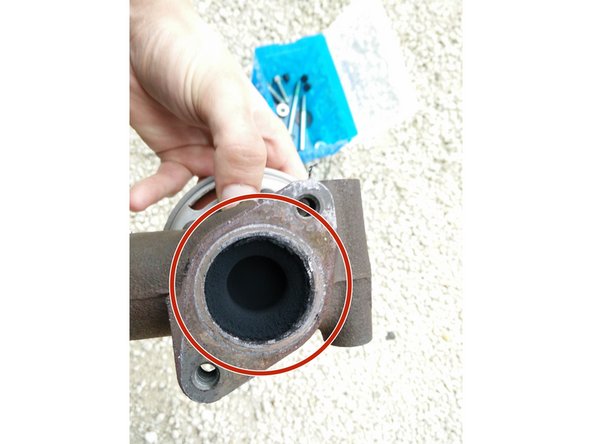
Sortir la vanne du moteur en faisant attention au joint d'étanchéité si vous ne remplacez pas celui-ci
-
-
-
Utiliser de l'essence ou du nettoyant frein pour le nettoyage
-
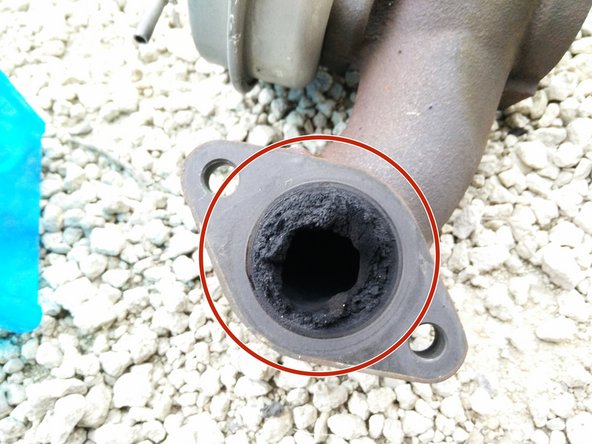
Ne nettoyer que l'intérieur des conduits
-
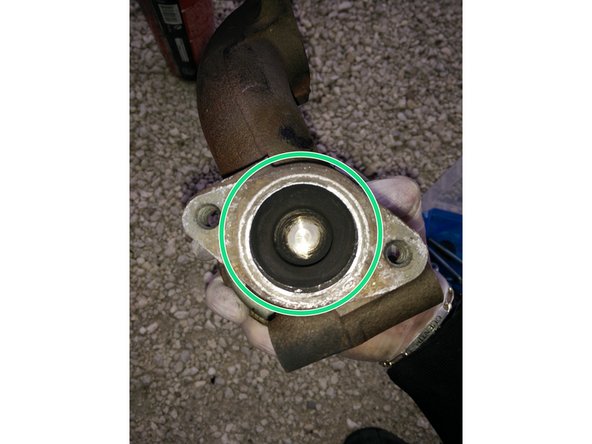
Ne pas mettre de produit sur la tête de la vanne (partie grise)
-
-
-
Utiliser un aspirateur pour éviter que les crasses ne partent dans l'admission !
-
Ne vaporiser PAS le nettoyant frein directement dans les conduites !
-
Utiliser un tournevis plat pour racler (sans forcer pour ne rien rayer) et l'aspirateur en même temps
-
Utiliser du sopalin imbibé de nettoyant frein
-
Utiliser vos doigts pour en enlever un maximum (utiliser des gants en latex)
-
-
-
Avant
-
Après
-
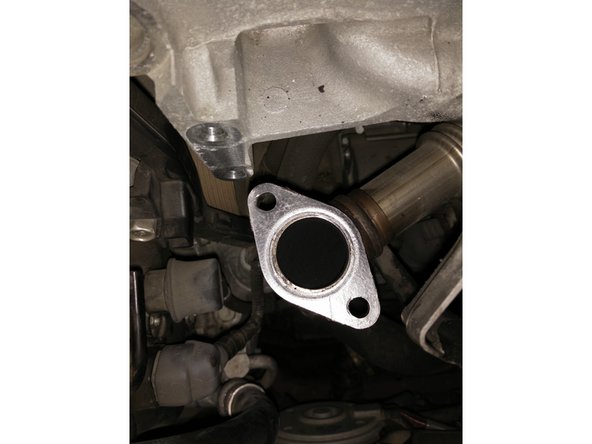
Procéder au remontage après des surfaces d'appuis de joints propres !
-
Remplacer les joints si nécessaire
-


Il n'y a rien de compliqué, le plus difficile c'est l'accès aux vis et écrous. Plus la vanne EGR s'encrasse plus elle est susceptible de tombée en panne. Un bon nettoyage pour une dizaine d'euros évite de gros frais par la suite.
Il n'y a rien de compliqué, le plus difficile c'est l'accès aux vis et écrous. Plus la vanne EGR s'encrasse plus elle est susceptible de tombée en panne. Un bon nettoyage pour une dizaine d'euros évite de gros frais par la suite.
Annulation : je n'ai pas terminé ce tutoriel.
23 autres ont terminé cette réparation.
18 commentaires
Bonjour et merci beaucoup pour ce super tuto, très simple et efficace. J'ai cependant un soucis, je n'arrive pas à dévisser les 2 vis qui se situent sous la vanne EGR. j'ai forcé au max, mais ça ne bouge pas. Les autres étaient dur, mais pas à ce point. J'ai essayé avec du dégrippant mais rien n'y fait. Auriez vous une idée ?? Merci d'avance :)
athos26.epaa - Résolu à la publication Réponse
Au top, j’ai suivi à la lettre votre topic et j’ai pu nettoyer ma vanne egr en 1h30. Elle était plus encrassée que la vôtre. Merci beaucoup
Nicolas Carles - Résolu à la publication Réponse
Merci pour ce tuto !
Petite clé à cliquet conseillée.
Ma civic : 2008 169.000 klm (sans FAP) le conduit côté moteur était quasiement bouché.
Operation effectuée en 1h30 nettoyages compris en prenant le temps.
Guillaume MARGERIE - Résolu à la publication Réponse
Merci pour ce tuto très clair, je suis parvenu a nettoyer ma vanne EGR qui était fortement encrassée apres 140000km…
Les boulons orange situés sous la vanne sont très difficiles d'accès mais avec un de patience et d'astuce on y arrive.
Gregory RECCHIA - Résolu à la publication Réponse
Bonjour, merci pour ce tuto qui m'a bien aidé pour le démontage de la vanne EGR, juste pour info, sur mon Frv j'ai démonté le carter puis la barre transversale qui sont au-dessus des radiateurs, ça facilite grandement l'accès aux vis inférieur des conduits sous la vanne, cette barre est fixée par 4 vis + 6 vis des pattes de fixation des radiateurs.
stephane cavalerie - Résolu à la publication Réponse