


Introduction
Tutoriels réalisé sur Peugeot 307 2.0HDI 90 CV
Vidéo d'introduction
-
-
Mise en sécurité du véhicule : démontage et remontage de la roue
-
A l'aide d'un cliquet et d'une douille de 21 desserrer l’écrou de la rotule sous le triangle puis retirer le
-
-
-
Placer l'extracteur de rotule entre la rotule et le triangle
-
Serrer la vis de l’extracteur pour décoller la rotule du triangle
-
-
-
Une fois décoller dévisser la vis de l'extracteur de rotule et retirer le
-
-
-
Glisser une barre de force entre le cardan et le triangle pour prendre appui sur le bas de caisse
-
Appuyer sur la barre afin de dégager la rotule du triangle
-
Relâcher délicatement et retirer la barre de force, tout en prenant soin d'écarter le moyeu
-
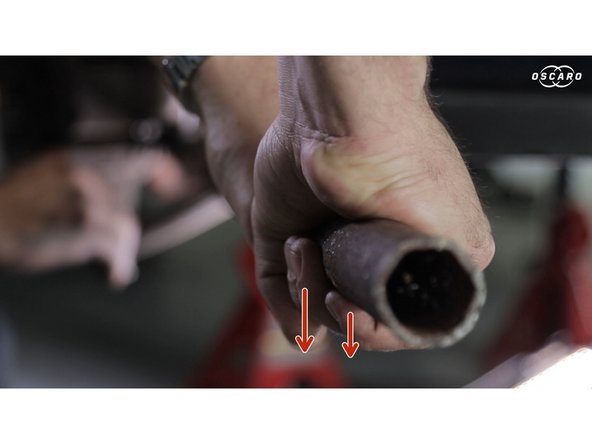
Pour le coté gauche, le cardan n’étant pas retenue par la boite de vitesse , il peut alors reculer et faire couler l'huile de boite, pour éviter cela maintenir le moyeu vers l’intérieur
-
-
-
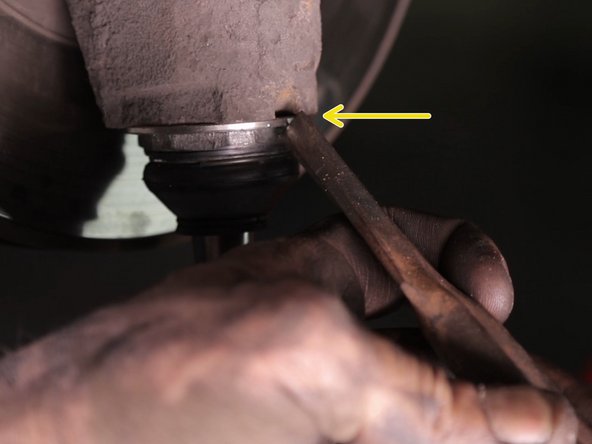
Afin débrider la rotule du moyeu placer un burin dans la fente
-
Taper avec un marteau sur le haut du burin afin de débrider la rotule du moyeu
-
En général une tôle pare chaleur protège le joint de la rotule , elle est retenue sur le haut de la rotule tirer dessus pour l'extraire
-
-
-
A l'aide d'une clé à griffe ( ou une douille de 36 longue) desserrer la rotule
-
Dévisser et retirer la rotule à la main
-
-
-
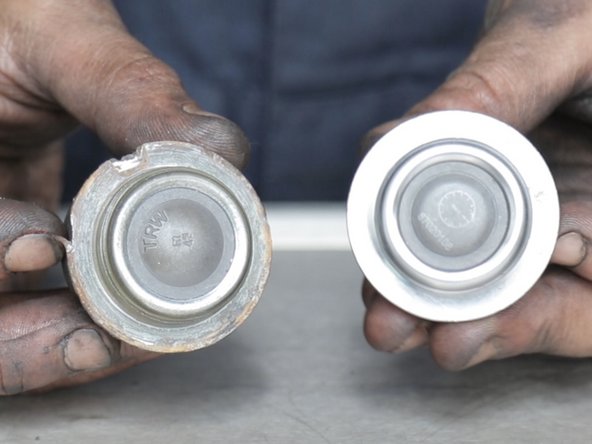
Comparer les dimensions entre l' ancienne et la nouvelle rotule de suspension
-
-
-
Replacer la nouvelle rotule et revisser dans un premier temps à la main puis bloquer avec la clé à griffe (ou la douille longue de 36)
-
-
-
Brider la rotule en frappant avec le burin et le marteau sur le bord de la rotule pour l’écraser dans la fente du moyeu
-
En général une tôle pare chaleur protège le joint de la rotule , reposer la en la clipsant sur le haut de la rotule
-
-
-
Replacer la barre de force entre le cardan et le triangle
-
Écarter le triangle pour insérer la rotule en manœuvrant le moyeu
-
La rotule est difficilement manipulable afin de faciliter sa repose ne pas hésiter à utiliser une clé à pipe pour l'incliner vers le triangle
-
-
-
Revisser l’écrou de la rotule et serrer le avec un cliquet et une douille de 21
-


Annulation : je n'ai pas terminé ce tutoriel.
8 autres ont terminé cette réparation.

Équipe

4 commentaires
Bonjour, bravo pour votre tuto très bien expliqué, mis à part la douille de 36 longue au lieux d'une 41 mais bon ça reste très bien merci.
hubert.larue50 - Résolu à la publication Réponse
Oui exacte douille spécifique longue de 41 spécial rotule Peugeot Citroën .
KS Tools 700.1662 - Douille 12 pans 1/2" pour rotules de suspension pour Citroën et Peugeot, 41 mm - En acier spécial https://www.amazon.fr/dp/B014ESOEO6/ref=...
bonjour la douille n’est pas du 36 mais du 41
chrisetlolo letertre - Résolu à la publication Réponse
bonjour la douille n’est pas une 36 mais une de 41 longue
chrisetlolo letertre - Résolu à la publication Réponse