


Introduction
Vous souhaitez changer vos biellettes de barre stabilisatrice sur votre Renault Clio IV ? Ce tutoriel vous aidera à le faire rapidement et facilement !


-
-
Pour pouvoir démonter votre roue :
-
- Utilisez une croix ou regarder dans votre coffre en enlevant la moquette, vous y trouverez une clé prévue pour desserrer vos 4 écrous, sans les retirer entièrement.
-
- Utilisez un cric pour lever l'avant de votre véhicule.
-
Pensez à sécuriser votre véhicule en utilisant des chandelles ou autres.
-
Vous pouvez totalement enlever vos écrous, puis déposer la roue.
-
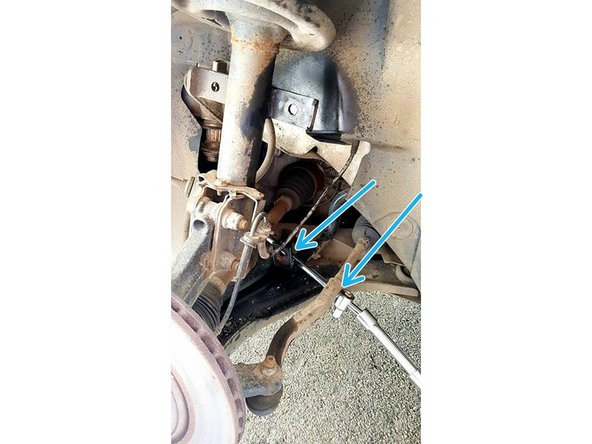
Maintenant, vous pouvez voir la biellette de barre stabilisatrice.
-
-
-
Vous pouvez retiré entièrement les 2 écrous qui maintiennent la biellette barre de stabilisatrice à l'aide d'une clé plate de 16 ainsi qu'un tournevis avec un embout BTR 30.
-
La clé plate vous servira à dévisser les écrous alors que le tournevis avec l'embout BTR 30 vous servira à maintenir le pas de vis dans le sens anti horaire afin qu'il ne tourne pas dans le vide.
-
Pensez à mettre du dégrippant pour faciliter le dévissage des écrous et l'extraction future de la biellette.
-
Les deux écrous sont entièrement déposer
-
-
-
Vous pouvez maintenant retirer la biellette barre de stabilisatrice de son logement en tirant dessus.
-
Aidez vous d'une longue tige pour faire levier sur la barre stabilisatrice afin de faciliter la dépose de la biellette et avoir donc un meilleur accès pour la retirer.
-
-
-
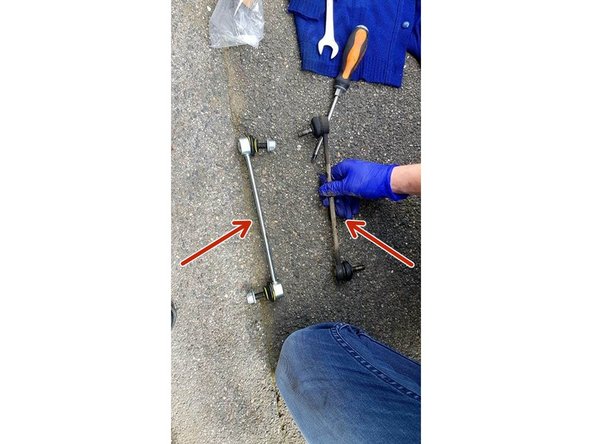
Vous allez maintenant comparer l'ancienne, ainsi que la nouvelle biellette de barre stabilisatrice (dimension etc...)
-
Maintenant, vous pouvez mettre la nouvelle biellette en respectant son sens de pose dans son logement, en vous aidant de la longue tige pour appuyer sur la barre stabilisatrice afin de faciliter la tache.
-
Vous pouvez visser les 2 écrous qui la maintienne à l'aide de la clé plate de 16 et en bloquant le pas de vis à l'aide du tournevis avec l'embout BTR 30.
-
La tâche est maintenant terminée, vous pouvez remettre votre roue en toute sécurité.
-
Il est conseillé de changer de chaque côté les biellettes de barre stabilisatrice.
-




Annulation : je n'ai pas terminé ce tutoriel.
Une autre personne a terminé cette réparation.