


Difficulté
Modérée
Étapes
12
Temps nécessaire
01:00:00
- Changer le silencieux sur Citroën C1 12 étapes

Ce tutoriel a été créé par la communauté
User contributed
Introduction
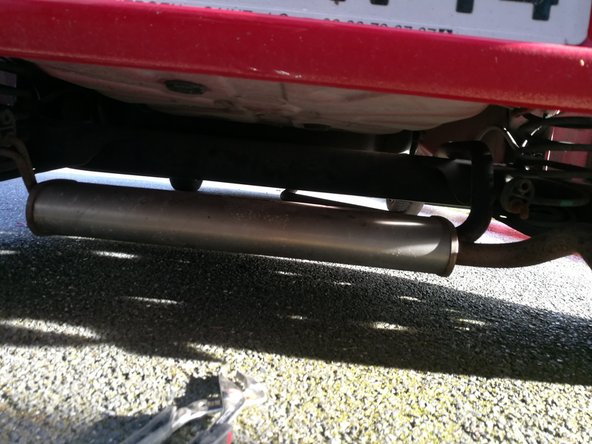
Changement du silencieux d’échappement sur Citroën C1 5 Portes 1.0 i 12V 68 cv
Pièces
-
-
outillages nécessaires:
-
toile a poncer
-
graisse haute temperature
-
pince multiprise
-
clé plate de 12
-
-
-
le collier se situe sous la voiture a proximité de la roue arrière droite
-
utiliser une clé plate pour le démontage de la vis
-
voici le collier et la vis démonté
-
-
-
faire glisser les caoutchoucs de leurs supports en les laissant sur le silencieux d’échappement
-
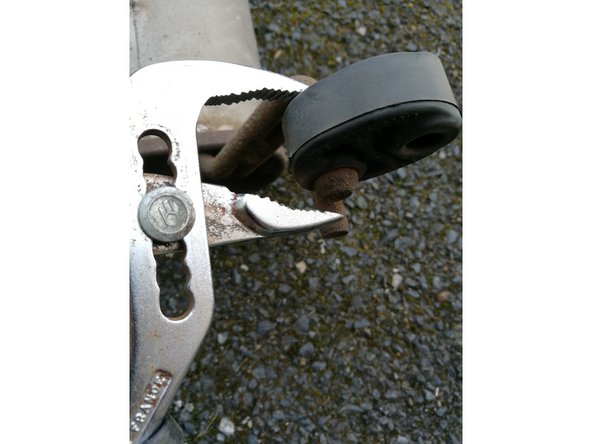
utiliser une pince multiprise si nécessaire
-
sur les images côté gauche prochaine étape côté droite
-
-
-
le caoutchouc côté droit est enlevé
-
maintenir le silencieux pour éviter qu'il ne tombe brusquement
-
-
-
Le silencieux n'est maintenue que par l’emboîtement du tuyau d'echappement
-
-
-
Dans cette étape il va falloir tirer le silencieux en exerçant un léger mouvement de rotation de manière a désolidariser le silencieux du tuyau d'échappement
-
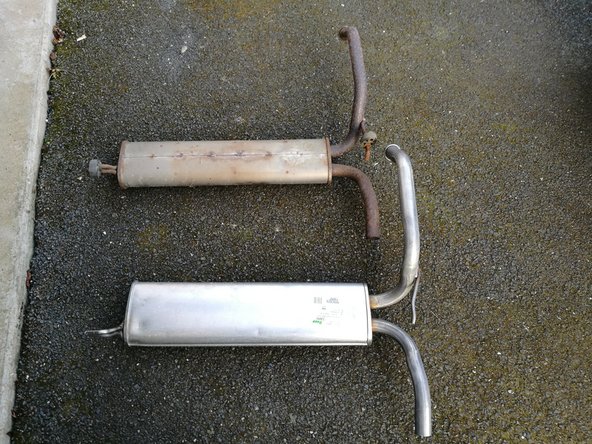
Voilà l'ancien silencieux est demonté
-
-
-
rien de bien compliqué il suffit juste de faire glisser le caoutchouc et de le remettre sur le nouveau silencieux au même emplacement coté droit sur cette étape
-
-
-
côté gauche sur cette étape
-
utiliser une pince multiprise pour enlever le caoutchouc si nécessaire
-
-
-
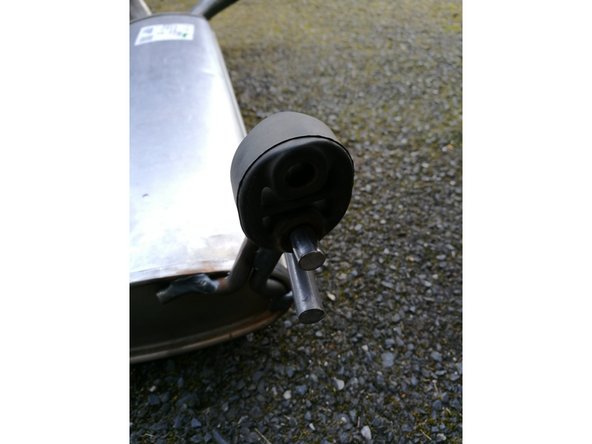
mettre un peu de graisse haute temperature a l'intérieur du tuyau du silencieux cela permettra une facilité d'introduction du silencieux dans le pot d’échappement et surtout un demontage plus facile la prochaine fois
-
Hé oui on pense au copain;)
-
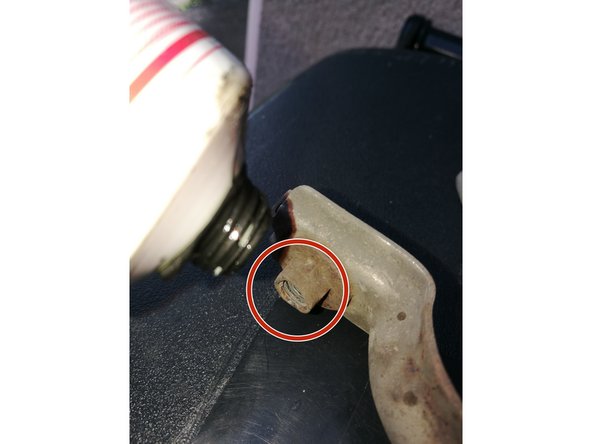
Passer un coup de toile a poncer autour de la partie qui va s'introduire dans le silencieux(voir 2éme image partie entourée en rouge)
-
-
-
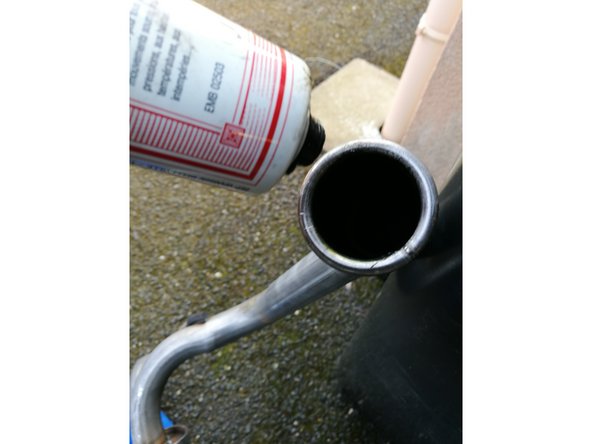
Introduire le tuyau du silencieux dans le tuyau du pot d'échappement voir photo 2
-
-
-
insérer les caoutchoucs dans les support prévu a cet effet côté droit d'abors puis côté gauche
-
-
-
Rapprocher au maximum les"bourrelets" du silencieux et du pot d’échappement voir photo 1
-
graisser l’écrou du collier pour faciliter le montage et le démontage voir photo 2
-
mettre en place le collier sur les "bourrelets" rapprochés et serrer la vis voir photo 3
-
voilà le silencieux est en place reste plus qu'a démarrer la voiture ;)
-


Annulation : je n'ai pas terminé ce tutoriel.
8 autres ont terminé cette réparation.
3 commentaires
Et n’oubliez pas de mettre de la graisse sur le filetage de la vis du collier pour la prochaine fois. (inutile de le changer tant qu’il est en bon état)
Serge Chambard - Résolu à la publication Réponse
Bien vu le coup de la pince multiprise, mais il y a encore mieux pour sortir les caoutchouc sans effort et sans les les abîmer :
1) GRAISSER le bout des tiges entre les caoutchoucs et les butées.
2) placer une clef à fourche de 12 ou de 13 de l’autre coté du caoutchouc (par exemple la clé mixte que vous avez utilisé pour desserrer le collier)
3) Serrer avec la multiprise entre le bout de la tige et la clé plate, ça sort tout seul (le plus difficile en tout cas).
Vraiment pas la peine de s’embêter.
Serge Chambard - Résolu à la publication Réponse
Et un de plus sur ma Aygo, avec de chaleureux remerciements.
Claude PELLEGRINI - Résolu à la publication Réponse