


Difficulté
Modérée
Étapes
8
Temps nécessaire

En cours
Ce tutoriel est en cours de création. Revenez de temps en temps pour voir les modifications.

Ce tutoriel a été créé par la communauté
User contributed
Introduction
Intervention effectuée sur une Renault Twingo 2 phase 2, moteur 1.5 dCi 75ch.
C'est une voiture que j'ai acheté d'occasion, je n'ai ni manuel d'utilisation ni revue technique par conséquent je ne connais ni les contenances ni les couples de serrage.
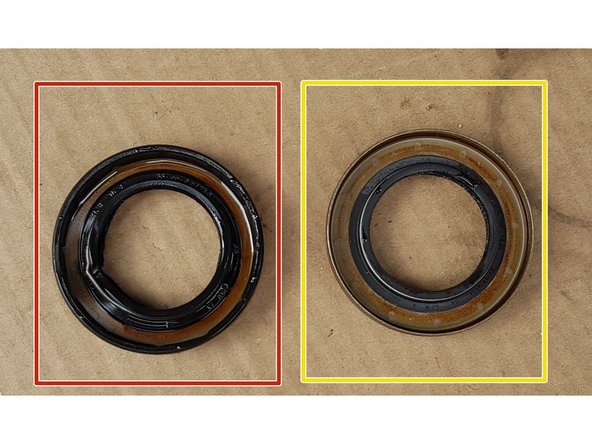
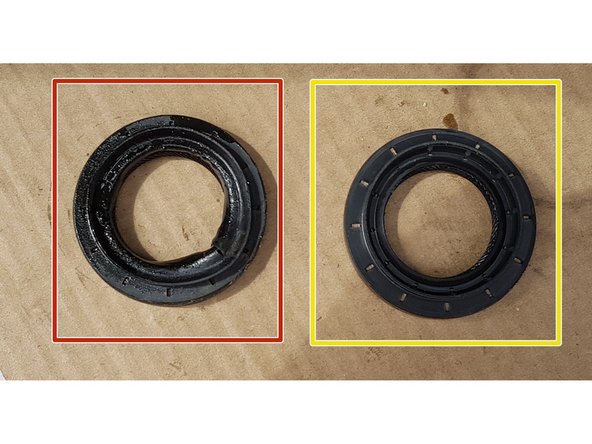
Le joint spi de boîte côté droit se trouve sur Oscaro. J'ai acheté la référence 20033804B de la marque CORTECO.
Le joint spi de boîte côté gauche n'était pas disponible sur Oscaro. Je l'ai acheté 28,56€ chez Renault. La référence est 82 00 884 113.
-
-
Vu que vous allez devoir remplir la boîte d'huile à la fin de l'intervention, il faut que le véhicule soit garé sur une surface horizontale.
-
Commencez par retirer l'écrou de cardan avec une douille de 30mm.
-
Retirez la roue : Mise en sécurité du vehicule
-
Placez un bac de vidange sous la boîte.
-
Repérez le bouchon de remplissage de la boîte et ouvrez-le.
-
-
-
Avec un carré de 8mm retirez le bouchon de vidange et laissez l'huile s'écouler.
-
-
-
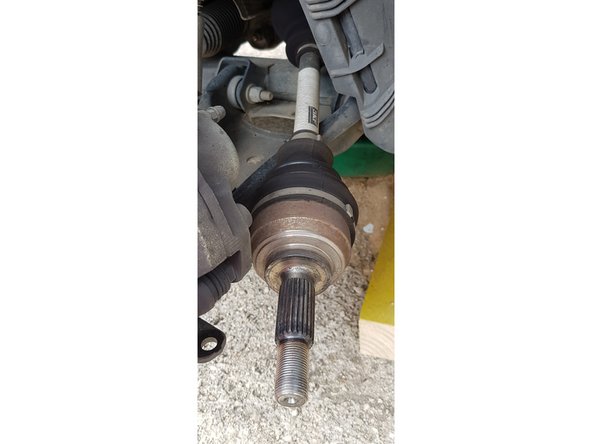
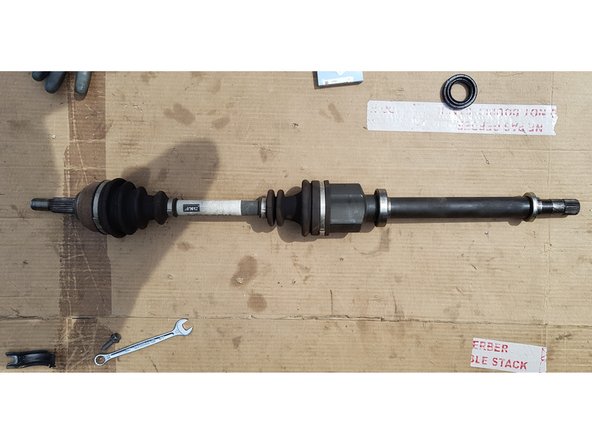
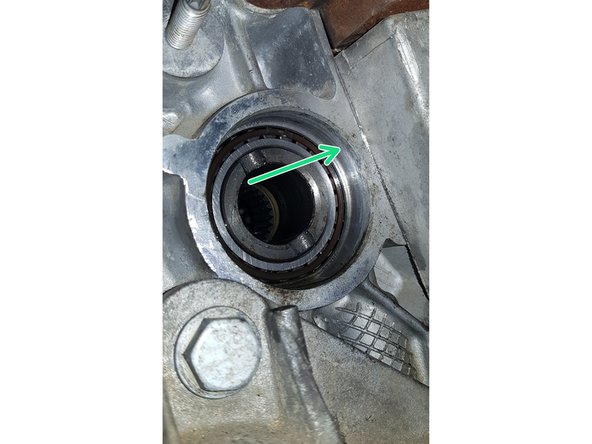
Cardan
-
Accouplement à la boîte grâce à des cannelures.
-
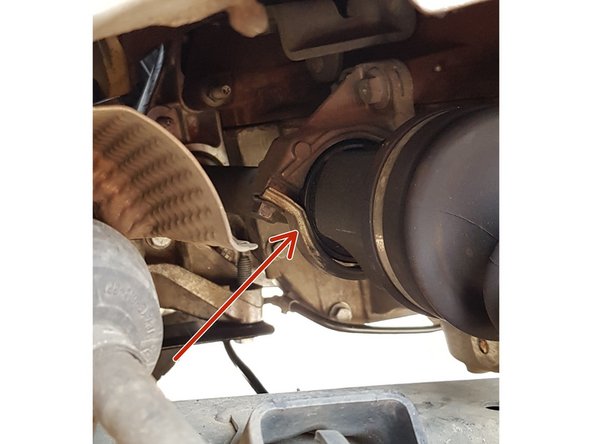
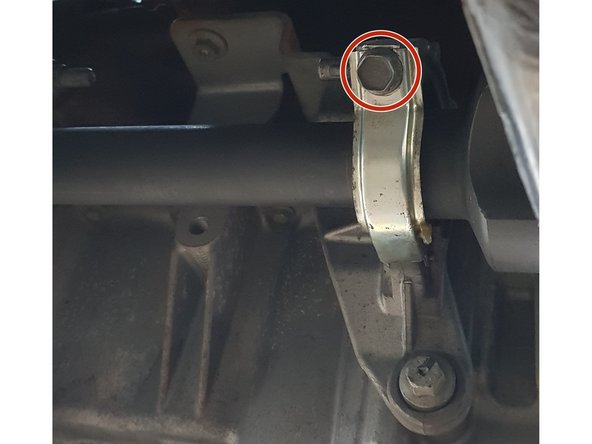
Fixation du palier
-
Le palier permet de limiter la flexion sur le cardan. Ici, le cardan est juste inséré dans la boîte et le palier est le seul élément qui l'empêche d'en sortir.
-
-
-
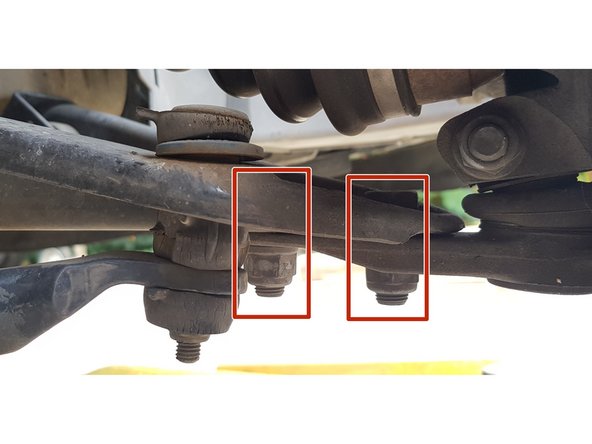
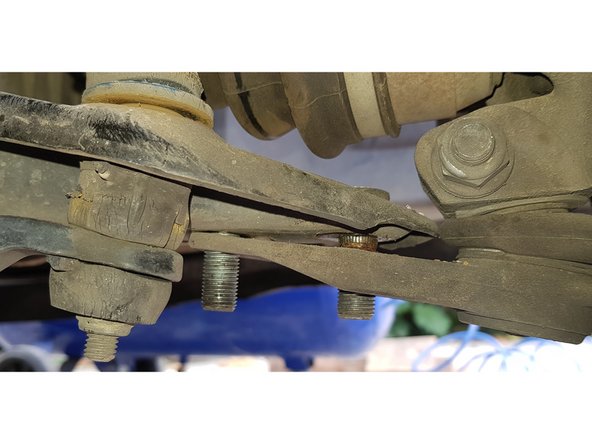
Avec une douille et une clé mixte de 18mm, retirez les 2 écrous ainsi que la vis côté intérieur puis désaccouplez la rotule du triangle.
-
Si vous avez du mal à désaccoupler la rotule, vous pouvez utiliser un pied de biche ou une barre à mine pour faire levier sur le triangle en prenant appui sur la barre stabilisatrice.
-
-
-
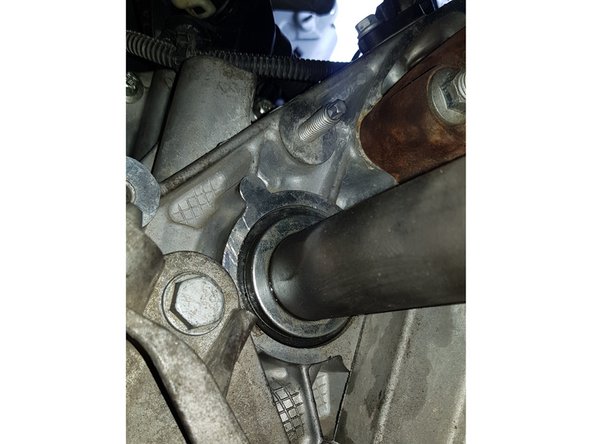
Avec une douille de 13mm retirez la vis puis faites basculer le support du palier.
-
Retirez le cardan en tirant dessus.
-
-
-
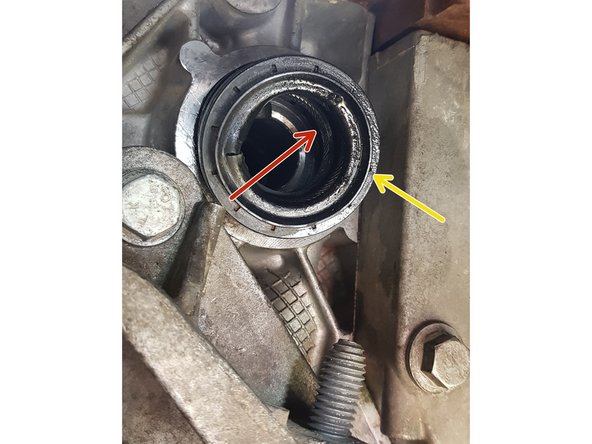
Mettez un peu d'huile de boîte sur la portée afin de faciliter le remontage.
-
Pour le remontage, j'ai positionné le joint neuf puis ai posé l'ancien joint sur lequel j'ai tapé au maillet jusqu'à l'insertion du joint neuf à sa position finale. Vous pouvez utiliser une douille plutôt que l'ancien joint si vous préférez.
-
Joint neuf
-
Ancien joint
-
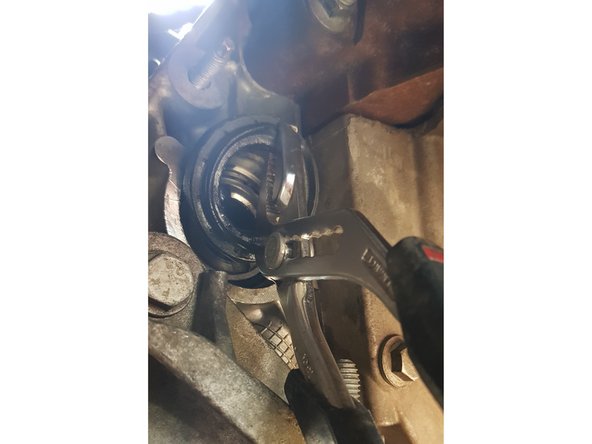
Utilisez une pince multiprise pour sortir l'ancien joint.
-
N'endommagez pas le joint neuf!
-
A l'aide d'un tuyau transparent et d'un entonnoir, faites le plein de la boîte avec de l'huile ELF NFJ 75W80. Le niveau se fait par débordement.
-
Le reste du remontage se fait en sens inverse
-


Annulation : je n'ai pas terminé ce tutoriel.
Une autre personne a terminé cette réparation.