


Difficulté
Modérée
Étapes
8
Temps nécessaire
02:00:00

Ce tutoriel a été créé par la communauté
User contributed
Introduction
Dans ce tutoriel, nous verrons comment changer les amortisseurs arrière.
Les pièces et la majorité des outils nécessaires sont disponibles sur le site.
Seules les douilles Torx femelles ne le sont pas, mais vous les trouverez aisément dans un centre auto. De plus cette acquisition vous sera très utile si vous envisagez de changer vos disques et plaquettes de freins avant, eux aussi disponibles sur le site.
-
-
Après avoir engagé une vitesse, serré le frein à main et desserré les écrous de la roue.
-
Levez la voiture et placez la sur chandelle. Vous pouvez vous référer au guide sur le site pour réaliser cette opération en toute sécurité https://conseils.oscaro.com/placer-voitu...
-
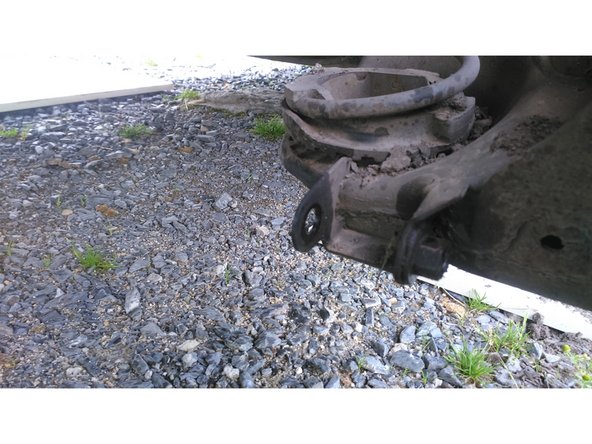
Retirez la roue afin d'accéder à l'amortisseur.
-
-
-
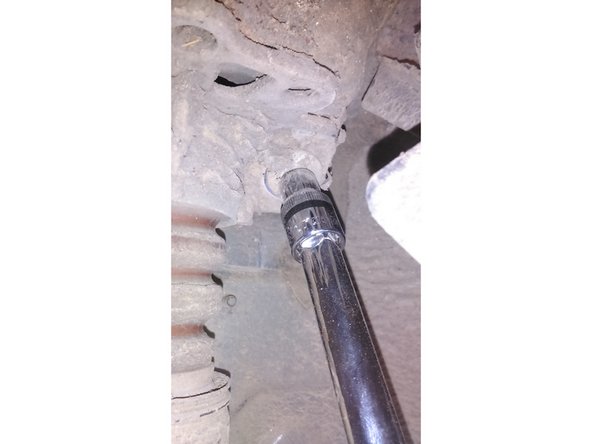
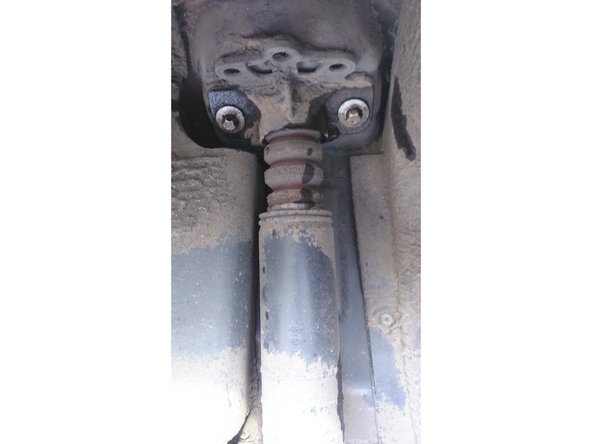
Dans l'exemple nous verrons le démontage de l'amortisseur arrière droit, qui nécessite de retirer un écrou pour accéder aux vis qui tiennent la platine de tête d'amortisseur.
-
A l'aide d'une clé à pipe de 10, dévissez l'écrou afin de pouvoir écarter le carter de protection
-
-
-
Après avoir écarté la protection, à l'aide de votre douille torx femelle E14, dévissez les deux vis de la platine sans les retirer entièrement.
-
-
-
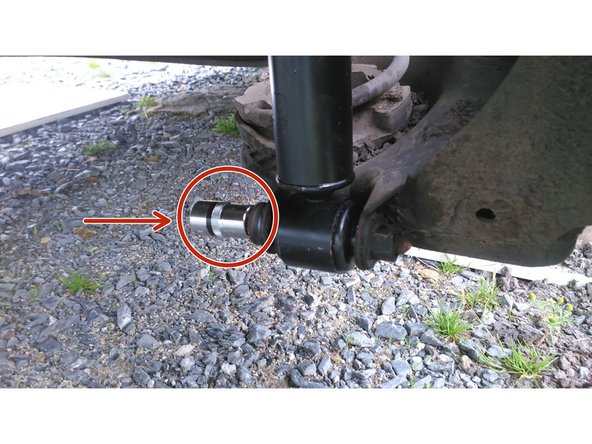
A l'aide de votre douille torx femelle E18, dévissez le boulon du pied d'amortisseur.
-
Une fois ce dernier desserré, retirez les deux vis maintenant la platine de l'étape précédente.
-
Retirez l'ancien amortisseur.
-
-
-
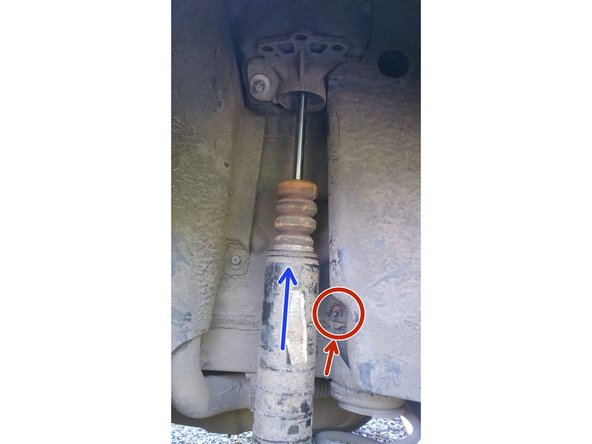
Sur l'ancien amortisseur, vous devez récupérer la platine de tête, ainsi que le tube de protection.
-
Pour démonter la platine, à l'aide de votre clé à pipe de 16, desserrez l'écrou. Aidez vous d'un étau pour bloquer la tige de l'amortisseur.
-
-
-
Comparez vos nouveaux amortisseurs avec les anciens.
-
Remettez en place la protection de tige.
-
Puis ré-assemblez l'amortisseur et sa platine grâce au nouvel écrou fourni et en respectant les couples de serrage.
-
Remettez en place l'amortisseur en commençant par le boulon de pied sans le serrer.
-
-
-
A l'aide de votre cric soulagez le train arrière afin de pouvoir mettre en place la platine.
-
A l'aide de votre douille torx E14 remettez en place les deux vis de la platine de tête d'amortisseur et serrer les au couple requis.
-
Remettez en place le boulon du carter de protection et remontez la protection de la tige d'amortisseur et insérez là dans son logement.
-
Serrez le boulon du pied d'amortisseur à l'aide de votre douille torx E18 en respectant le couple de serrage.
-


Annulation : je n'ai pas terminé ce tutoriel.
2 autres ont terminé cette réparation.
5 commentaires
Bonjour ,
merci pour ce tuto
grosse economie
merci
Thierry P le 13/11/2020
parenteau thierry - Résolu à la publication Réponse
Très bon guide pour remplacer soit même ses amortisseurs arrière.
À noter que ce guide est également valable pour les Corsa D et les Mito qui possèdent le même train arrière que la Grande Punto !
Sidney Malgras - Résolu à la publication Réponse