Introduction
La rotule de direction est la pièce mécanique qui permet de tourner les roues, mais également, en association avec les rotules de suspension, d'absorber certains chocs. Cette pièce fait le lien entre la biellette de direction et la roue.
Cette opération est ici réalisée sur une Alfa Roméo 147 phase 1 Twin Spark 120cv. Elle est cependant similaire aux autres véhicules.
Parts
-
-
Serrer le frein à main puis lever l'avant de la voiture au cric et le poser sur chandelles. Déposer la roue avant du côté intervention.
-
-
-
Rotule extérieures de biellettes de direction.
-
Contre-écrou de blocage de la rotule de biellette de direction.
-
Biellette de direction (fait le lien entre la crémaillère et la rotule de biellette de direction) .
-
Pivot porte-moyeu.
-
Le contre-écrou permet le réglage du parallélisme, il ne devra donc en aucun cas quitter sa position d'origine.
-
-
-
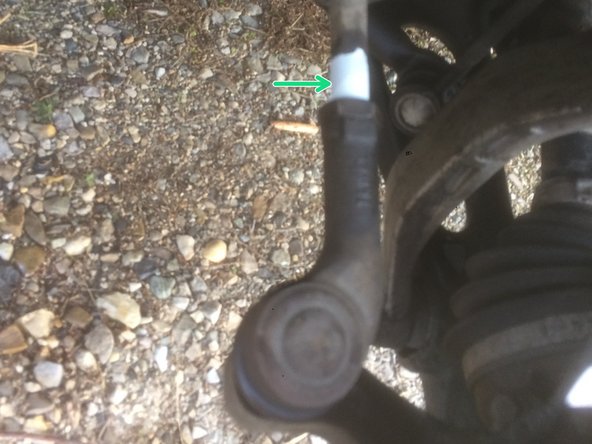
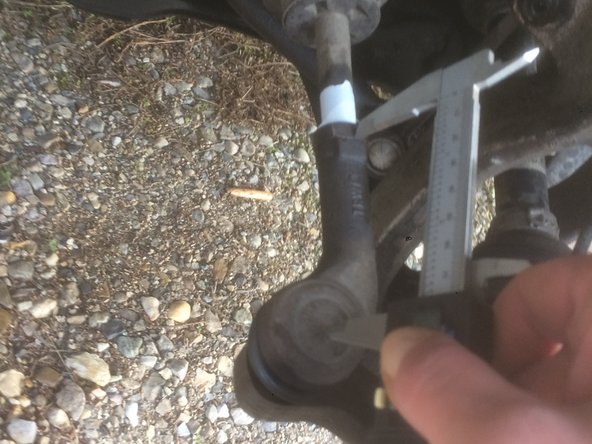
Pour conserver la position du contre-écrou, placer un repère au scotch. Pour plus de sécurité, ne pas hésiter à effectuer une mesure à l'aide d'un pied à coulisse.
-
Vérifier que la nouvelle pièce est en tout point identique à celle d'origine, à défault le parallélisme se verra modifié.
-
-
-
Desserrer le contre-écrou d'un demi-tour uniquement pour conserver au maximum sa position originelle. Le desserrer dans le sens horaire.
-
Enlever l'écrou de fixation de la rotule de la biellette de direction sur le pivot porte-moyeu puis extraire le cône de la rotule du pivot au moyen d'un arrache-rotule universel (un marteau peut aussi faire l'affaire).
-
Dévisser ensuite complètement la rotule en bout de biellette de direction, en comptant le nombre de tours exacts pour y parvenir.
-
Ne pas hésiter sur le WD40.
-
-
-
Nettoyer soigneusement le filetage de la biellette de direction.
-
Visser la rotule en bout de biellette de direction en observant le même nombre de tours notés à la dépose.
-
Réaccoupler le cône de la rotule au pivot porte-moyeu puis remonter l'écrou de fixation.
-
En cas de rotation au serrage de l'écrou de l'axe de la rotule, le bloquer en exerçant une pression en dessous de la rotule à l'aide d'un cric.
-
Bloquer le contre-écrou dans le sens anti-horaire.
-
Reposer la roue puis ramener la voiture au sol.
-
S'il existe une modification du comportement du véhicule après cette opération ou si un doute subsiste, faire le parallélisme par un professionnel.
-
Annulation : je n'ai pas terminé ce tutoriel.
3 autres ont terminé cette réparation.
Un commentaire
De bons conseils précis. On peut donc éviter le parallélisme par un professionnel quand on a pris de bonnes pécautions au montage et démontage.
Merci


