Introduction
Description du montage,démontage disque, étrier , sous/ensemble pivot /moyeu sur Renault Twingo 1 1.2 55cv
Extraction et montage d'un roulement neuf.
-
-
Utiliser une clé à cliquet robuste munie d'une douille de 30 mm et débloquer cet écrou (ainsi que les 4 vis de fixation de le roue) avant de lever l'avant de la voiture.
-
Mise en sécurité du véhicule : démontage et remontage de la roue
-
-
-
Placer l'avant sur chandelles , déposer la roue ,déposer les vis d'assemblage de l' étrier et attacher celui-ci au bras de suspension
-
-
-
Extraire la rotule de direction: Si vous ne possédez par d'extracteur de rotule ,chauffer la zone d'emboitement au chalumeau à air chaud puis frapper (doucement) latéralement au marteau ,le cône se décolle rapidement.
-
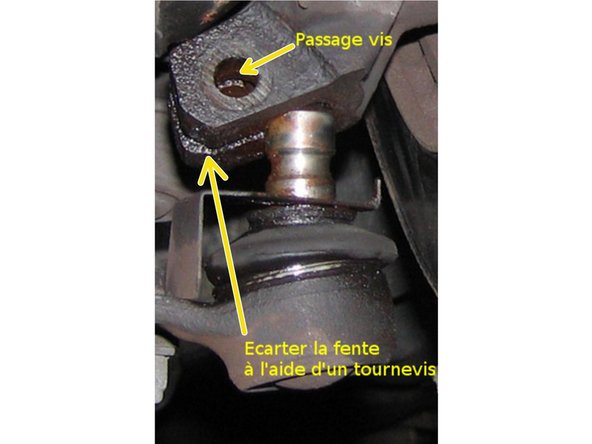
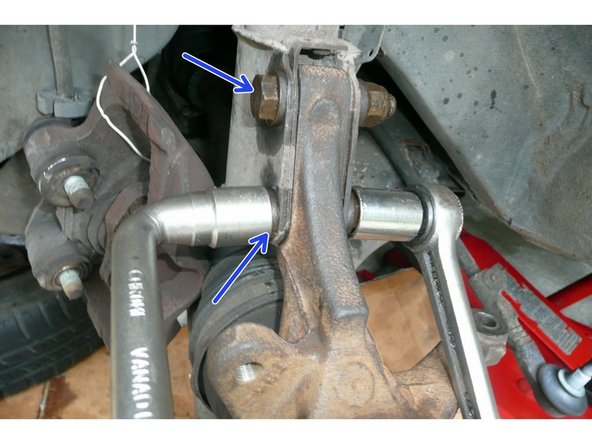
Extraire l 'axe de rotule de triangle Déposer la vis tangentielle (Clé à pipe de 16 et d'une douille de 16). Introduire la lame d' un gros tournevis plat dans la fente du pivot puis frapper au marteau pour libérer la queue de rotule du pivot
-
Déposer les 2 vis du pied d'amortisseur (Clé à pipe de 18 et douille de 18)
-
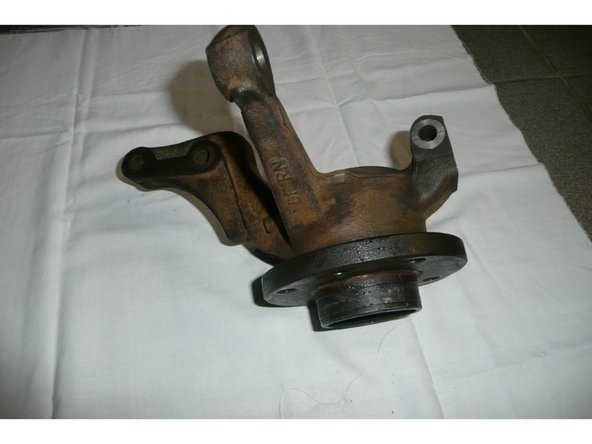
Déposer l'écrou central de transmission et sortir le sous-ensemble pivot / moyeu
-
-
-
Extraire le moyeu à l'aide d'un extracteur poussant une bague de Ø 34.8 maxi. Les pattes de l'extracteur sont accrochées aux formes du moyeu
-
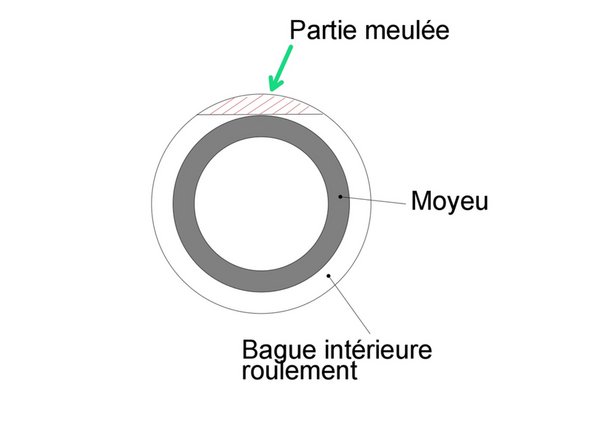
A ce stade une des bagues intérieures reste en place sur le moyeu. Utiliser un décolleur couplé à un extracteur ou plus simplement meuler tangentiellement la bague à la disqueuse jusqu'à quelques dixièmes de millimètre du moyeu .Il est maintenant facile de l' extraire
-
-
-
Replacer la bague (meulée précédemment) sur le roulement ,retirer le jonc de retenue ,enfiler une tige filetée M12 x350 munie d'une bague prenant appui sur la bague intérieure + écrou M12.
-
De l'autre coté du moyeu place un tube Ø int. mini 66 lgr 50 , une plaque , un écrou (voir schéma)
-
-
-
Placer le roulement au congélateur pendant 2 heures et chauffer le pivot au chalumeau à air chaud à env 200°
-
Positionner le pivot et le roulement autour d'une tige filetée M12x350 dont un écrou est serré dans les mâchoires d'un étau.(il convient au préalable d'enduire les zones en contact de graisse au lithium)
-
Placer une bague ,une rondelle et un écrou au dessus du roulement
-
Serrer lentement jusqu'à positionner le roulement au fond du logement
-
-
-
Positionner le pivot et le moyeu autour d'une tige filetée M12x350 dont l' écrou du bas retient une bague en appui sur le moyeu
-
Placer ensuite une bague en appui sur la bague intérieure du roulement , interposer une entretoise ,une rondelle et un écrou HM12 , serrer doucement
-
Il convient avant de réaliser l'emmanchement d'enduire le moyeu et l' alésage de la bague du roulement de graisse au lithium.
-
-
-
Introduire d'abord l'arbre cannelé , et approcher l'écrou de transmission. Vérifier que tous les écrous sont correctement serrés . L'ensemble des écrous seront enduits de "frein filet" avant montage
-
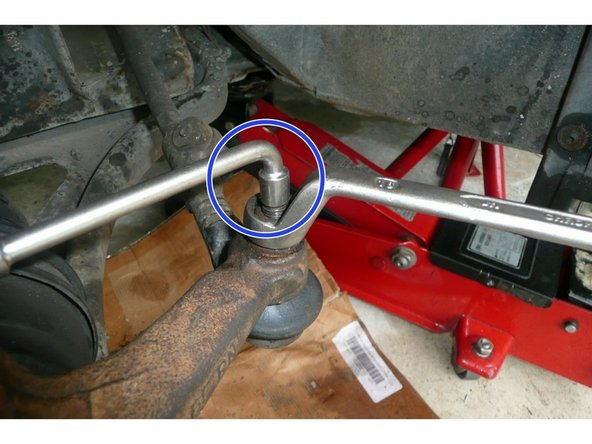
Monter la rotule de direction. Empêcher la rotation de l'axe en maintenant celui-ci avec une clé à pipe de 7. Dès que les cônes sont en contact , cette opération n'est plus nécessaire .
-
Assembler vis du du pied d'amortisseur
-
Fixer l'axe de rotule du triangle
-
Poser l'étrier de frein , puis le disque
-
Remonter la roue afin de finaliser le serrage de l'écrou de transmission .
-
Annulation : je n'ai pas terminé ce tutoriel.
11 autres ont terminé cette réparation.
6 commentaires
Merci pour ce tuto, opération terminée en 3 heures. J’ai eu juste besoin de chauffer le pivot avec une lampe à souder pour extraire le roulement..
C’est sympa et encourageant de savoir que ce tuto rend service, bravo pour avoir effectué ce travail en 3h . Ce travail ne peut être effectué que par des personnes ayant une formation mécanique . Par exemple il convient de prendre les appuis sur les bagues qui ne contraignent pas les billes au remontage …
Merci pour ce tuto. Juste un petit commentaire au sujet de l'extraction du roulement. Ne pouvant malheureusement pas fabriquer un extracteur, ni en acheter un…j'ai trouvé un garagiste qui extrait l'ancien roulement et me remet en place le nouveau, je donne 20 euros pour le travail…non facturé, mais c'est pratique. Il y a des garagistes coopérants, heureusement. J'ai fait pareil avec les 2 tambours de frein arrière. Maintenant je prie que le roulement avant gauche tienne encore longtemps. Voilà. Merci à Oscaro pour leur site.
bon professeur. et bon noel
bon commentaire bon detail du vecu merci


