


Difficulté
Modérée
Étapes
8
Temps nécessaire
01:00:00

Ce tutoriel a été créé par la communauté
User contributed
-
-
Véhicule au sol, dessérer les écrous de fixation de la roue
-
Lever le véhicule et sécuriser le levage avec une chandelle
-
Terminer de dévisser les écrous et déposer la roue
-
-
-
Extraire le cabochon en tirant dessus
-
Utiliser un petit tournevis en guise de burin et l'insérer entre le cabochon et le tambour puis faire levier doucement
-
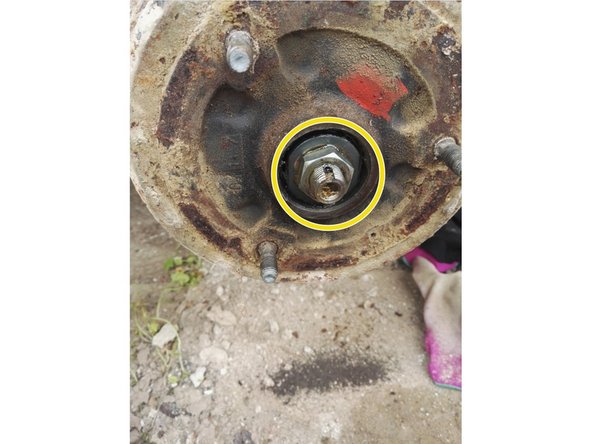
Extraire la goupille en tirant vers le haut et retirer le frein d'écrou (cercle rouge)
-
-
-
Dévisser l'écrou
-
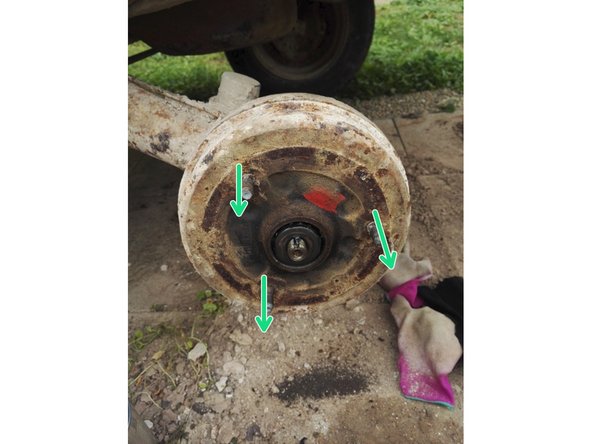
Tirer sur le tambour, au besoin jouer légèrement.
-
Profitez en pour nettoyer le roulement extérieur et l'intérieur du tambour (piste) en éliminant l'ancienne graisse
-
-
-
Déconnecter le ressort inférieur
-
A l'aide d'un tournevis décrocher les 2 ressorts de fixation des mâchoires et déposez les mâchoires
-
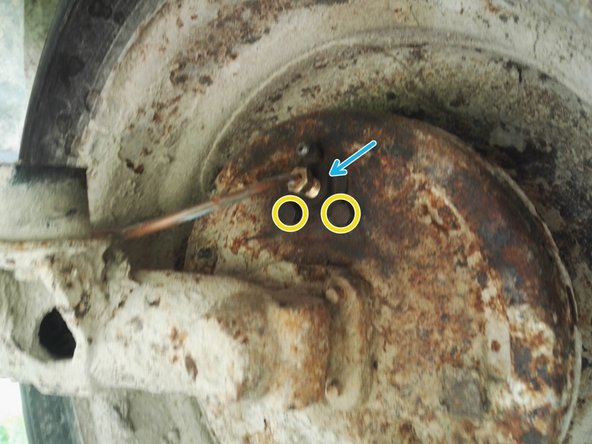
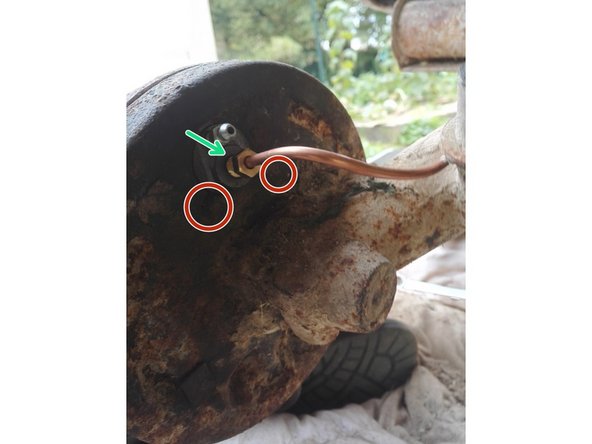
Dévisser la durite de frein à l'arrière de la flasque
-
Très forte probabilité de casse/arrondir la tête, ne pas lésiner sur le dégrippant et utiliser une clé à tuyauter.
-
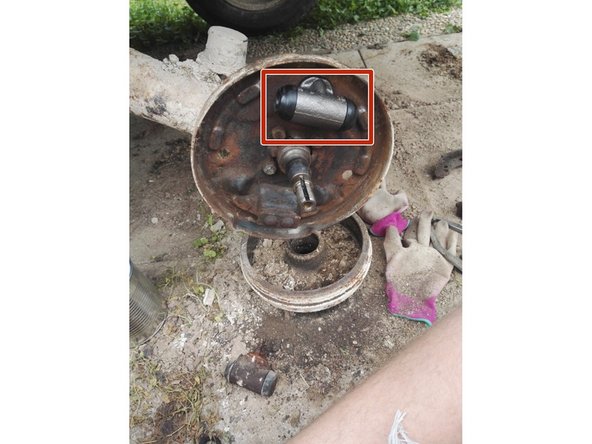
Dévisser les 2 écrous de 10 à l'arrière du cylindre puis le pousser pour le dégager
-
Profitez en pour nettoyer la flasque et l'intérieur du tambour et éliminer tout les dépots/poussières
-
-
-
Poser le nouveau cylindre, serrer les 2 écrous et reconnecter la durite de frein
-
-
-
Mettre les 2 garnitures en place, attention à ne pas arracher les caoutchoucs du cylindre de roue
-
Dans le cas de garniture prémontées, déposer les 2 ressorts (supérieur et inférieur, encadré rouge), positionner une des deux machoires, y attacher le ressort supérieur, mettre la seconde machoire en place, reconnecter le ressort supérieur. (Pour se faire "tirer" sur le ressort à l'aide d'une pince pour le positionner dans le logement)
-
Veiller à ce que les 2 mâchoires soient bien en place en partie supérieure, les placer chacune derrière la petite patte de maintiens inférieure puis reconnecter le ressort inférieur (Même technique pour le ressort supérieur)
-
Pour une facilité d'accès, je commence toujours par la machoire accueillant le système de frein à main Si frein à main il y a.
-
Reconnecter ensuite les 2 ressorts de maintiens des mâchoires (cercle vert) (Placez les ressorts dans les trous, et à l'aide d'un tournevis plat appuyez sur le crochet pour mettre le ressort en tension et ainsi pouvoir l'accrocher dans l’agrafe métallique, même procédé que la dépose)
-
-
-
Remettre le tambour en place et regraisser l'intérieur (ne pas hésiter à en mettre "trop")
-
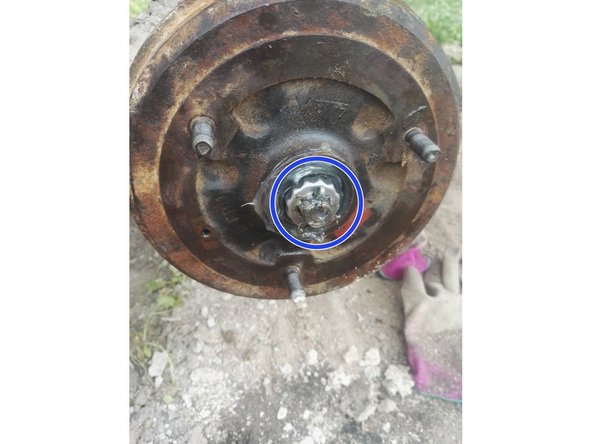
Replacer le roulement, la plaque, serrer l'écrou jusqu'à ce que le tambour "accroche" (Difficulté à le tourner à la main) puis desserer l'écrou d'un quart de tour
-
Remettre le frein d'écrou et la goupille de sécurité
-
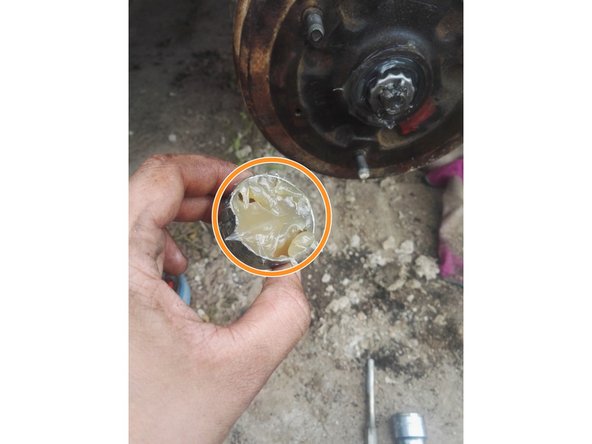
Puis reposer le cabochon, en le bourrant de graisse
-
Utiliser de la graisse pour roulement
-
-
-
Remonter la roue
-
Reposer le véhicule au sol et controler le serrage de la roue
-
Effectuer une purge du liquide de frein
-
-


Annulation : je n'ai pas terminé ce tutoriel.
2 autres ont terminé cette réparation.