


Difficulté
Modérée
Étapes
12
Temps nécessaire
02:00:00 - 04:00:00

Ce tutoriel a été créé par la communauté
User contributed
Introduction
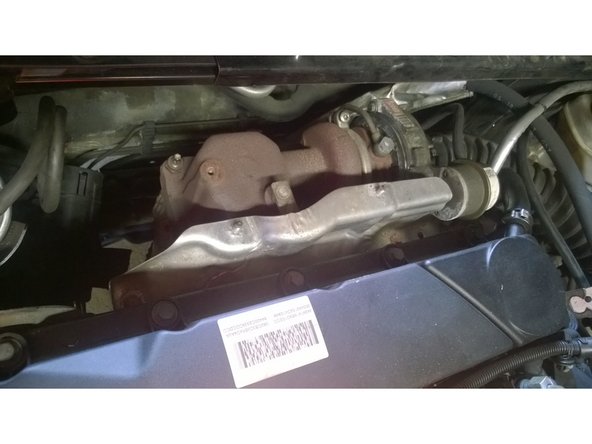
Tutoriel réalisé sur une Ford Mondeo MK3 2.0 TDCI 115
Avant toute chose pour ce tutoriel, il faut savoir que les manipulations à faire ne sont pas compliquées mais l'encombrement du moteur rend cela parfois plus complexe. Cependant, il faut être bien outillé, et surtout avoir 2 tontons bricoleurs pour vous aider (concrètement il vous faut une deuxième personne). Enfin, prévoyez du temps (comptez 3h pour le démontage/remontage quand on sait exactement ce qu'il faut faire).
-
-
Après avoir levé la voiture côté avant droit et l'avoir sécurisé sur avec des chandelles, retirer le cache en plastique donnant accès à la courroie et aux galets. Pour cela retirer une vis torx T25 (en vert) et 2 vis grace à une douille de 9 (en rouge)
-
Ouvrir le capot de la voiture
-
-
-
Munissez vous de la clé Ford T303676. (fait maison dans mon cas). C'est une clé fine et longue avec 2 bouts à la fin qui permettent d'aller dans les encoches du tendeur. Cet outil est nécessaire car il n'y a pas la place de passer un cliquet ou autre chose.
-
Sur le seconde photo, les 2 encoches qu'il faudra aller chercher avec l'outil.
-
Sur la photo 3, le tendeur à détendre. Mettre les deux pointes de l'outil Ford dans les encoches. Tirer vers vous afin de compresser le ressort (flèche verte) et détendre la courroie. Pendant ce temps, la deuxième personne vous accompagnant doit désengager la courroie en passant pas en haut (côté capot).
-
-
-
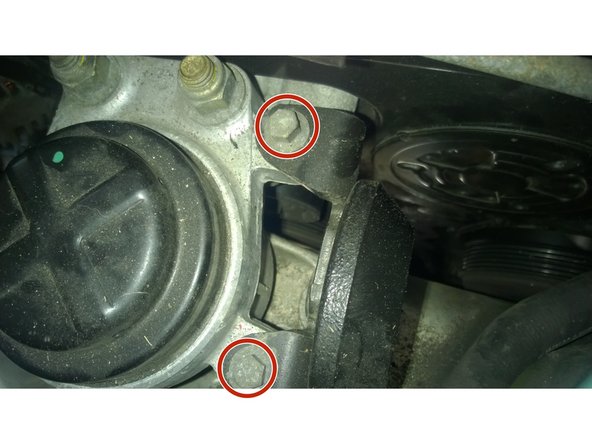
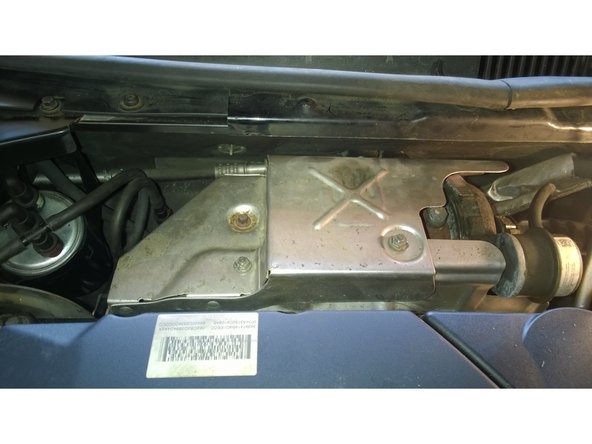
Démonter le cache du turbo afin d'avoir un meilleur accès (et visibilité) aux vis de la pièce monobloc qui tient le tendeur et deux des galets. Pour cela, dévisser, 2 boulons avec une douille de 10 (rouge) et 2 vis avec une douille de 8 (vert) (Une se situe à l'arrière).
-
Une fois démonté, nous avons une meilleure visibilité et plus de place.
-
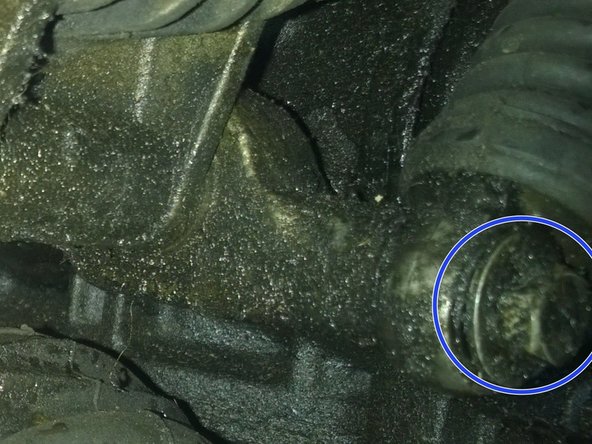
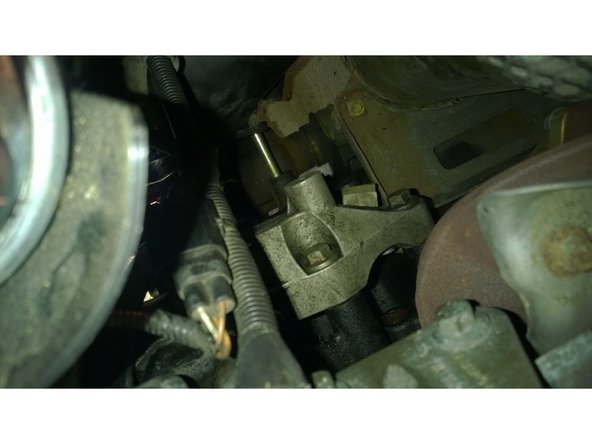
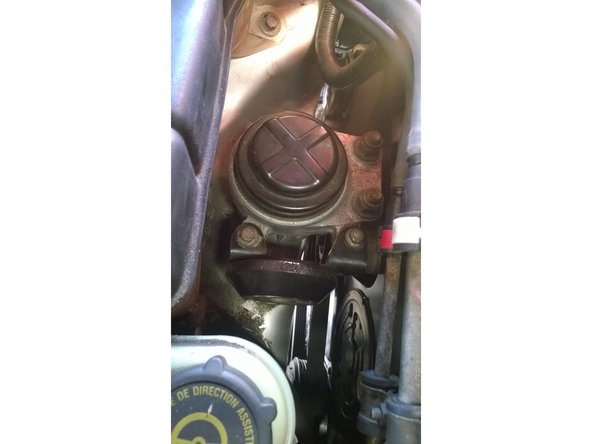
Démonter la masse du support moteur droit qui nous permettra d'avoir un meilleur accès à un des galets
-
-
-
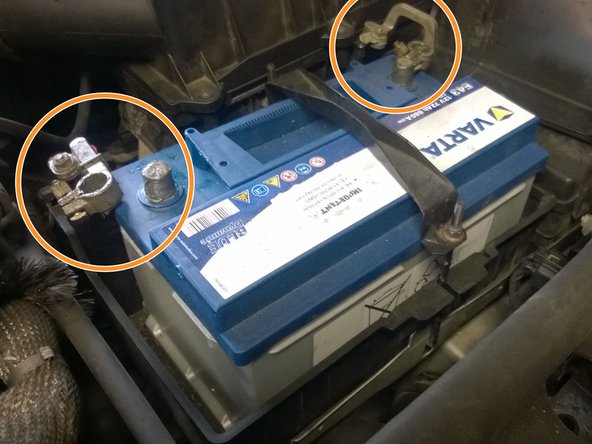
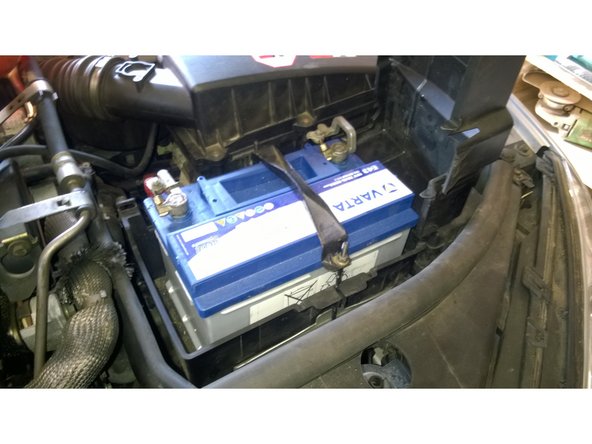
Débrancher par précaution la batterie avant de démonter l'alternateur. Pour cela, enlever la borne négative puis la borne positive afin de ne pas faire court-circuit.
-
Le démontage de l'alternateur est nécessaire pour démonter la pièce monobloc qui tient le tendeur et 2 galets. Il n'est pas nécessaire de débrancher les parties éléctriques de l'alternateur. Pour retirer l'alternateur, il faut retirer 3 boulons. 2 grâce à une clé de 15 situés juste sous l'alternateur et accessibles par le côté roue de la voiture.
-
Le troisième boulon est au dessus de l'alternateur, caché derrière une gaine de cable electrique. Il est accessible depuis le côté capot et necessite l'utilisation de la douille de 13.
-
Une fois le tout enlevé, retirer l'alternateur qui coulisse le long des 2 grandes vis du bas. Le poser ensuite de façon à ce qu'il ne gène pas et sans que ça force sur les cables éléctriques.
-
-
-
Afin de changer le tendeur et le galet enrouleur, il est nécessaire de retirer le monobloc qui relié au tendeur. Pour cela, il faut retirer 3 vis à l'aide de la douille de 13. 2 se retirent par le côté capot, la troisiement est facilement visible depuis le côté roue de la voiture.
-
Retirer ensuite la vis fixée au bas du tendeur (photo 2) afin de pouvoir retirer l'ensemble
-
Une fois l'ensemble enlevé (depuis le haut ou le bas, personnellement ça a été par le haut), voila la pièce.
-
-
-
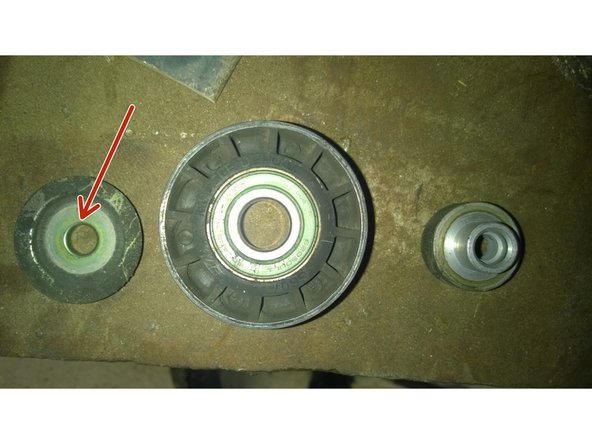
Sur la pièce retirée précédemment, il faut changer le galet enrouleur (en vert) par le nouveau fourni grâce à un clé Torx T40.
-
Ensuite il faut changer le tendeur qui contient un galet en dévissant la vis (fleche rouge). Mettre le nouveau tendeur en faisant attention de mettre le détrompeur au bon endroit (photo 2)
-
-
-
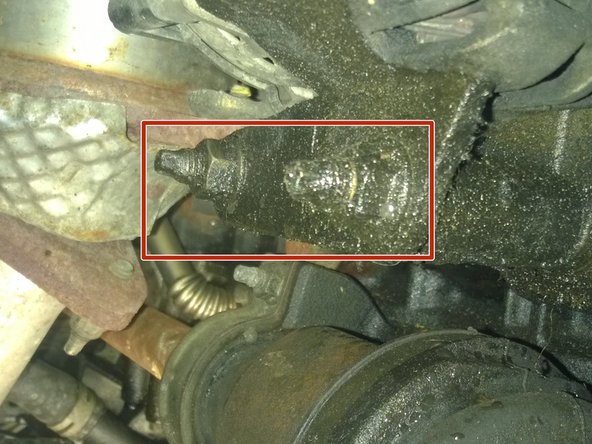
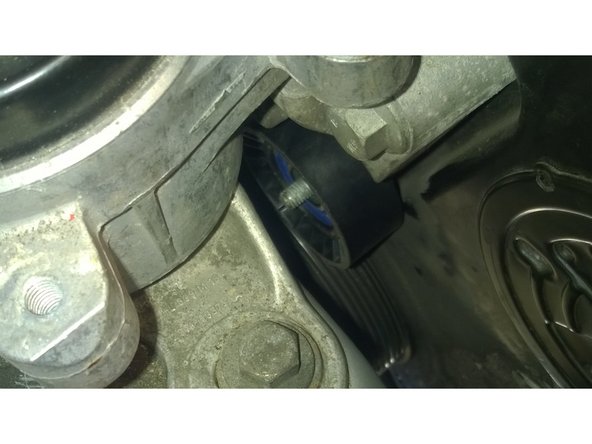
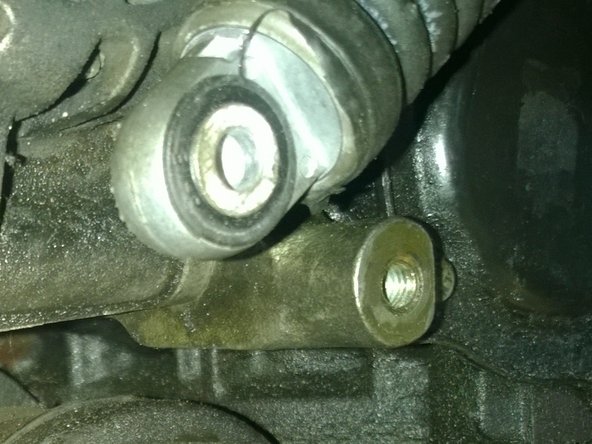
Nous avons enlevé la masse de support moteur afin de changer le galet fixé au moteur.
-
Après avoir dévissé l'écrou qui tient le galet, le galet ne sort pas du au manque de place. Il faut en fait comprendre comment il est fait pour le retirer. il faut avec un tournevis plat retirer la rondelle du roulement. Ensuite tout vient seul.
-
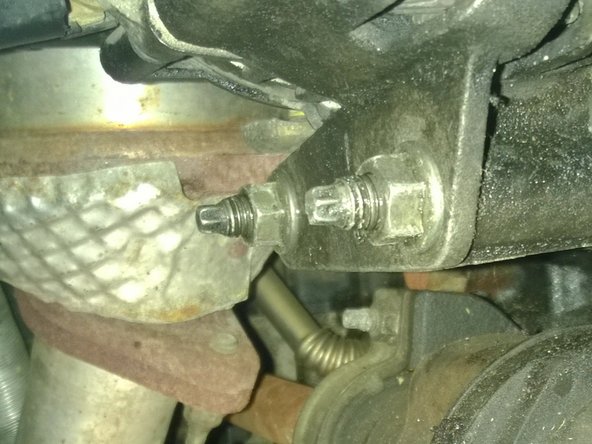
Il suffit ensuite de mettre le nouveau galet de la meme façon. La pièce ronde, le galet (si ça coince un peu, écarter le moteur avec un pied de biche de quelque mm). Enfin mettre la rondelle (la reclipser) et visser l'écrou.
-
-
-
Pour changer la poulie damper, il faut retirer grâce à la clé à choc et une douille de 15 les 3 vis qui maintiennent la poulie. Avoir une bonne clé à choc et une douille à choc sont nécessaires, car le tout est solidement vissé!
-
Mettre en place la nouvelle poulie et visser. Le vissage doit être au couple puis à l'angle. Il faut visser avec la dynamométrique à 45 Nm puis à 90°. Pour réussir à visser, il faut réussir à bloquer la poulie damper, sinon l'ensemble tourne. Personnellement, nous avons remonté à la clé à choc au feeling (ne pas visser comme des brutes).
-
-
-
Pour remonter l'ensemble, faire repasser l'ensemble par le haut ou le bas et commence à positionner l'ensemble dans le moteur. Avant de commencer à fixer l'ensemble, penser à mettre en position la courroie dans le bon sens (ne pas la mettre partout mais la mettre de sorte à se faciliter la tache pour la remise en place de la courroie)
-
Fixer ensuite les 3 vis du monobloc (photo 2). Fixer ensuite le bas du tendeur (photo 3)
-
-
-
Remettre en place l'alternateur en le remettant sur les rails et serrer les 2 vis du bas. Revisser ensuite la 3eme vis du haut.
-
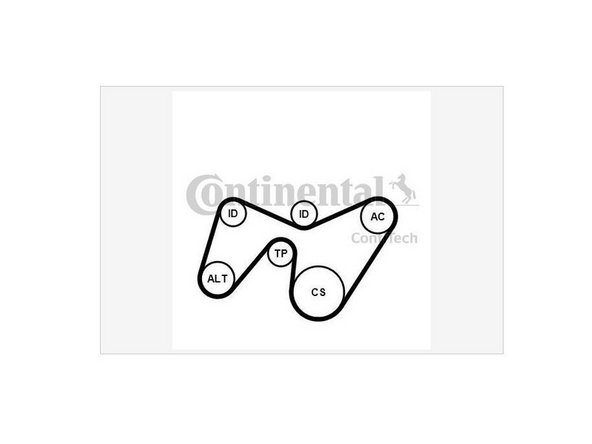
Mettre la nouvelle courroie en place en compressant le tendeur grâce à l'outil Ford T303676. La personne vous aidant doit mettre en place la courroie pendant que vous tendez. Vérifier que le cheminement de la courroie est le bon et que celle ci est correctement mise sur le différentes poulies.
-
-
-
Rebrancher la batterie en branchant la borne positive puis la borne négative.
-
Remettre la masse du support moteur.
-
Remettre le cache turbo
-
Remettre le cache en plastique au niveau de la roue, remettre la roue et descendre le véhicule afin qu'il pose sur les roues.
-
-
-
Démarrer le véhicule et vérifier que la courroie tourne correctement.
-
Réinitialiser les vitre éléctrique afin que la remontée automatique fonctionne. Pour cela, baisser la vitre puis remonter la vitre jusqu'à la butée. Appuyer à nouveau pour monter la vitre comme pour la faire forcer. La montée automatique de la vitre doit fonctionner.
-


Il faut être bien outillé et avoir du temps. La liste des outils indiquée est non exhaustive, mais voila déjà un minimum indispensable.
Le pdf SKF en pièce jointe permet de visualiser les étapes à faire.
Concernant les pièces, j'ai utilisé un Kit SKF et une poulie damper Gates. D'autres marques comme Hutchinson, SNR et Contitech qui sont de qualité peuvent être prises. D'ailleurs, notons que le tendeur fourni dans le kit SKF est de marque Hutchinson et semble être le Ford d'origine (les marquages Ford sont effacés sur la nouvelle pièce mais on voit que c'est pour le logo ford et le numéro de série).
Enfin, notons que je conseille vivement le changement des galets, de la courroie et de la damper. En effet, les anciens galets étaient tous en fin de vie, et le caoutchouc de la damper était très dégradé.
Annulation : je n'ai pas terminé ce tutoriel.
9 autres ont terminé cette réparation.
25 commentaires
Bonjour
Comment avez vous fait pour retirer la vis btr du galet tendeur car pas de place ?
jenniferetserge - Résolu à la publication Réponse
Je ne saisi pas vraiment votre question.
En ce qui concerne le galet tendeur, j'ai sorti l'ensemble de la pièce (support galet et ressort) et fait l'échange avec la nouvelle pièce en dehors du véhicule (étape 5 et 6 du tuto).
Pour le galet enrouleur qui est à part (étape 7), je crois être passé avec une clef mixte ou clé oeil coudé.
Merci pour tout impeccable première fois que je le faisais j'étais tous seul donc un peu galère madame est juste venue à la fin m'aider à détendre la courroie je me suis fabriqué un outil dans le même genre que vous par contre pour repassé la courroie faut pas ce trompé sinon on recommence on démonte!
Résultat moi qui ne suis pas mécano juste des bricoles normalement j'ai mis 4h1/2 !
Encore merci
chapu.david - Résolu à la publication Réponse
Merci pour ce tutoriel!
Je suis surpris que ce soit si embatant de changer le kit sur ce modèle, par rapport à d’autres voitures… L’accès n’est pas simple car très proche du chassis.
En effet, pas le choix d’enlever l’alternateur.
Nickel pour moi (j’ai pas changé ma poulie damper car elle était en très bon état.
eddie bardin - Résolu à la publication Réponse
Bonjour,
Un GRAND merci pour ce tuto qui m’as rendu un très grand service.
julien mondout - Résolu à la publication Réponse