


Difficulté
Facile
Étapes
10
Temps nécessaire
00:45:00

Ce tutoriel a été créé par la communauté
User contributed
Introduction
Ce tutoriel montre comment changer les bougies d'allumage sur Citroën C1 phase 2 1.0i 12v.
Le changement des bougies n'est pas très difficile. Seuls le démontage et le remontage de la boîte à air sont un peu délicats puisqu'on travaille en aveugle pour déloger celle-ci du boîtier papillon.
-
-
la boîte à air est maintenue en place par :
-
4 agrafes au niveau du filtre à air
-
1 collier au niveau du boîtier papillon
-
1 collier au niveau du reniflard d'huile
-
1 ergot en caoutchouc
-
-
-
déclipser les 4 agrafes autour du filtre à air
-
pincer les colliers au niveau du boîtier papillon et du reniflard puis soulever la boîte à air
-
et la sortir
-
-
-
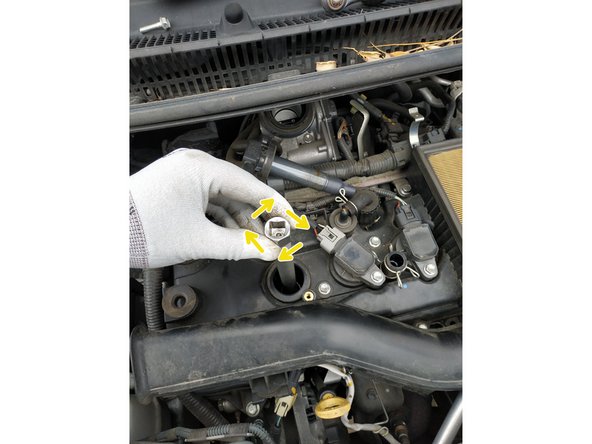
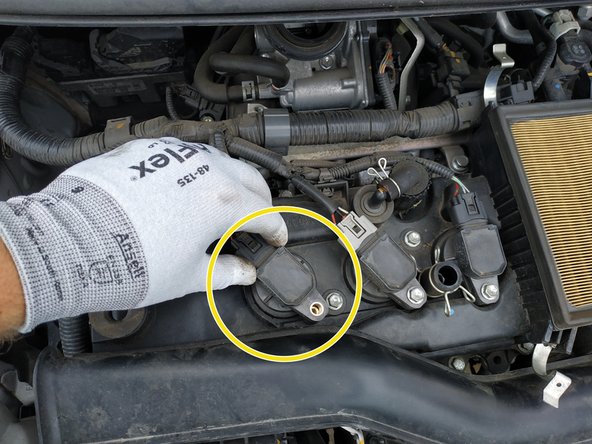
défaire la vis de maintien de la bobine d'allumage, clé de 10mm
-
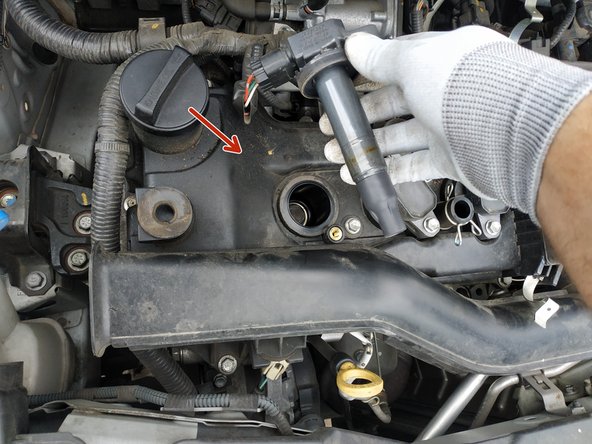
sortir la bobine et la mettre en attente
-
Ne pas forcer sur la connectique, la bobine est encore branchée.
-
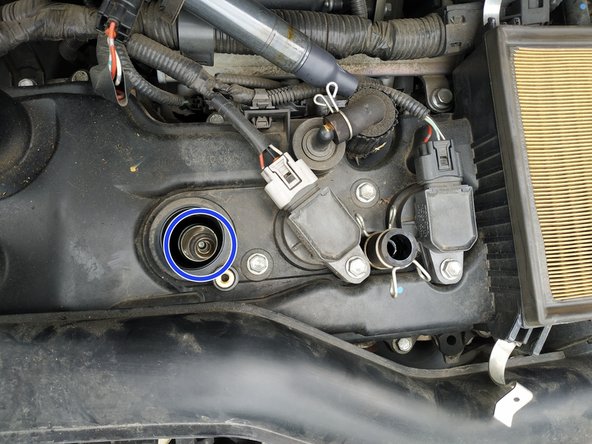
la bougie est maintenant accessible
-
-
-
passer un coup de soufflette pour nettoyer le puits de bougie
-
Une bombe d'air pour l'informatique peut faire l'affaire.
-
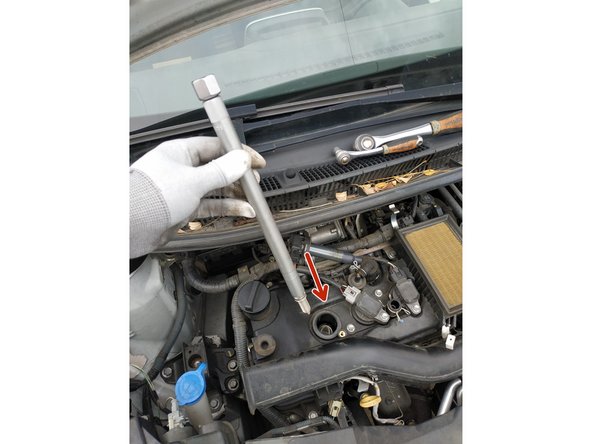
dévisser la bougie à l'aide d'une douille longue de 14mm et d'une clé à cliquet
-
J'utilise une douille aimantée très pratique pour ce genre d'opération.
-
retirer la bougie
-
-
-
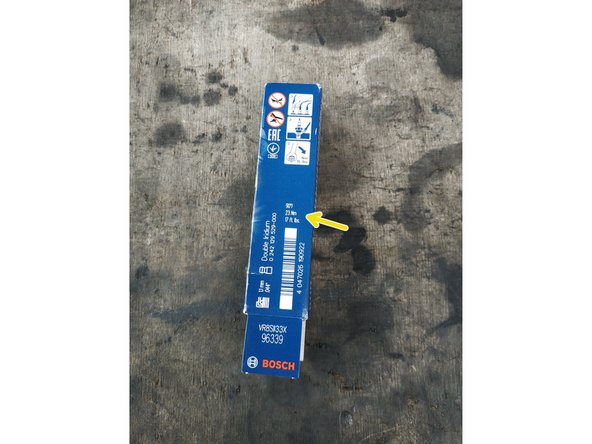
comparer les bougies (forme, longueur, diamètre et surtout références)
-
l'emballage de la nouvelle bougie nous renseigne quant au couple de serrage : 23 N.m
-
-
-
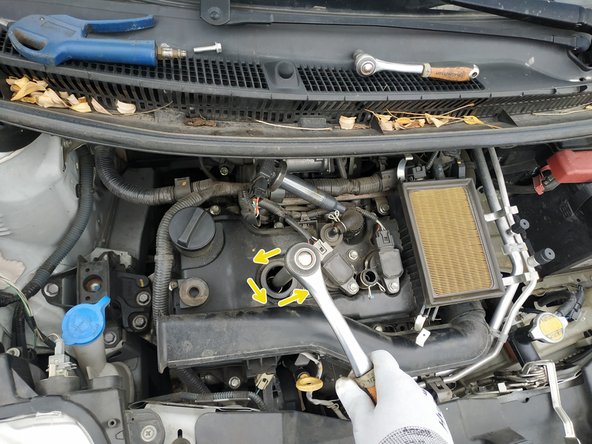
présenter la bougie
-
serrer à la main au maximum
-
finir le serrage à la clé dynamométrique, couple de 23 N.m
-
-
-
saisir la bobine
-
et la remettre en place
-
On peut appliquer une fine couche de graisse di-électrique là où vient s'insérer la bougie.
-
visser la vis de fixation, clé de 10mm
-
-
-
Remonter la boîte à air en procédant à l'inverse du démontage.
-
faire attention :
-
aux agrafes de la boîte à air
-
au collier du boîtier papillon
-
au collier du reniflard
-
à l'ergot en caoutchouc
-


Annulation : je n'ai pas terminé ce tutoriel.
Une autre personne a terminé cette réparation.
4 commentaires
Pas besoin de préciser que la C1 de ce tuto est une phase 2. Primo, le tuto est rangé dans la rubrique C1 phase 2, deuxio on voit dès la 1ere image que c'est une C1 phase 2. Pas d'histoire de pretention, vous aviez tort et j'avais raison. C'est aussi simple que ça.
Il n'y a pas de tuto bougie pour C1 phase 1, je vous invite à en faire un plutôt que de venir troller ma page.
a_bosc2000 - Résolu à la publication Réponse
ok mais ç’est pas précisé que ce sont les derniers modèles , la mienne étant de 2013 et de 2005 à 2014 ; ce sont des douilles de 16 et quand je rentre mon n°d’immatriculation pour des bougies ; il y a du 14 et du 16 , d’après le n° que j’ai rentré il ne devrait donc , je pense apparaître que du 16 et les C1 ou 107 ou aygo jusqu’en 2014 sont encore pour beaucoup d’entr’elles en circulation ; votre tuto est bien mais il précise pas l’année et la configuration diffère quelque peu avec les modèles + anciens ; je vous trouve du reste très à fleur de peau , la moindre remarque vous hérisse le poil ; un brin prétentieux peut-être…