


Difficulté
Modérée
Étapes
8
Temps nécessaire
01:00:00

Ce tutoriel a été créé par la communauté
User contributed
Introduction
Dépose et repose des disques et plaquettes arrières pour Ford Kuga MK2
-
-
Pour effectuer la pose dépose de vos plaquettes et disques arrières il est nécessaire que votre frein à main soit désséré. Par conséquent, il est IMPERATIF d'attacher un soin particulier au callage de votre véhicule afin d'éviter tout accident, par consequent :
-
Engager une vitesse.
-
Placer des cales devant et derrière une des deux roues avant
-
-
-
Déserrer les 5 écrous de la roue.
-
Procéder au levage du vehicule. Pour cela utiliser au point de levage du vehicule. Celui-ci est repéré par une flèche sous le véhicule.
-
Sécuriser en ajoutant une chandelle sous le véhicule
-
Déposer les 5 ecrous et retirer la roue
-
-
-
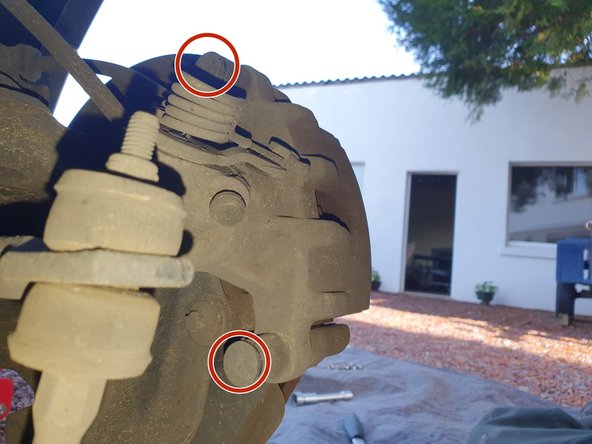
Déposer l'agrafe à l'aide d'un tournevis plat
-
Retirer les caches poussières
-
Dévisser les deux BTRs de 7 mm se trouvant derrière les caches poussières précédemment retirer afin de libérer l'étrier.
-
-
-
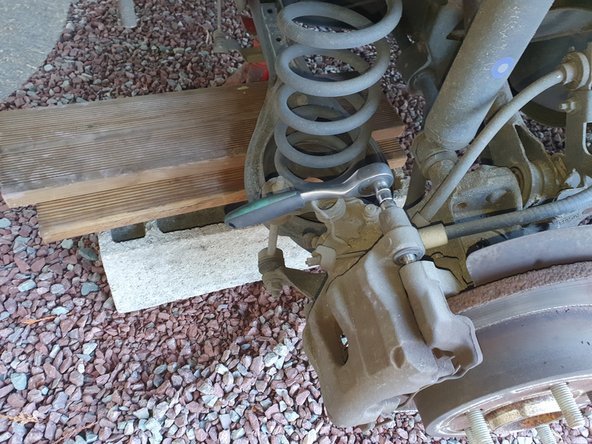
Faire un mouvement de balancier afin de libérer de l'étrier de son support. Celui-ci sort par l'arrière (vers le pare-choc).
-
Afin de pouvoir travailler sans encombre et d'éviter que l'étrier ne tombe, vous pouvez comme sur la photo, attacher votre étrier avec un fil de fer sur le ressort d'amortisseur
-
Les plaquettes restent sur le support d'étrier
-
-
-
Ouvrez votre bocal de liquide de frein. Si celui-ci est sur le repère max, prélevez un peu de liquide afin que le liquide ne déborde pas au moment où vous repousserez le piston
-
Le rattrapage automatique se fait en dévissant, par conséquent, pour rentrer le piston vous devrez exercer une pression sur celui-ci tout en le vissant (sens horaire).
-
On voit pas mal de chose sur le net pour effectuer cette opération sans repousse-piston. Par pitié un coffret complet de repousse piston coûte moins de 30 euros, alors ne jouez aux apprentis sorciers utilisez le matériel adequat. C'est du temps de gagner et cela évitera de prendre le risque de déchirer le soufflet de piston
-
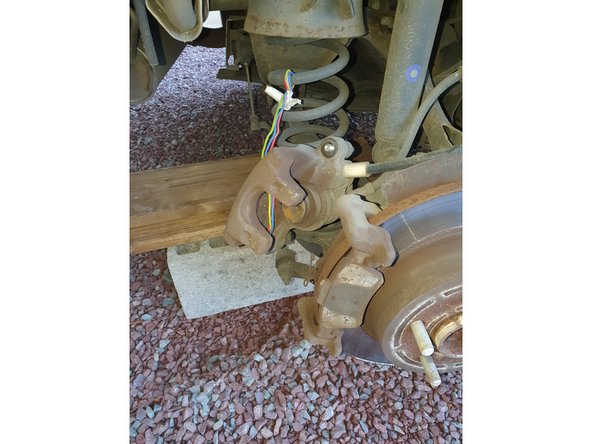
Une fois ces étapes effectuées attacher votre etrier avec le fil de fer (fil electrique sur l'image) le plus haut possible afin de laisser le champs libre pour la suite des opérations.
-
-
-
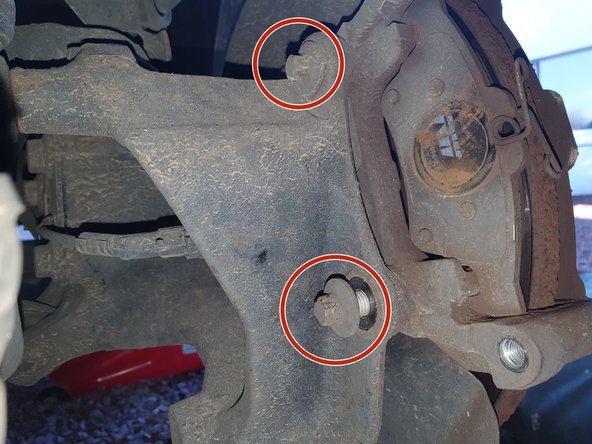
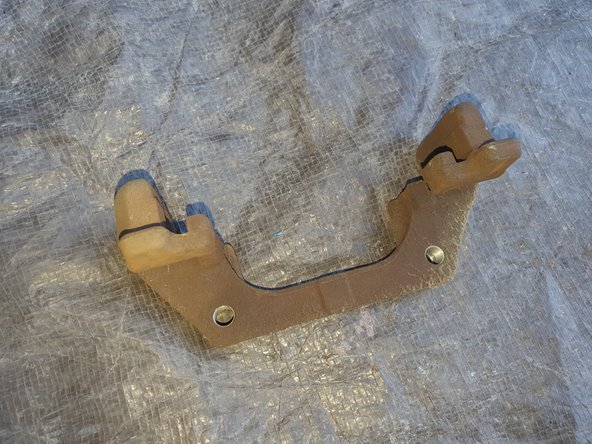
Rétirer les plaquettes du support d'étrier
-
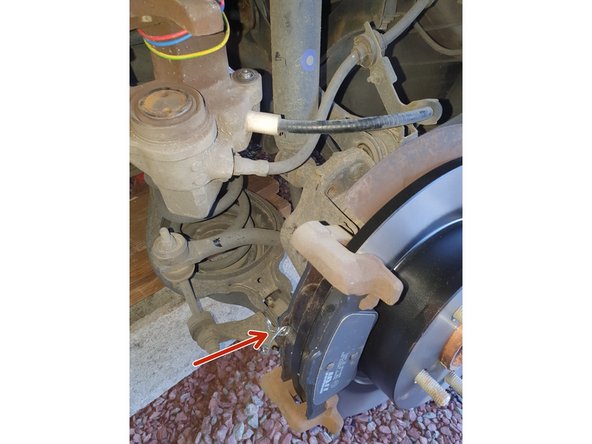
Déposer les deux vis torx males afin de libérer le support d'étrier
-
Le disque est libéré de toute contrainte. Vous pouvez le déposer. S'il est collé, tapez à l'arrière de celui-ci en le tournant légrement jusqu'à ce qu'il soit décollé
-
-
-
Le remontage s'effectue dans le sens inverse de la dépose.Assurez-vous de la compatibilité de vos pièces en comparant le nouveau disque et l'ancien ainsi que les nouvelles plaquettes et les anciennes
-
Reposer le nouveau disque
-
Mettre du frein filet sur les deux vis torx du support d'etrier
-
Procéder à la pose du support d'étrier en revissant les deux vis torx male.
-
Poser les plaquettes sur le support d'étrier de chaque coté du disque.
-
La plaquette comportant le petit ressort doit être positionné du coté intérieur
-
Repositionner l'étrier et visser les deux BTRs. Repositionner l'agrafe entre le support d'étrier et l'étrier
-
C'est terminé!!! il n'y a plus qu'à poser votre roue et à procéder à la même opération sur le coté opposé
-
-
-
Pomper 3/4 fois sur votre pédale de frein.
-
Serrer/déserrer 3/4 fois le frein à main
-
Vérifier le niveau de liquide de frein, mettre à niveau si nécessaire
-
Les plaquettes et les disques se rodent. Par conséquent il faut les faire fonctionner progressivement avec précaution pour optimiser leur efficacité et donc, éviter les frainages violents pendant les premiers kilomètres.
-


Annulation : je n'ai pas terminé ce tutoriel.
Une autre personne a terminé cette réparation.
5 commentaires
Bonjour,
Du coup cela fonctionne avec un frein à main électrique ou pas ?
Merci
christophe.deprez26 - Résolu à la publication Réponse
non surtout pas repousser le piston cela se fait avec une valise
Bonjour cela fonctionne t il avec le frein à main électrique merci
marivin.nicolas - Résolu à la publication Réponse
Oui c'est expliqué, il faut caler la voiture à l'avant mettre une vitesse et desserer le frein à main électrique.