


Difficulté
Modérée
Étapes
17
Temps nécessaire
01:00:00 - 02:00:00

Ce tutoriel a été créé par la communauté
User contributed
Introduction
Comment remplacer les disques et plaquettes de freins arrière sur Renault Scenic III - 1.9 dci 130 ch de 2011
-
-
afin de travailler en toute sécurité il est préférable sur le véhicule a l'arret d'enclenchez une vitesse et de placer des cales derrière les roues opposées au levage de la voiture.
-
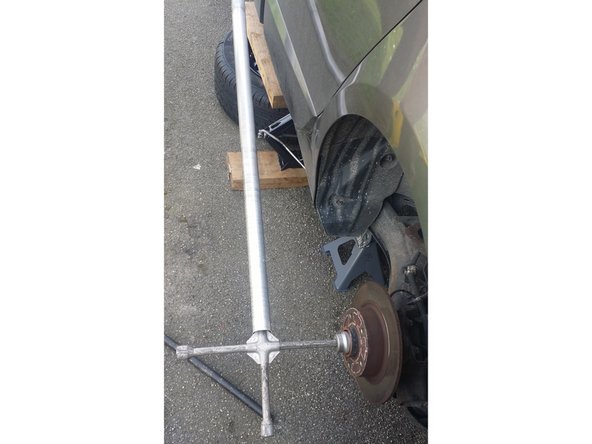
desserrer les 5 écrous de roue avec une douille de 17.
-
lever le véhicule et placer une chandelle
-
déposer la roue
-
-
-
revenir dans le véhicule et insérrer la carte de démarrage dans son logement , appuyer sur la pédale de frein et pousser vers le tableau de bord sur le bouton de freins de parking
-
le voyant rouge du bouton de frein de parking s' est éteint
-
lorsqu' on ouvre la portiere un message d'erreur apparait sur l écran du tableau de bord ( c est tout a fait normal ) sortez de la voiture et fermer la portiere .
-
-
-
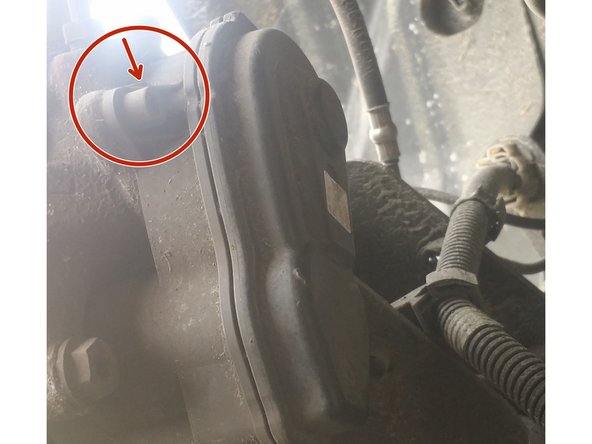
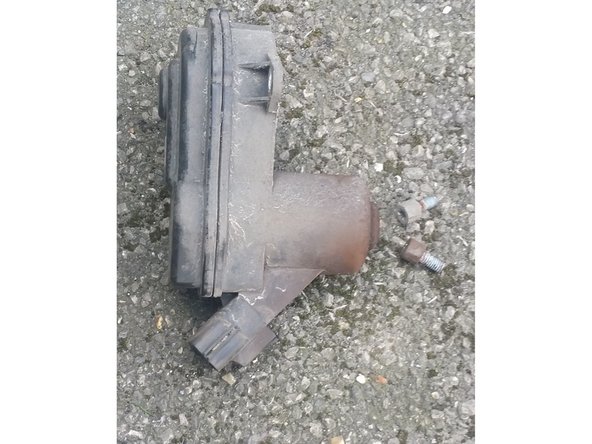
desserrer les 2 vis de fixation du moteur de frein de parking et le déposer
-
-
-
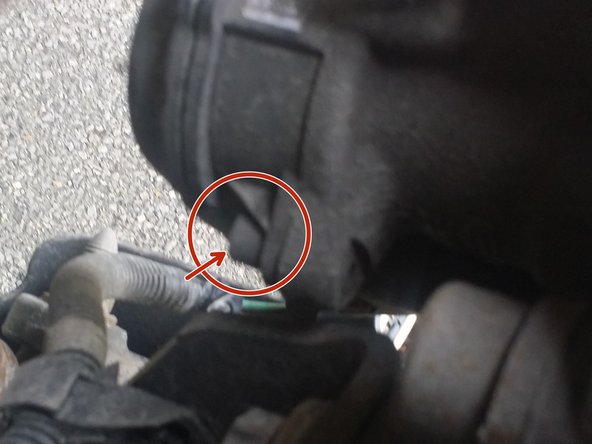
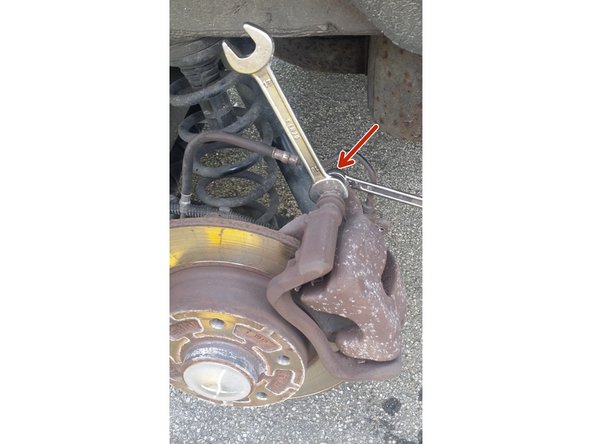
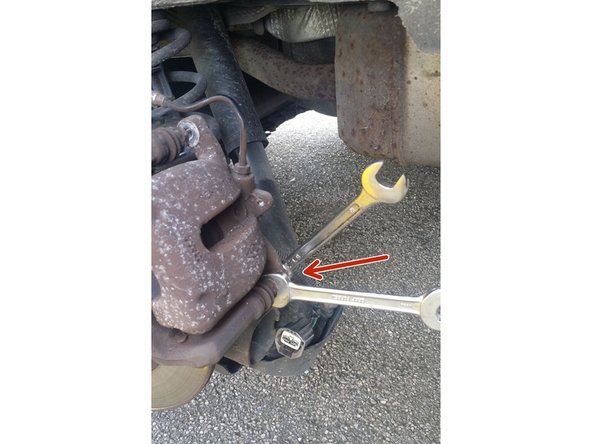
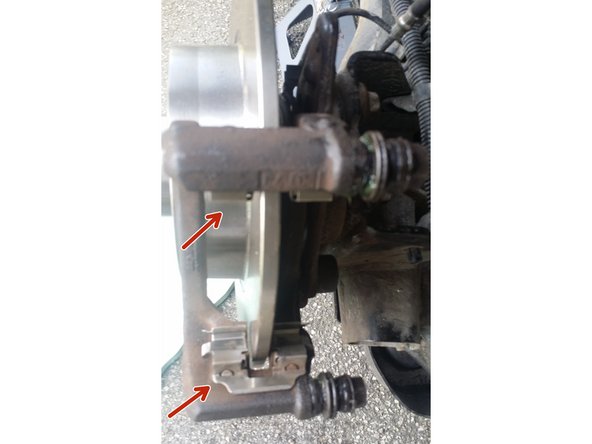
dévisser les vis des coulisseaux d'étrier avec une clé plate de 13 et et une clé plate de 15 pour le contre écrou
-
enlever la coiffe et la poser délicatement sur le coté en veillant a ne pas plier la durite de liquide de frein
-
-
-
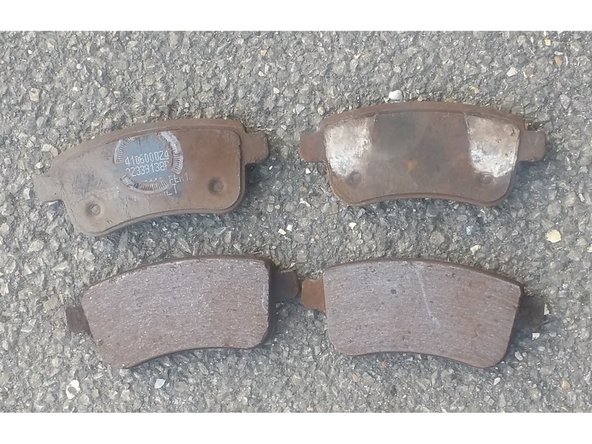
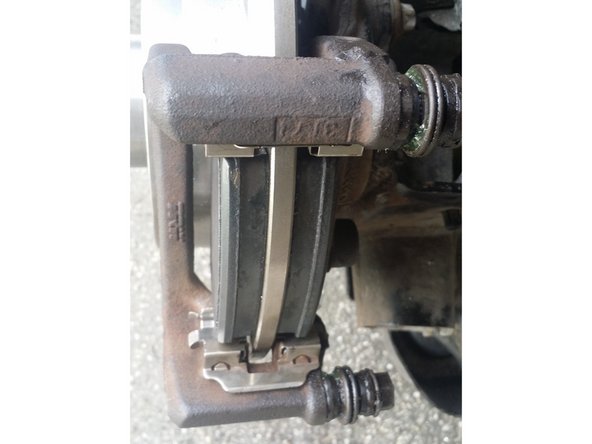
avec un tournevis plat retirer les plaquettes de freins
-
avec un tournevis plat retirer les agrafes de maintien
-
-
-
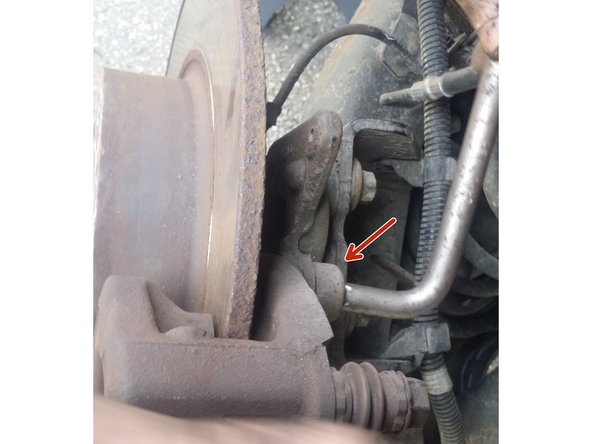
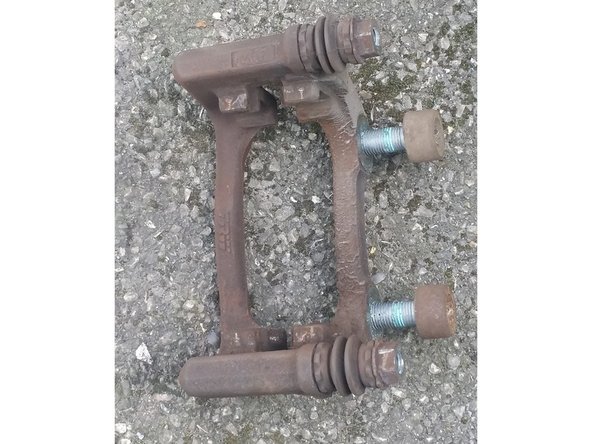
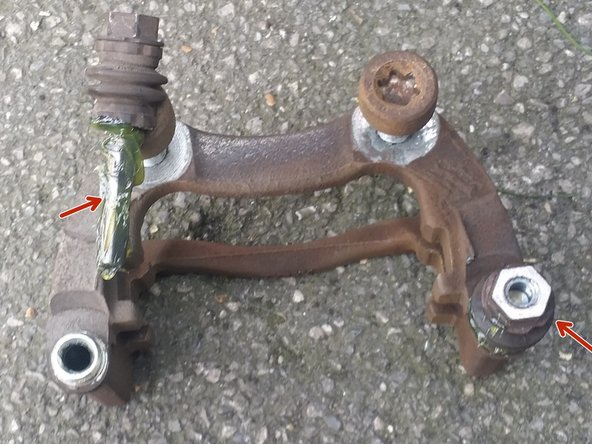
devisser les 2 vis du support a l aide d'une clé torx 55 et le déposer
-
-
-
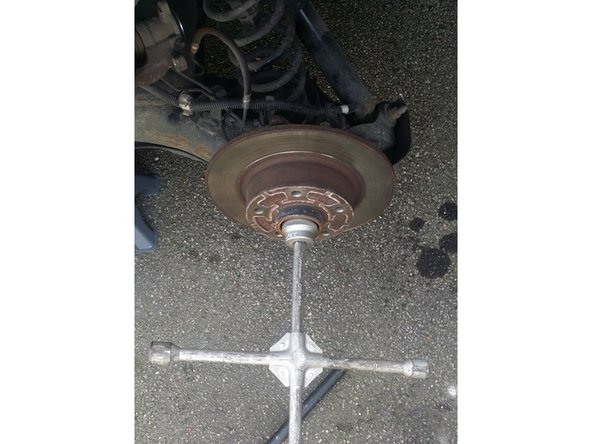
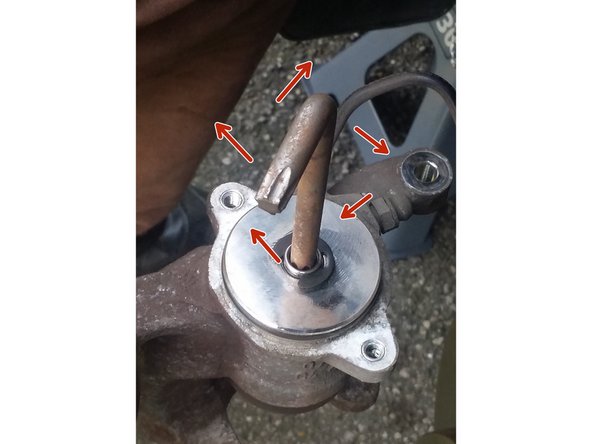
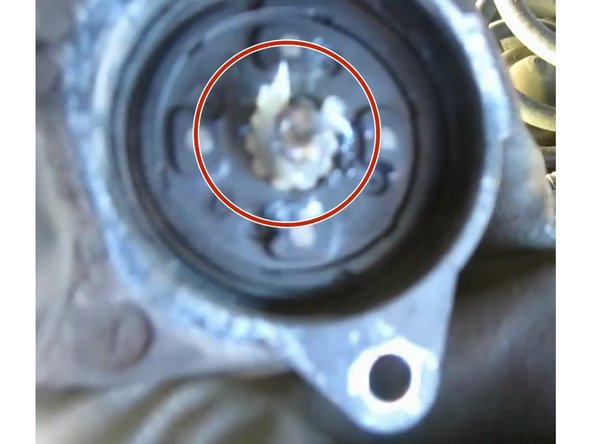
a l'aide d'un tournevis plat et d'un marteau enlever le cache moyeu et desserrer l écrou avec une douille de 36
-
-
-
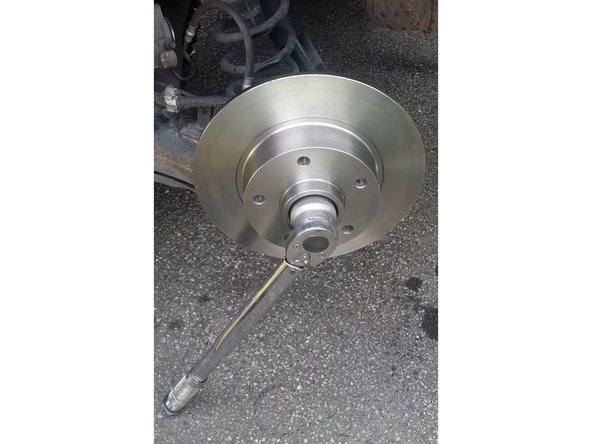
désserer l'écrou de moyeu avec une douille de 36 . utiliser un tube d'acier pour augmenter le bras de levier car l écrou est fortement sérré
-
déposer le disque de frein
-
-
-
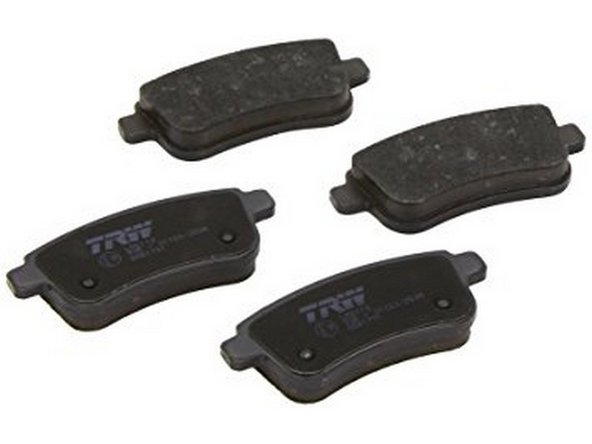
déposé le disque usé et remplacé le disque neuf de diametre 260 avec roulement de roue intégré
-
-
-
reposer le disque de frein avec le roulement de roue intégré au disque neuf
-
serrer l écrou a la clé dynamométrique a 220 n.m
-
mettre en place le nouveau cache moyeu
-
-
-
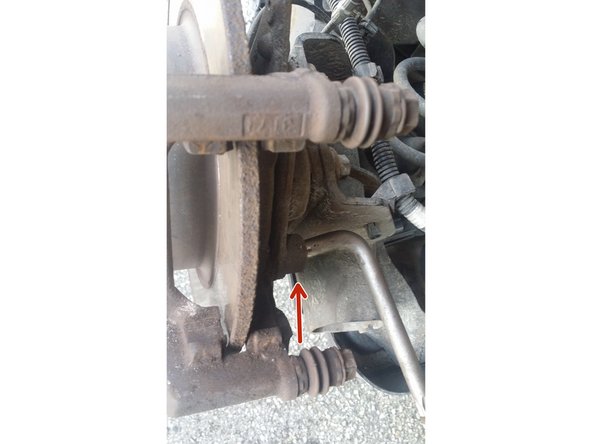
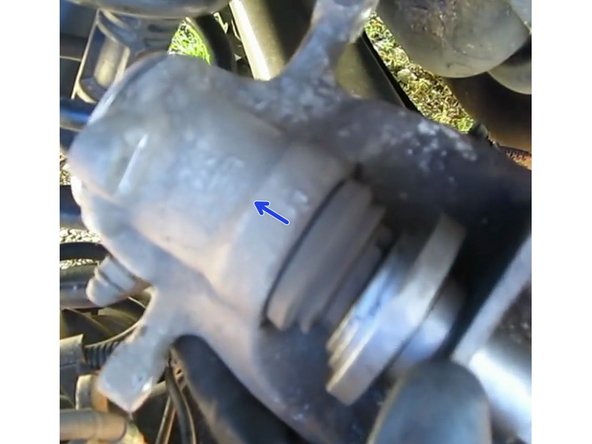
brosser et dépoussiérrer le support, declipser et graisser les coulisseaux
-
repose du support
-
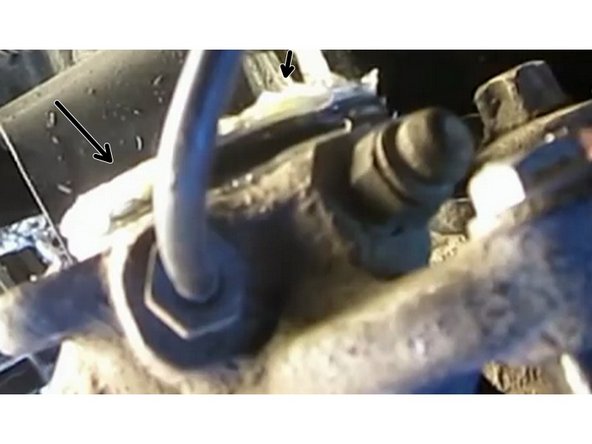
appliquer du frein filet bleu sur les 2 vis de fixations et serrer les vis au couple de 80 n.m
-
-
-
positionner les nouvelles agrafes
-
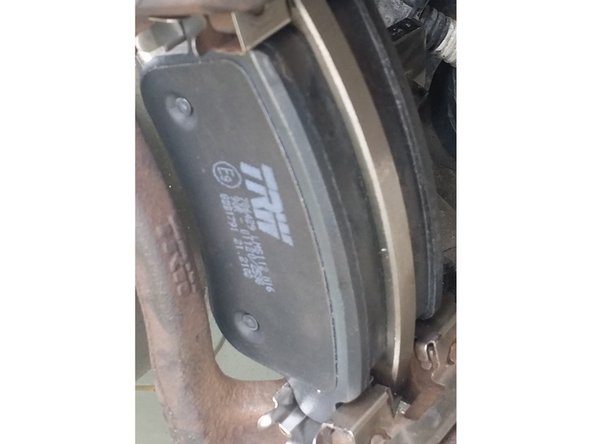
insérer les plaquettes de freins dans les agrafes
-
-
-
avec une clé torx de 45 tourner la vis du moteur électrique sur l étrier dans le sens horaire et jusqu en butée
-
repousser le piston de l'étrier avec un repousse piston ou un serre joint .
-
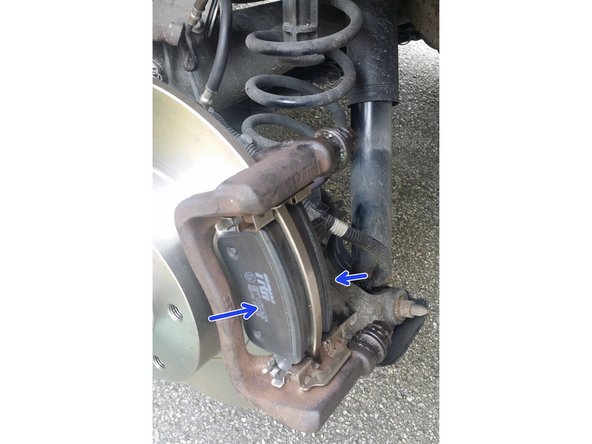
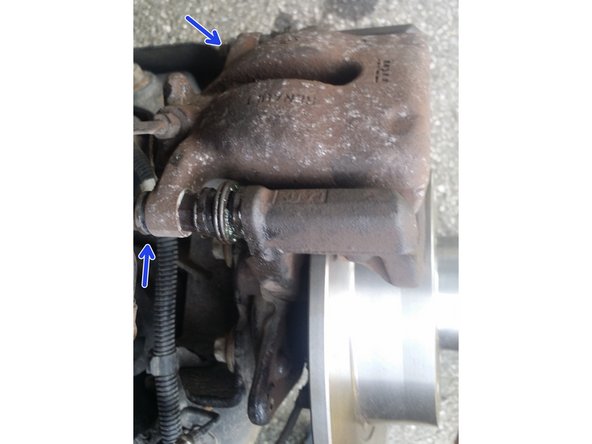
repose de la coiffe de l'étrier , mettre en place les vis dans les coulisseaux et les serrer au couple de 35 n.m
-
-
-
graisser l' arbre central du moteur
-
graisser le joint torique qui se trouve sur l étrier pour faciliter le montage du moteur
-
-
-
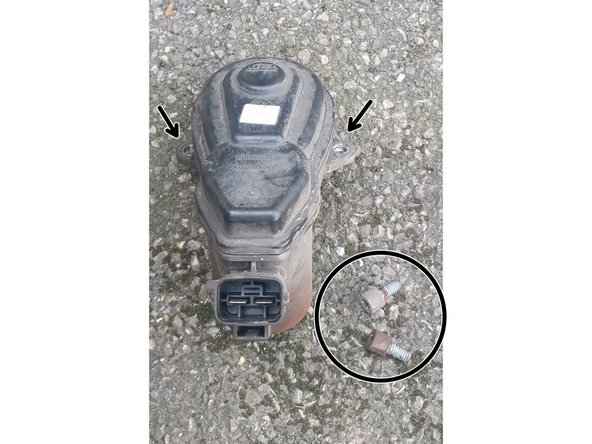
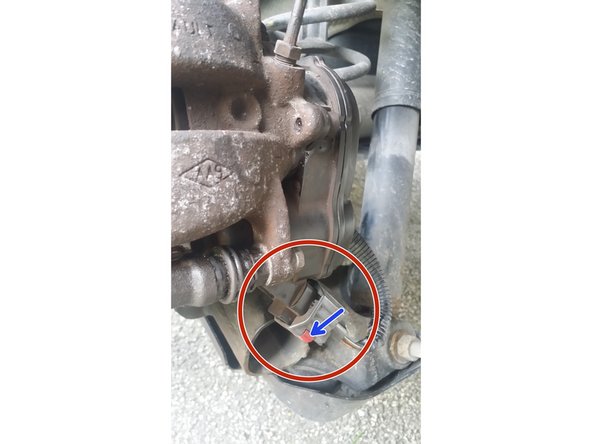
repose du moteur elctrique sur l étrier et mettre en place les 2 vis de fixation et les serrer a la clé torx de 27
-
rebrancher la connection électrique et remonter le verrou rouge de sécurité
-
-
-
retournez dans l'habitacle enclenchez le bouton de frein , le voyant rouge s allume et vous avez le message frein de parking sérré
-
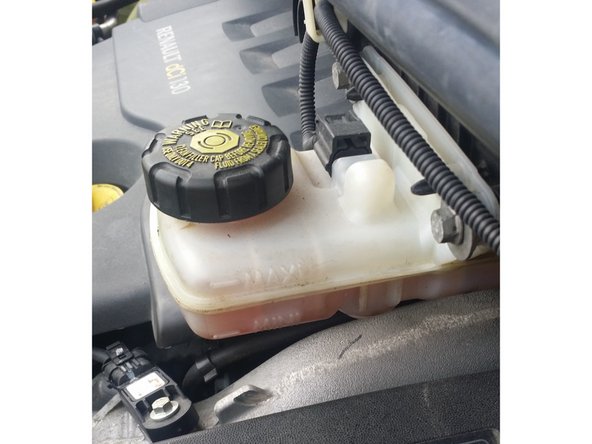
verifié que le disque de frein est bien bloqué et que les plaquettes sont bien en contact sur le disque . vérifier votre niveau de liquide de frein
-
remonter la roue et mettre la voiture au sol . serrer les vis de roue au couple de 90 n.m
-
eviter les freinages brusque pendant une période de rodage de 200 kms environs
-


Annulation : je n'ai pas terminé ce tutoriel.
20 autres ont terminé cette réparation.
22 commentaires
Super tutoriel, tout est bien phasé. La méthode est vraiment au point, a priori aucune anomalie à la remise en fonction.
Ritondaubagne - Résolu à la publication Réponse
Bonjour à tous
Je dois changer mes disques et plaquettes arrières sur mon scenic 3 de fin 2012
Vous me confirmez que pour repousser le piston je dois faire exactement comme le tuto ? Tourner l arrière de l’étrier dans le sens horaire jusqu’à butée ?
Et es ce une obligation de débrancher le moteur du frein à main électrique ou es ce que je peux le laisser brancher ? Si débrancher risque de voyant ?
Cordialement
Merci pour ce très bon tutoriel. Je m'y mets pour changer les freins de ma titine.
luc.maradan - Résolu à la publication Réponse
Pas besoin de valise car c est hydropique juste le frein de parking qui et électrique
fraga stephane - Résolu à la publication Réponse