


Difficulté
Modérée
Étapes
8
Temps nécessaire
00:20:00 - 00:40:00

Ce tutoriel a été créé par la communauté
User contributed
-
-
Positionner le cric sur le point d'ancrage conseillé par le constructeur et lever la voiture
-
Positionner la chandelle sous le berceau à coté du triangle et mettre la voiture en appui sur la chandelle
-
-
-
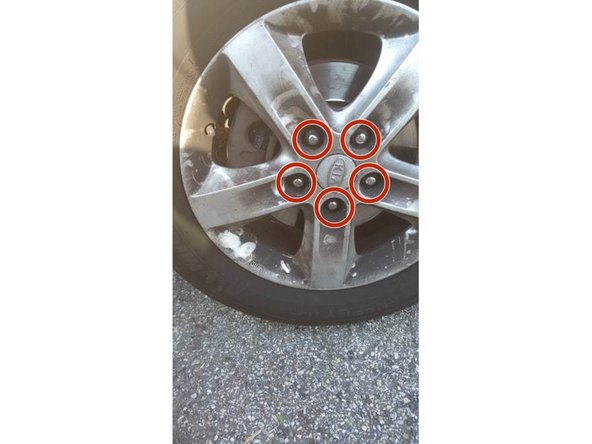
Desserer 1/4 de tour les boulons de la roue.
-
Lever la voiture à l'aide d'un cric et mettez la sur chandelles.
-
Sécurisez au maximum le levage, et l'immobilisation de la voiture.
-
-
-
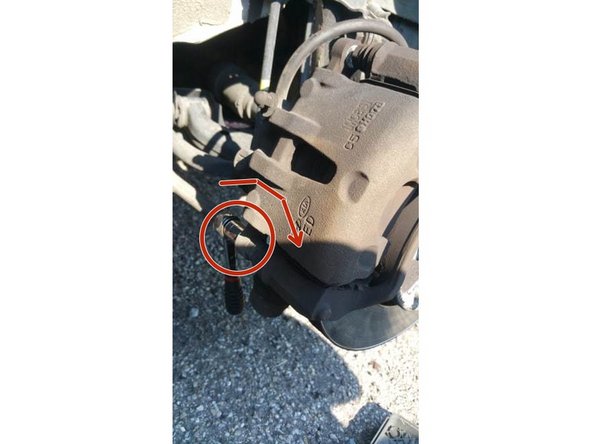
Munissez vous d'une douille diamètre 14.
-
Sur l'arrière de l’étrier, dévissez la vis en haut.
-
Ensuite dévissez la vis en bas de l'etrier de la même manière.
-
-
-
L’étrier est maintenant libre.
-
Repousser le piston de l'etrier afin de compenser la surepaisseur des plaquettes neuves, soit à l'aide d'un repousse piston, soit d'un serre joint, ou en faisant levier avec les anciennes plaquettes.
-
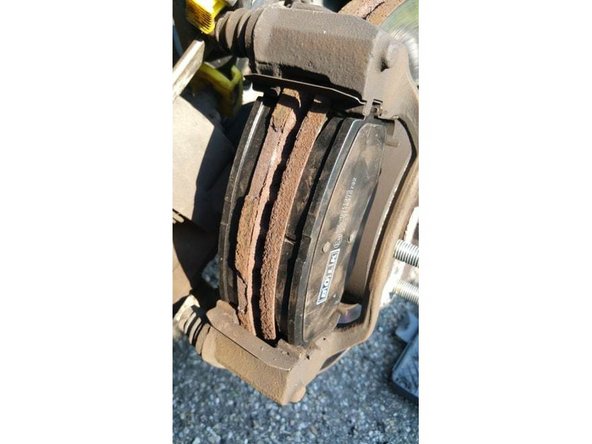
A présent on enlève les anciennes plaquettes, il suffit de les faire coulisser vers l’extérieur.
-
On se retrouve maintenant sans plaquettes, profitez en pour nettoyer l’étrier et le logement des plaquettes à l'aide d'une brosse metallique.
-
-
-
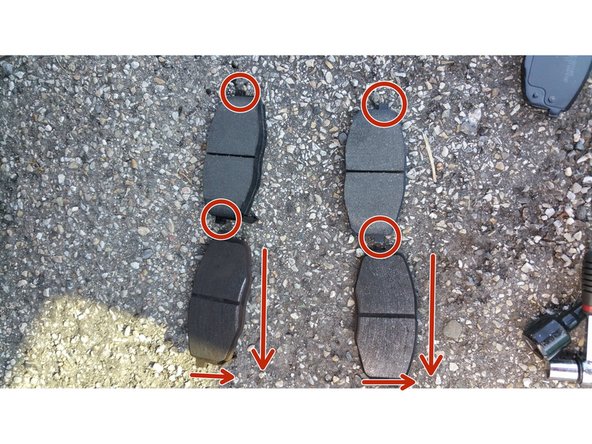
Avant le montage on compare bien les anciennes et les nouvelles plaquettes (dimensions, ergo, largeur, longueur).
-
-
-
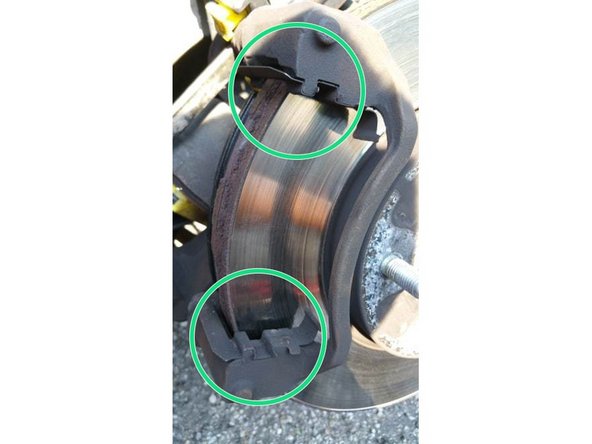
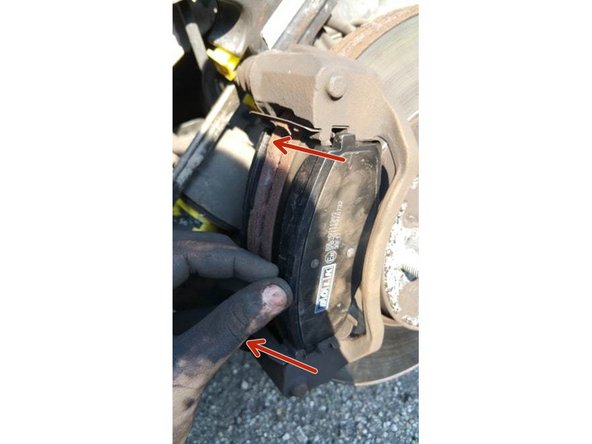
On glisse à présent les nouvelles plaquettes dans le logement.
-
On vérifie que les 2 plaquettes sont bien rentrées et en appuie sur le disque.
-
-
-
On remonte à présent l’étrier.
-
On le positionne, on met une première vis, on visse un peux pour qu'elle accroche, puis on met la 2nd avant de serrer, on serre un peux chacune des vis à tour de rôle afin d'être sur de ne pas forcer sur un pas de vis et de visser de travers.
-
Une fois l’étrier serré, on remonte la roue, on vis les 5 boulons de roue en étoile" afin d'être sur de ne pas endommager un pas de vis et de visser de travers.
-
Pensez à pomper plusieurs fois à mi course sur la pédale de frein afin de repousser les piston au niveau des plaquettes.
-
Avant de prendre la route, pensez à regarder le niveau du liquide de frein.
-
Soyez attentif les premiers kilomètres, assurez vous que tout fonctionne correctement. et ne soyez pas "brusque" avec vos freins il faut les roder sur 200/300 km.
-


Le changement de plaquette est simple, pensez bien à faire les choses en sécurité et correctement, le freinage est un élément primordial, ne négligez pas les vérifications avant de prendre la route.
Le changement de plaquette est simple, pensez bien à faire les choses en sécurité et correctement, le freinage est un élément primordial, ne négligez pas les vérifications avant de prendre la route.
Annulation : je n'ai pas terminé ce tutoriel.
4 autres ont terminé cette réparation.