


Difficulté
Difficile
Étapes
30
Temps nécessaire
01:00:00 - 03:00:00

Ce tutoriel a été créé par la communauté
User contributed
Introduction
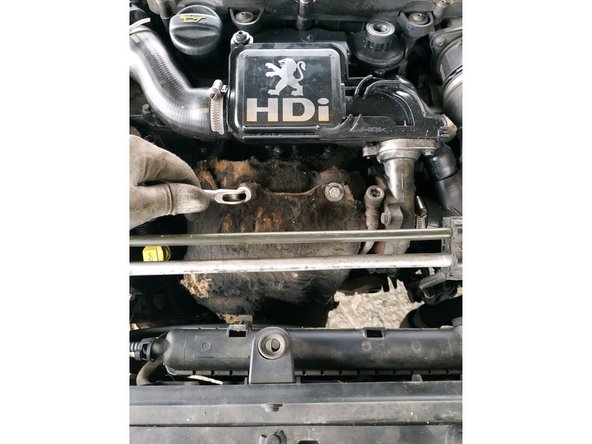
Il existe plusieurs modèles d'alternateurs sur 206 1.4 HDi. Il faudra impérativement s'assurer que l'on commande une pièce identique ou compatible. En cas de doute, ne pas hésiter à se renseigner auprès d'un professionnel.
La 206 sur laquelle est réalisée l'intervention est équipée de la climatisation et de la direction assistée ; il y aura pas mal de choses à défaire pour remplacer l'alternateur et c'est une opération qui prend du temps. Voilà pourquoi je conseille de partir sur un alternateur neuf plutôt que de l'occasion (on veut une réparation qui durera dans le temps).
-
-
Le remplacement d'un alternateur est une opération assez longue et coûteuse sur un 1.4hdi (plus de 150e pour un alternateur reconditionné). On s'assurera avant tout que c'est bien lui qui est en cause et non la batterie ou la courroie d'accessoires par exemple.
-
dans mon cas le voyant batterie restait allumé en permanence moteur tournant
-
un défaut "anomalie charge batterie" était apparu sur l'afficheur
-
et j'avais une tension beaucoup trop faible à la batterie quand le moteur était en route
-
J'ai bien pris soin de contrôler la batterie avec un testeur, rien à signaler de ce côté, la courroie était ok. Le courant arrivait également bien au régulateur. Vu le fort kilométrage de la voiture, je soupçonne les charbons et les bagues collectrices d'être défectueux.
-
-
-
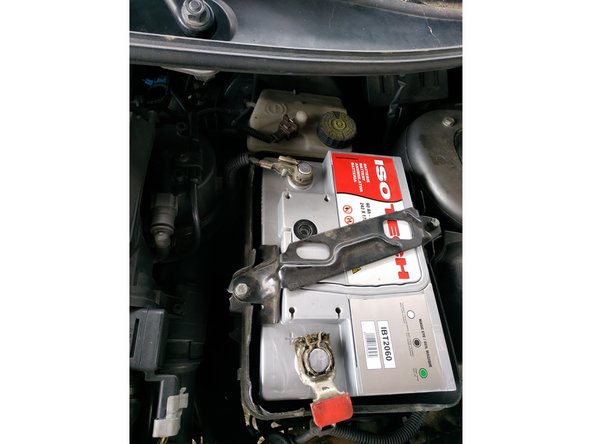
couper le contact et retirer le cache en plastique du bac de batterie
-
débrancher la cosse du terminal négatif de la batterie, clé de 8mm
-
on peut aussi débrancher la cosse du terminal positif si on le souhaite
-
Veiller à ce que les cosses soient bien à l'écart des terminaux de la batterie.
-
-
-
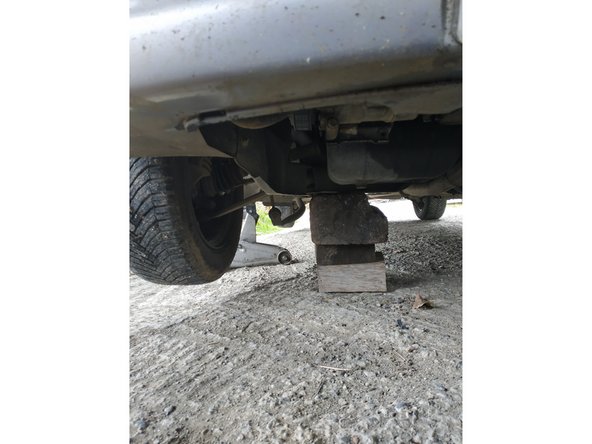
mettre le frein à main (on travaille sur sol plat évidemment)
-
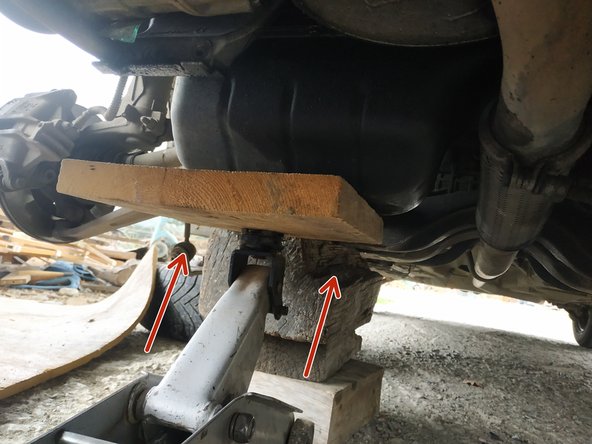
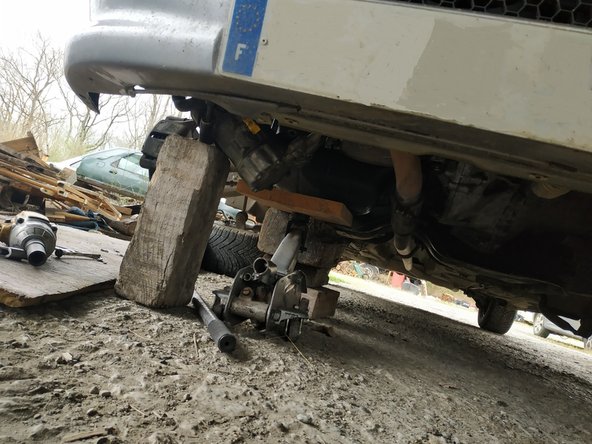
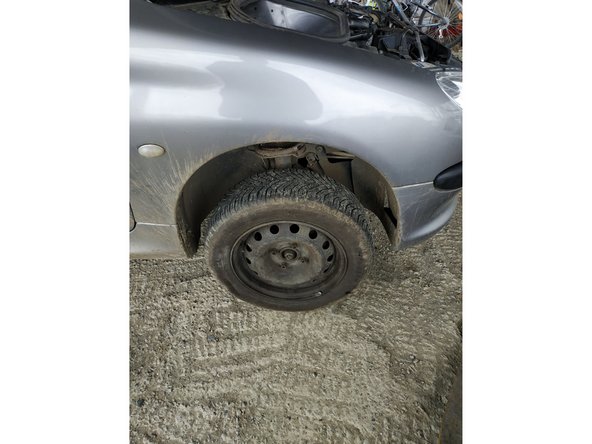
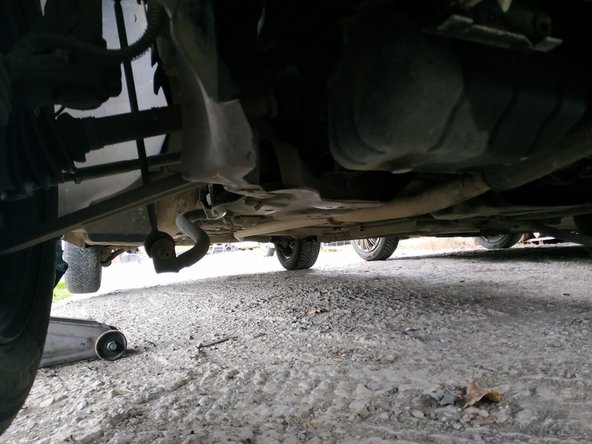
lever le côté avant droit de la voiture à l'aide du cric et placer une chandelle sous le berceau ou le longeron
-
Des cales en bois peuvent parfaitement faire l'affaire, l'important étant que la voiture soit bien sécurisée.
-
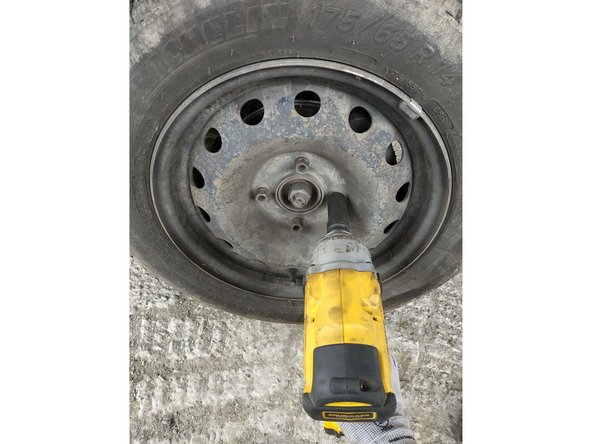
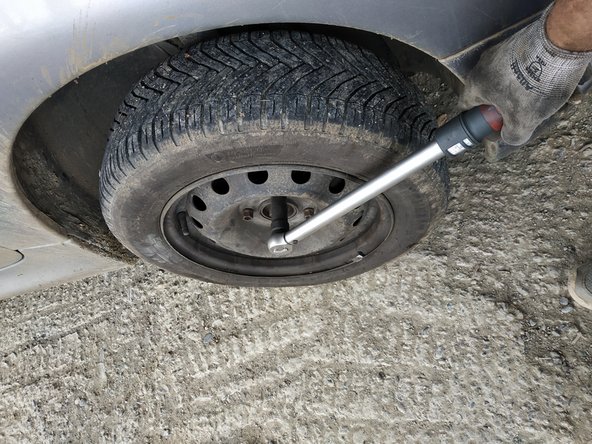
défaire les 4 goujons à l'aide de la manivelle fournie (ou clé à cliquet et douille de 17mm) et retirer la roue
-
J'utilise une clé à chocs, voilà pourquoi je n'ai pas débloqué les goujons avant de lever la voiture.
-
-
-
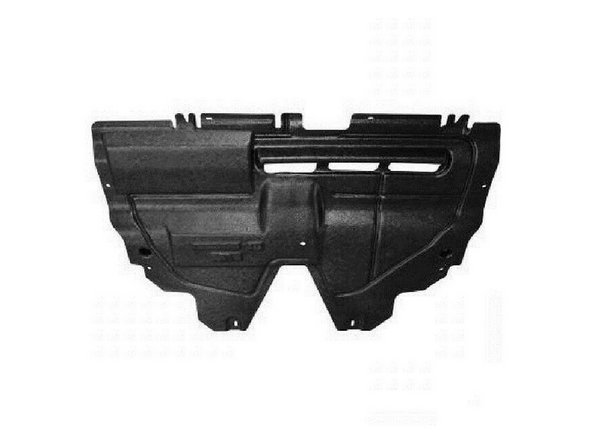
retirer le cache de protection sous le moteur si votre voiture en est encore équipée, il y a 8 vis
-
Ces vis se défont à l'aide d'un tournevis plat, en faisant 1/4 de tour.
-
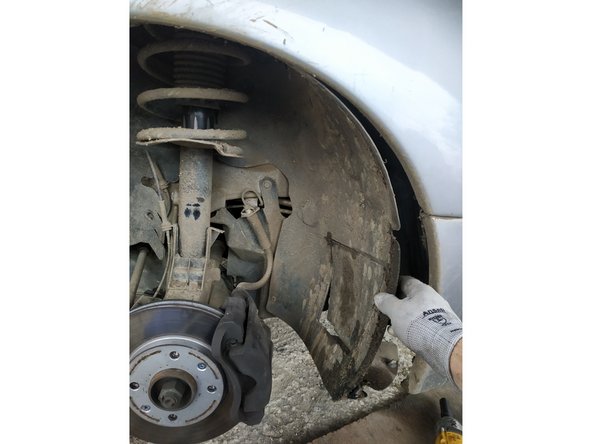
retirer la protection de passage de roue : il y a 3 clips à défaire et 2 vis, clé torx T30
-
La protection de passage de roue est en 2 parties, je n'enlève que la partie avant.
-
retirer le cache latéral : il y a 2 vis à défaire, clé de 13mm
-
-
-
à l'aide d'une clé de 15mm, désarmer le tendeur de la courroie d'accessoires
-
Prendre une rallonge si trop de résistance.
-
jusqu'à aligner le trou sur le tendeur avec celui sur le bloc moteur
-
puis insérer une pige de blocage
-
La pige de blocage n'est pas obligatoire mais facilitera énormément les choses, surtout pour le remontage. Il s'agit simplement d'une tige en fer. Elle est souvent fournie avec les kits courroie d'accessoires.
-
-
-
faire une flèche pour indiquer le sens de rotation de la courroie si on la réutilise comme c'est le cas ici
-
on peut faire un schéma du cheminement de la courroie pour faciliter le remontage ou s'en procurer un
-
retirer la courroie
-
-
-
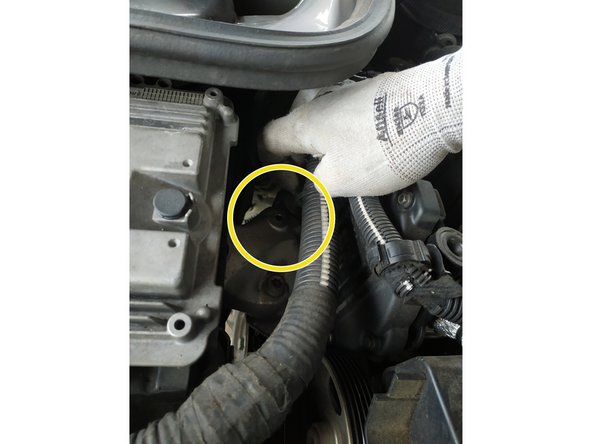
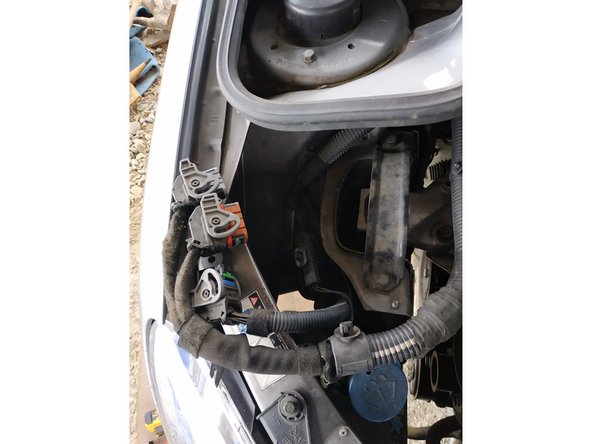
défaire l'agrafe qui tient le faisceau sur le support calculateur
-
J'utilise une pince à bec long mais on peut faire avec un tournevis plat.
-
retirer l'agrafe qui tient le faisceau calculateur sur le support moteur
-
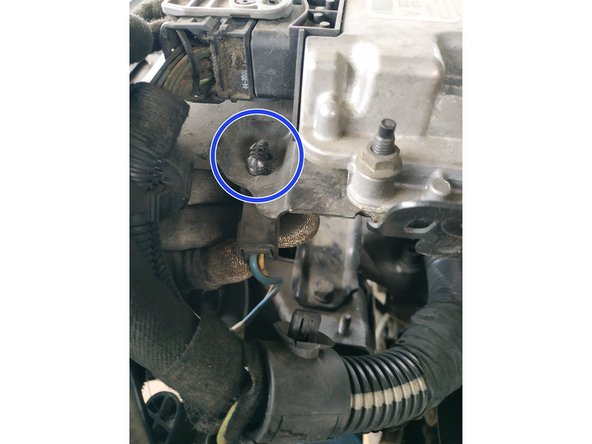
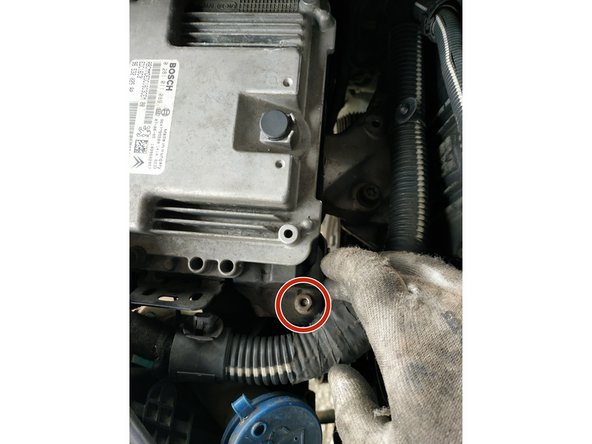
défaire l'écrou de maintien du support calculateur, clé de 10mm
-
-
-
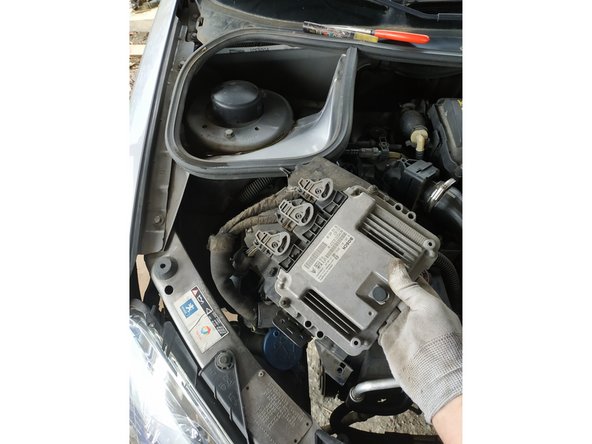
dégager le calculateur et son support
-
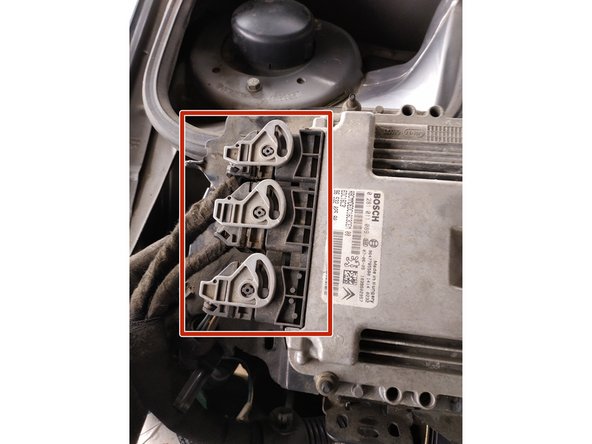
débrancher les 3 fiches du calculateur
-
Une des fiches du calculateur est prise dans un passe-fil, on veillera à l'en sortir.
-
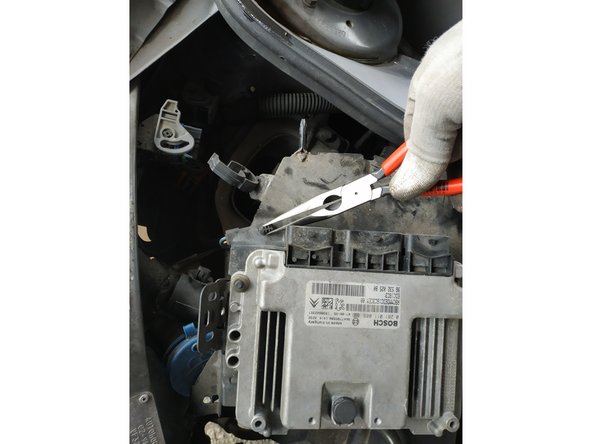
défaire la dernière agrafe qui tient le faisceau et retirer le calculateur
-
Veiller à mettre le calculateur bien à l'abri et en sécurité.
-
-
-
placer un cric et une cale en bois sous le carter d'huile et lever légèrement le moteur
-
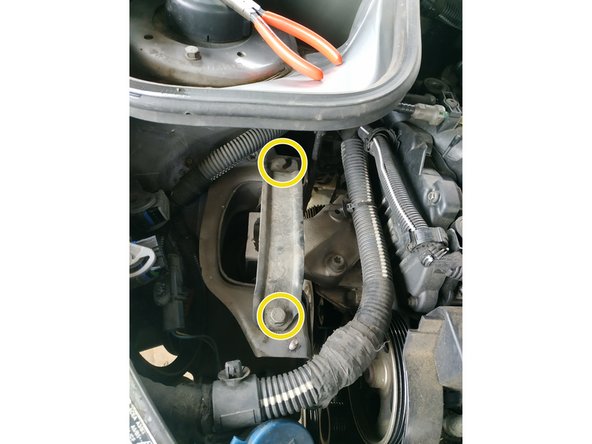
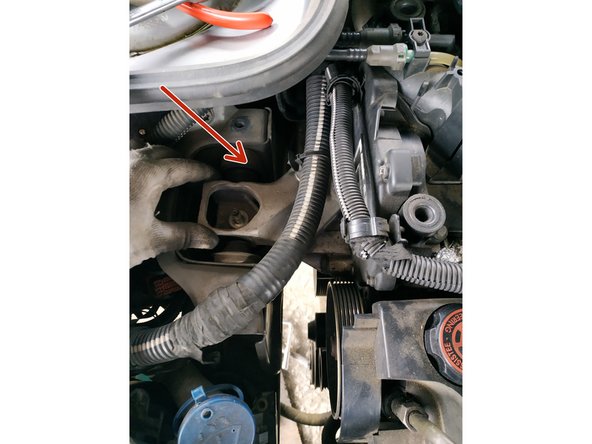
retirer la patte au-dessus du support moteur après avoir dévissé ses 2 vis de fixation, clé de 13mm
-
dévisser les vis du support moteur, clé à cliquet et douilles torx T50 et 16mm, puis retirer le support moteur
-
-
-
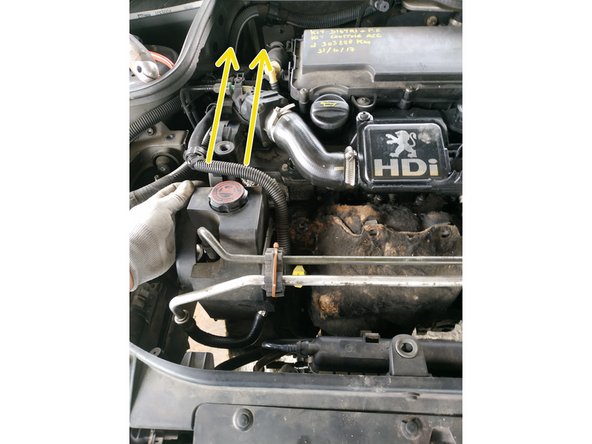
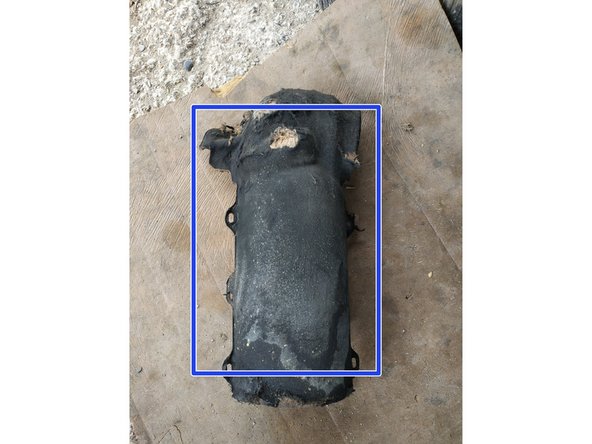
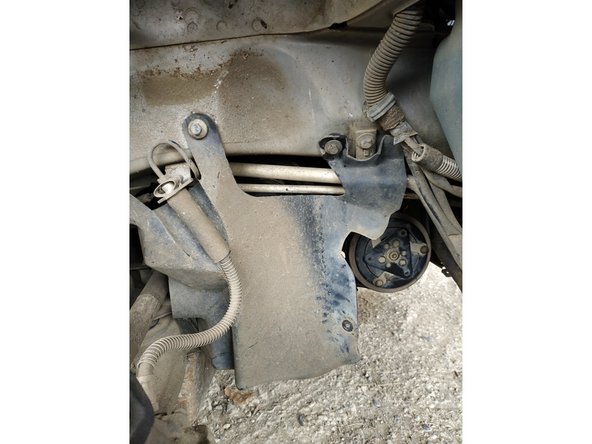
dévisser les 7 vis du pare-chaleur, clé de 10mm
-
pousser le moteur légèrement en arrière
-
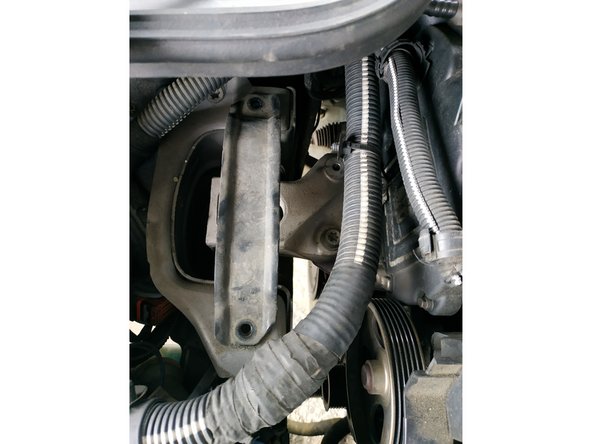
retirer le pare-chaleur (je l'ai sorti par le bas)
-
Il y a très peu de place pour travailler. La priorité est avant tout de ne pas endommager le radiateur moteur, voilà pourquoi j'ai retiré le support moteur.
-
-
-
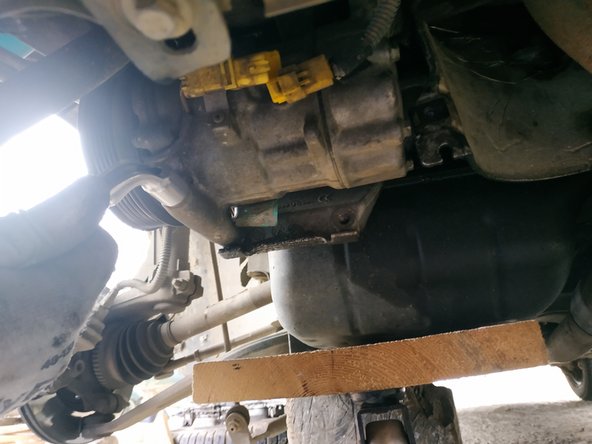
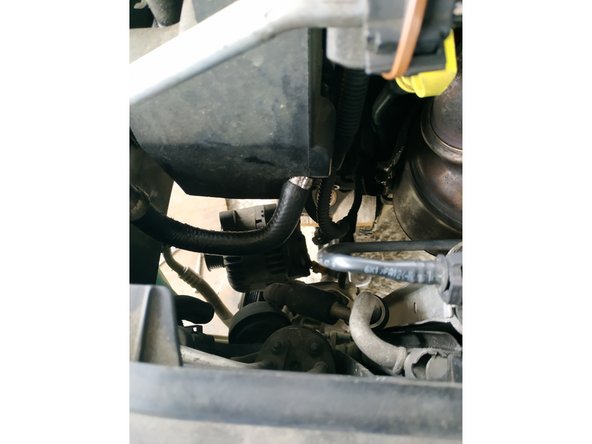
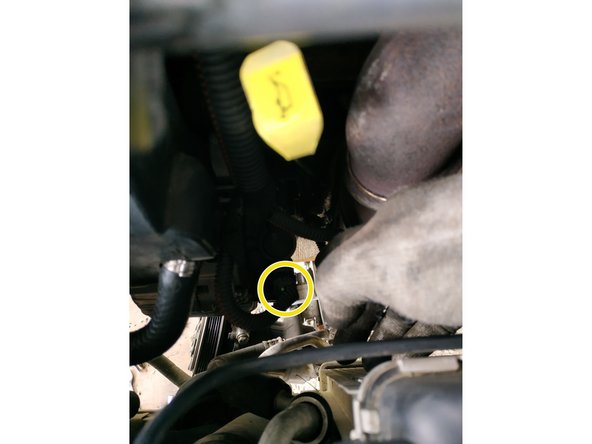
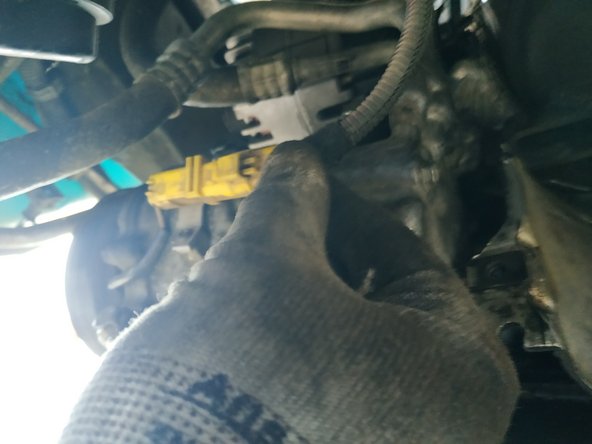
débrancher la fiche du compresseur de climatisation
-
et retirer les 3 vis de fixation, clé de 13mm
-
mettre le compresseur à l'écart
-
Je l'ai laissé reposer sur une cale en bois pour éviter de tirer sur les conduites de clim mais j'ai dû ensuite retirer cette cale car pas de place pour faire passer l'alternateur autrement.
-
-
-
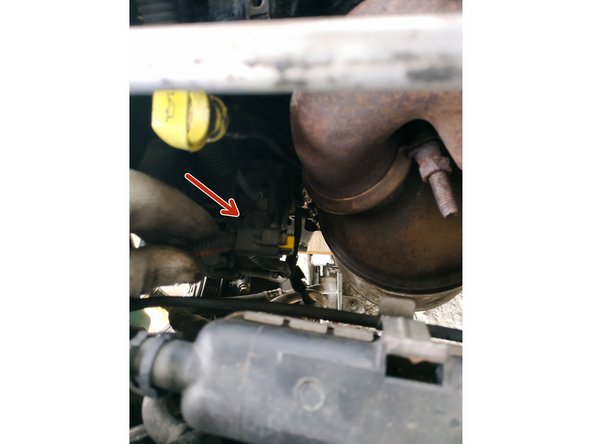
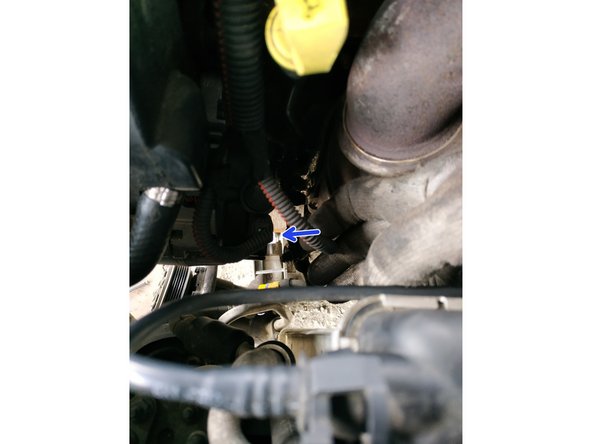
débrancher la fiche électrique du régulateur d'alternateur
-
retirer le capuchon en caoutchouc dévisser l'écrou du + alternateur, clé de 13mm et retirer le fil
-
retirer l'agrafe qui tient le faisceau sur l'alternateur (on peut se servir d'un petit tournevis plat pour faire levier)
-
-
-
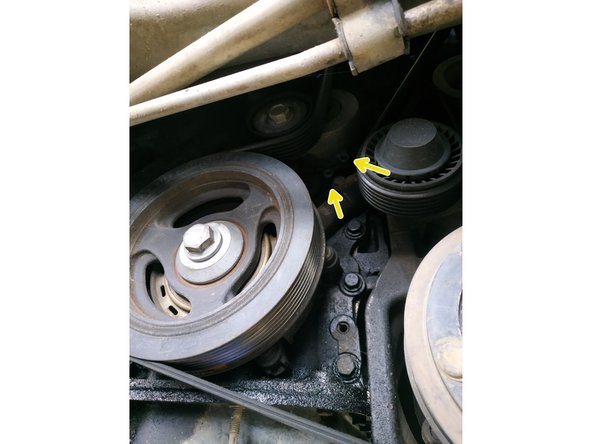
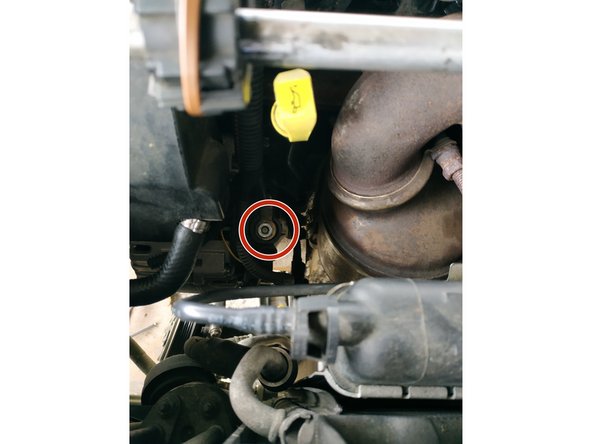
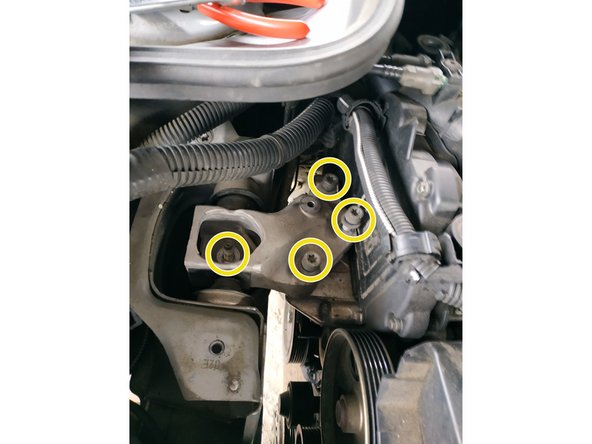
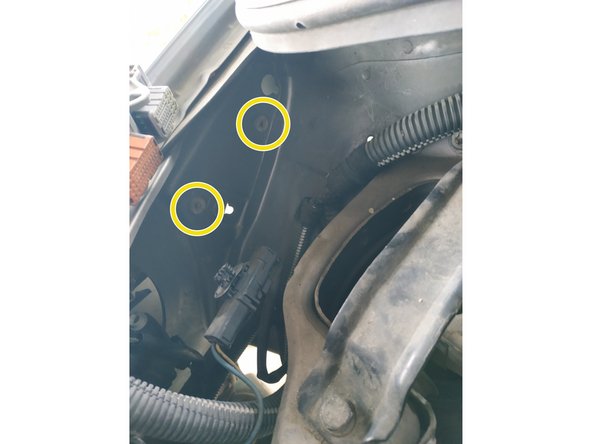
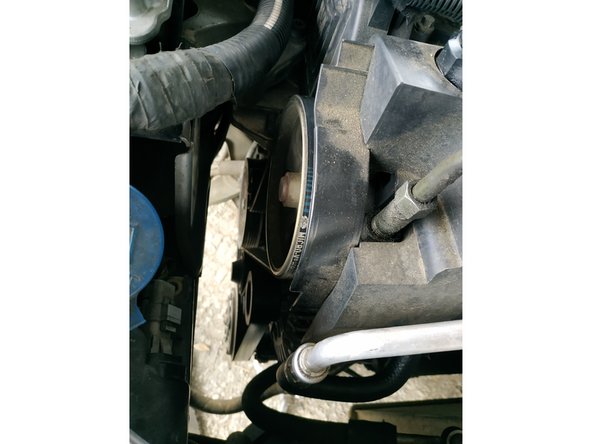
L'alternateur est tenu par 4 vis:
-
2 côté intérieur (en rouge)
-
2 côté extérieur (en jaune)
-
-
-
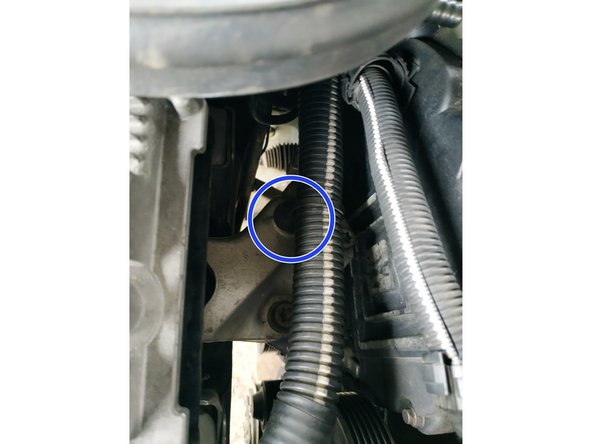
retirer le cache en plastique du galet enrouleur
-
et défaire la vis, clé Allen de 8
-
retirer la vis et le galet enrouleur
-
-
-
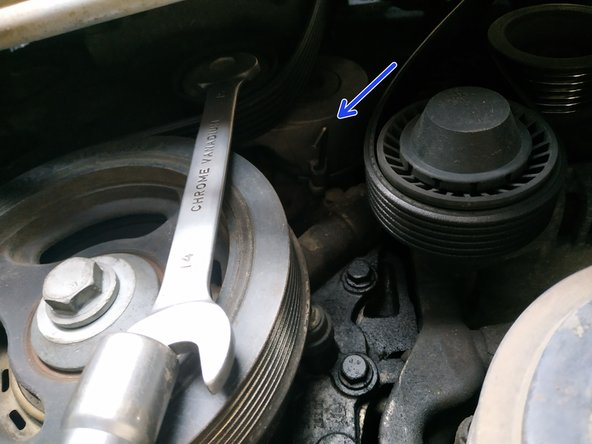
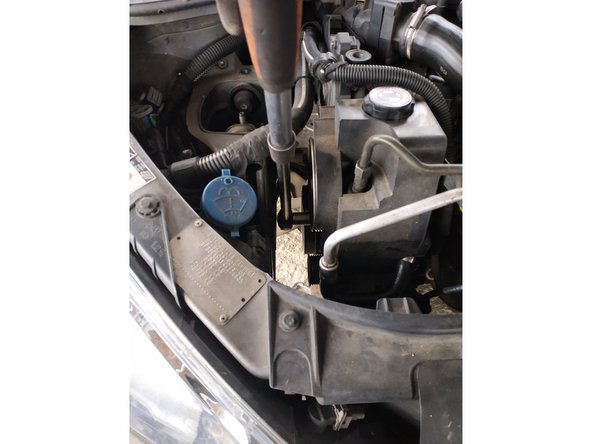
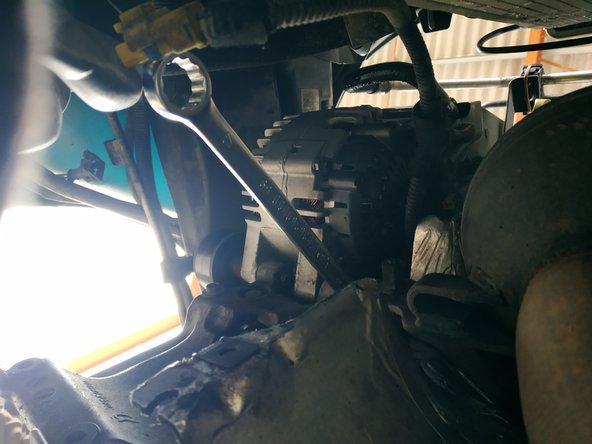
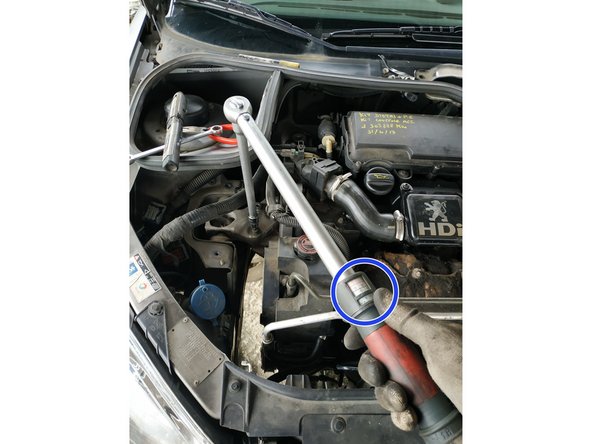
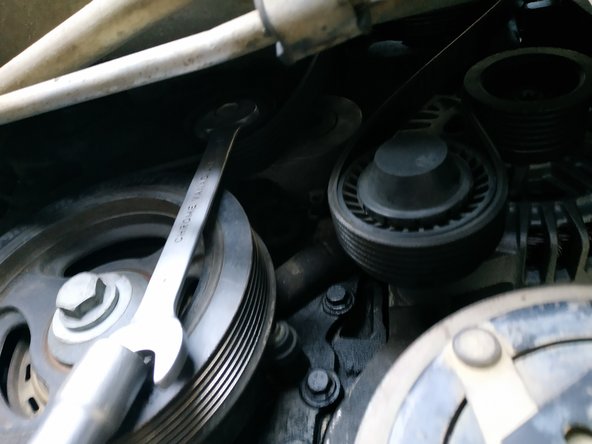
retirer la vis du haut à l'aide d'une clé de 16mm
-
et dévisser (sans les retirer) les 2 vis côté intérieur, j'ai utilisé une clé de 16mm contrecoudée pour la vis du haut une clé de 16mm à oeil pour celle du bas (l'accès est difficile surtout pour celle du haut)
-
Les vis côté intérieur s'insèrent dans un cône. On les laissera en place sur le bloc moteur. Ceci dit, ce n'est pas grave si vous les enlevez, on peut tout-à-fait les remettre avant le remontage du nouvel alternateur.
-
retirer l'alternateur par le bas
-
-
-
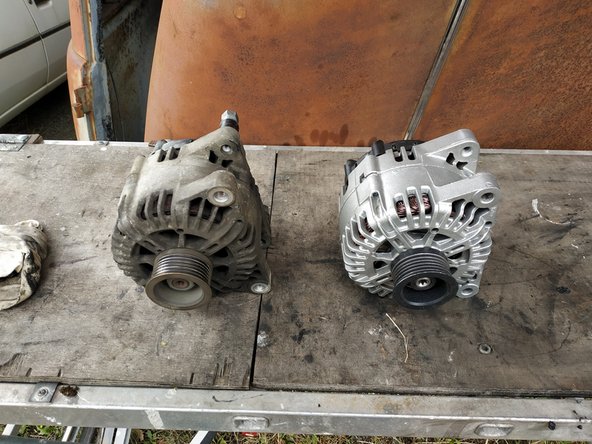
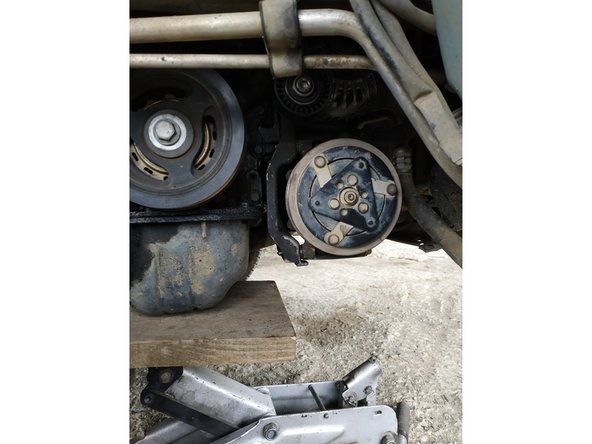
comparer les 2 alternateurs
-
Encore une fois, on se sera assuré de la compatibilité avant de commander la pièce neuve.
-
Faire très attention au démontage car très souvent il faudra renvoyer l'ancien alternateur (consigne).
-
-
-
positionner l'alternateur et veiller à ce que les vis et le cônes côté intérieur soient en place
-
installer le galet enrouleur avec sa vis, visser à la main
-
faire pivoter l'alternateur et mettre la vis du haut que l'on vissera à la main également
-
-
-
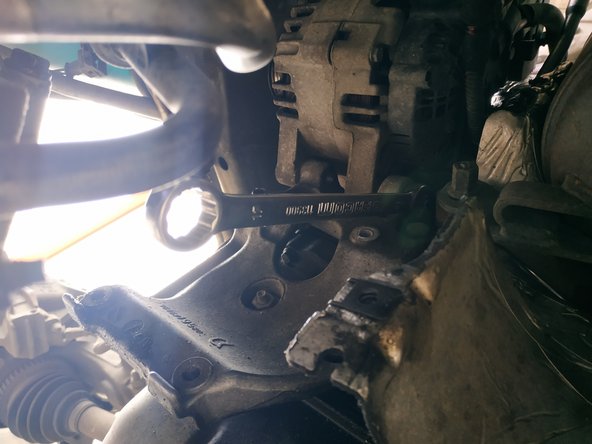
visser les 2 vis intérieures, clé de 16mm
-
puis les 2 vis extérieures, clé de 16mm et clé Allen de 8
-
On veillera à bien serrer les 4 vis de l'alternateur.
-
remettre en place le cache du galet
-
-
-
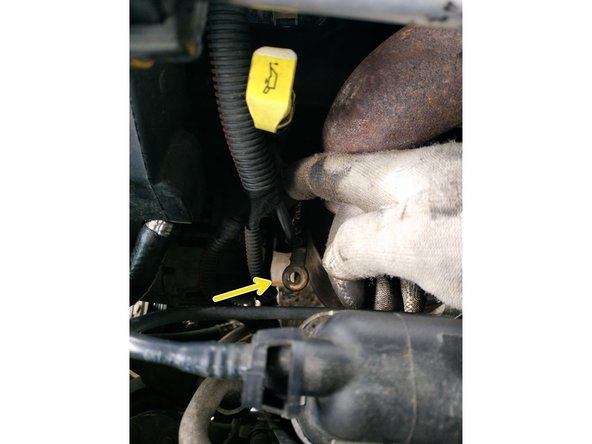
mettre en place la cosse + alternateur et visser l'écrou , clé de 13mm (ne pas oublier de remettre le capuchon en caoutchouc)
-
brancher la fiche électrique de l'alternateur
-
clipser l'agrafe du faisceau sur l'alternateur
-
-
-
positionner le compresseur de climatisation
-
Il y a un pion de centrage sur la vis du haut côté extérieur.
-
et visser ses 3 vis de fixation, clé de 13mm
-
rebrancher la fiche électrique
-
-
-
pousser le moteur vers l'arrière
-
et mettre en place le pare-chaleur du pot catalytique (par le bas)
-
visser les vis du pare-chaleur, clé de 10mm
-
-
-
mettre en place le support moteur
-
on peut faire jouer le cric pour repositionner le support correctement
-
avancer les 3 vis et l'écrou à la main (si le support moteur est correctement placé, on ne doit rencontrer aucune résistance)
-
serrer les vis du support, couple de 60N.m et retirer le cric sous le moteur
-
-
-
mettre en place la patte au-dessus du support moteur
-
et visser ses 2 vis de fixation, clé de 13mm
-
-
-
brancher les 3 fiches du calculateur
-
remettre la fiche du bas dans son passe-fil
-
clipser l'agrafe sous le support calculateur
-
-
-
le support calculateur a 2 ergots
-
qu'il faut mettre dans leur logement dans la carrosserie
-
remettre en place le support calculateur
-
-
-
visser l'écrou de maintien du support calculateur, clé de 10mm
-
remettre l'agrafe qui tient le faisceau sur le support calculateur
-
remettre l'agrafe qui tient le faisceau calculateur sur le support moteur
-
-
-
positionner la courroie correctement en respectant son cheminement et son sens de rotation (si on réutilise l'ancienne courroie comme c'est ici le cas)
-
retirer la goupille du tendeur pour armer celui-ci
-
On peut légèrement actionner le tendeur à l'aide de la clé de 15 pour faciliter l'extraction de la goupille.
-
s'assurer que la courroie est correctement placée dans les gorges
-
-
-
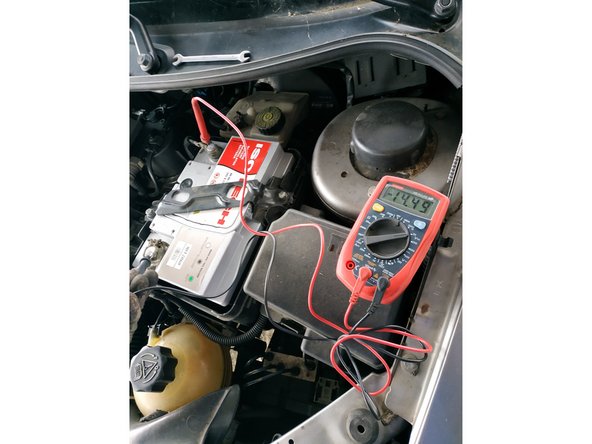
rebrancher la batterie
-
démarrer la voiture et contrôler le bon fonctionnement de l'alternateur à l'aide d'un multimètre (réglage courant continu 20V : on cherche une valeur autour de 14 volts moteur tournant)
-
Vérifier également que la courroie est bien en place et que tout fonctionne correctement.
-
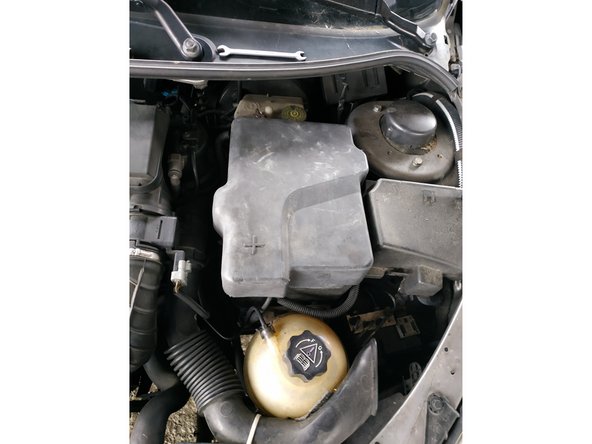
remettre le cache batterie
-
-
-
remonter le cache latéral : 2 vis, clé de 13mm
-
puis le passage de roue : 3 clips et 2 vis, clé torx T30
-
puis la protection sous moteur si vous l'avez encore : 8 vis, tournevis plat (1/4 de tour)
-
-
-
remettre la roue et serrer les goujons assez fort à la main
-
lever la voiture à l'aide du cric et retirer la chandelle (ou les cales en bois comme ici)
-
serrer les goujons, couple de 100N.m
-


2 commentaires
Bonjour. Excellent tuto, même si je viens de déposer cet alternateur sans enlever le support moteur ni le calculateur.Pour avoir un peu plus de place en haut j’ai écarté la pompe de direction en laissant branchés les deux tuyaux. Le compresseur de clim est particulièrement chiant a déposer. Et j’ai pas des mains de sage-femme !
walonislowc - Résolu à la publication Réponse
bonjour ,c est très bien expliqué avec les désins merci
ludovic.rapicault - Résolu à la publication Réponse