


Outils
Pièces
-
-
Mettre le contact.
-
Repérer l'ampoule défectueuse, en actionnant les différentes commandes: clignotants, phare, anti-brouillard.
-
Pour le frein se faire aider d'une autre personne ou bloquer la pédale de frein à l'aide d'un objet prenant appui sur le siège conducteur.
-
Une fois l'ampoule repérée, couper le contact (et retirer l'objet de la pédale de frein).
-
-
-
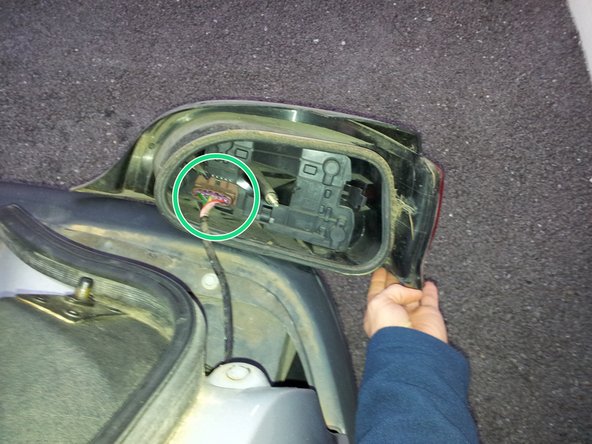
Ouvrir le coffre.
-
Dévisser à la main l'écrou papillon qui tient l'optique.
-
Détacher l'optique de feu en le tirant vers l'extérieur du véhicule.
-
-
-
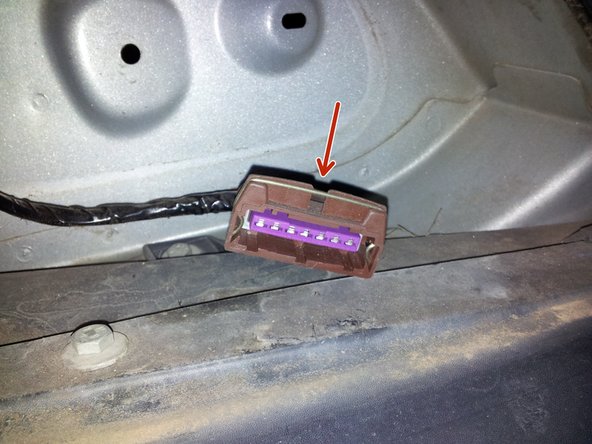
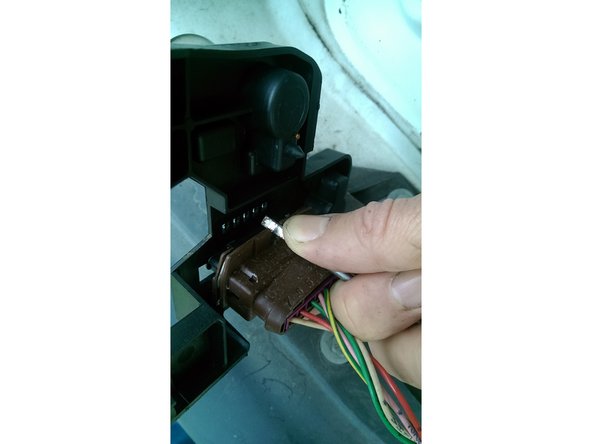
Appuyer sur la tige métallique du connecteur.
-
Tirer vers soi le connecteur en maintenant la tige métallique enfoncé, pour le détacher.
-
-
-
Appuyer sur la languette et sortir la plaque support vers soi.
-
Changer l'ampoule défectueuse.
-
-
-
Remettre la plaque support des ampoules en place. Rentrer d'abord le côté opposé à la languette (flèche orange).
-
Bien clipser la languette.
-
Remettre le connecteur électrique.
-
Bien enfoncer le connecteur à fond pour que le fil métallique soit bien clipsé.
-
Remettre l'optique en place.
-
Resserrer l'écrou papillon à la main. (pièce en plastique)
-


Annulation : je n'ai pas terminé ce tutoriel.
4 autres ont terminé cette réparation.
Un commentaire
Je saute généralement l’étape 3 pour aller plus vite. Attention dans le cas du feu arrière droit, la platine de feu est prévu pour 4 ampoules mais le phare est bouché sur la 4eme ampoule pour éviter de se tromper.
mathieu.malaterre - Résolu à la publication Réponse