


Difficulté
Facile
Étapes
9
Temps nécessaire
00:30:00
- Changer un feu arrière sur 207 SW 9 étapes

Ce tutoriel a été créé par la communauté
User contributed
Introduction
C'est une opération extrêmement simple sur 207 3 ou 5 portes mais un peu moins évidente sur SW.
Outils
Non tools spécifié.
Pièces
-
-
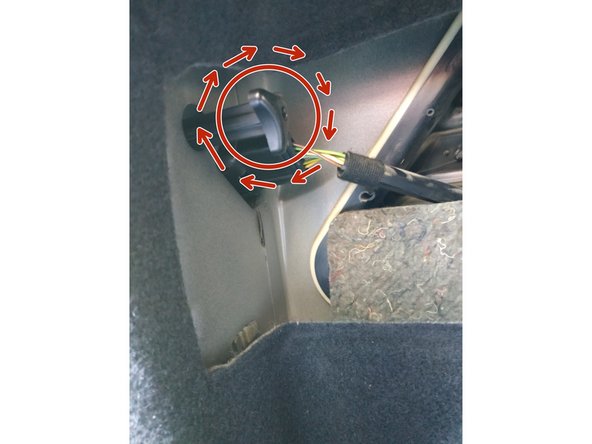
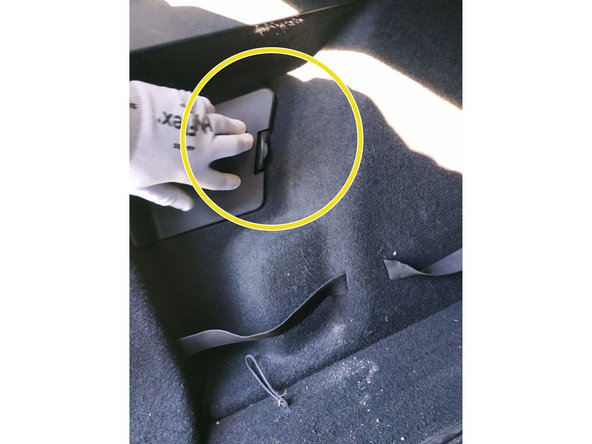
à l'intérieur du véhicule, repérer le cache en plastique
-
tirer sur la languette du cache
-
faire basculer l'ensemble vers soi et retirer les deux ergots du cache de leur logement
-
-
-
dévisser l'écrou noir qui fixe le phare
-
Il y a une languette sur la prise (ici la prise est débranchée pour plus de visibilité)
-
appuyer dessus et tirer sur la prise pour la débrancher
-
-
-
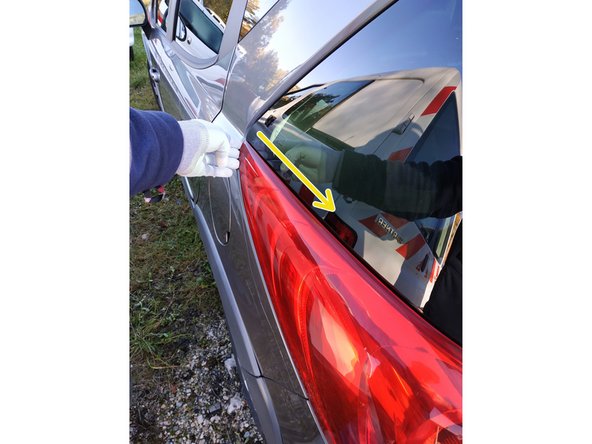
déloger le feu en tirant doucement sur la partie arrière d'une main
-
tout en essayant de tirer le long du feu vers l'arrière de l'autre main
-
il faut essayer de faire des petits mouvements de bascule mais ne surtout pas trop forcer sous peine de casser les ergots du feu
-
-
-
présenter le nouveau feu et brancher la prise en appuyant dessus
-
vérifier que toutes les ampoules fonctionnent avant d'aller plus loin
-
-
-
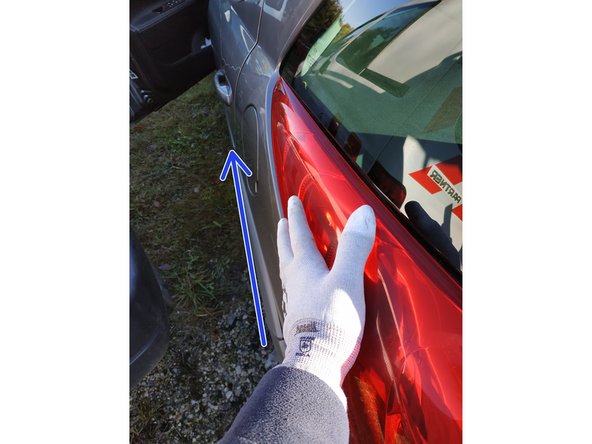
De loin le passage le plus délicat car il va falloir que tous les ergots du feu rentrent dans leur logement
-
bien aligner le feu et pousser sur la partie arrière d'une main
-
tout en maintenant le côté du feu plaqué de l'autre main
-
Ne pas forcer si ça ne rentre pas. Il faudra sans doute s'y reprendre à plusieurs fois.
-
-
-
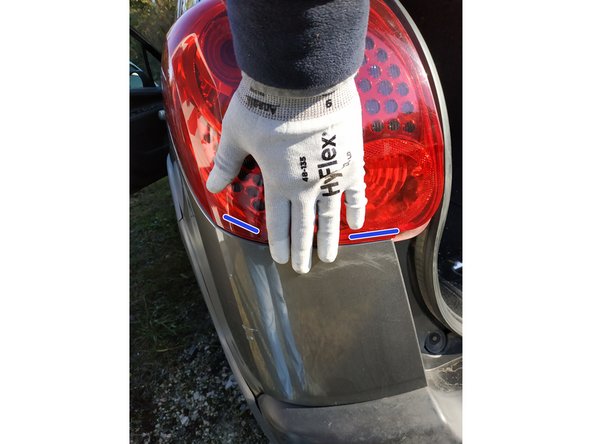
la partie haute du feu ne doit pas plaquer contre la carrosserie ; il y a un petit espace, c'est normal
-
pour savoir si c'est en place, vérifier que le côté du feu est à fleur de carrosserie
-
ainsi que l'arrière, qui doit être à fleur de pare-chocs
-
Si ce n'est pas le cas, reprendre l'opération précédente
-
on peut se servir de l'autre feu comme modèle
-
-
-
présenter les ergots du cache dans les logements
-
faire basculer le cache et appuyer pour clipser
-


Annulation : je n'ai pas terminé ce tutoriel.
Une autre personne a terminé cette réparation.
2 commentaires
Merci aussi pour votre tuto. Très bien fait et rassurant
daniel.miraucourt - Résolu à la publication Réponse