


Difficulté
Difficile
Étapes
20
Temps nécessaire
04:00:00 - 06:00:00

Ce tutoriel a été créé par la communauté
User contributed
Introduction
Remplacement du turbocompresseur moteur sur C4 HDI 90
Si votre turbo a un ou plusieurs symptômes suivant il faut le remplacer :
- perte de puissance
- sifflement important
- jeu excessif
- fumée et perte d huile
-
-
Le moteur HDI 1.6 est très sensible a la qualité de l'huile et la casse turbo peut être dû a un manque d'huile ou une huile avec trop de particules
-
-
Faire une première vidange avec une huile, bas de gamme type 15W40 pour "nettoyer le moteur"
-
Laisser tourner le moteur au ralenti pendant 15 minutes pour que le filtre neuf retire un le maximum de particules
-
Faire une seconde vidange avec l'huile normale
-
Cette fois ci la jauge doit sortir avec un huile très claire et non une huile noire
-
-
-
Dévisser la vis de droite
-
Dévisser le collier de fixation
-
Dévisser le collier de fixation de la durite et du conduit
-
Débrancher la durite radiateur du conduit
-
-
-
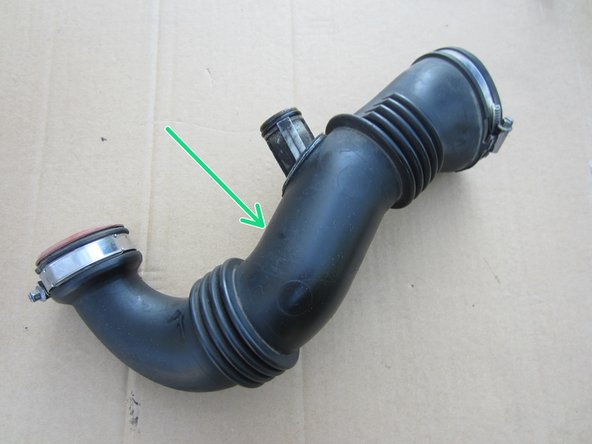
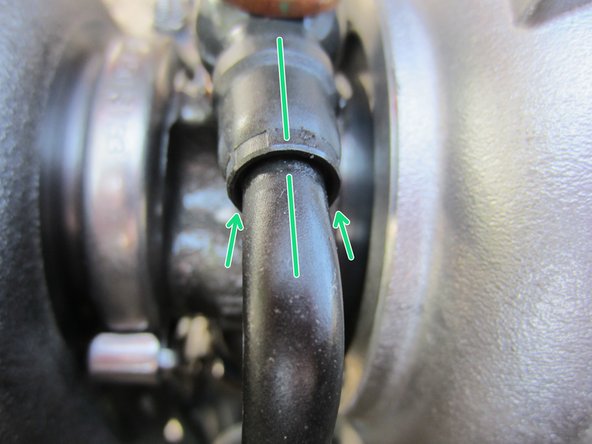
Pivoter le conduit et déclipser du plot plastique situé derrière
-
Sortir le conduit
-
Ranger les 2 vis et le conduit pour ne rien perdre
-
-
-
Désserrer les 2 colliers metaliques
-
Sortir le conduit
-
Ranger le conduit pour ne rien perdre
-
-
-
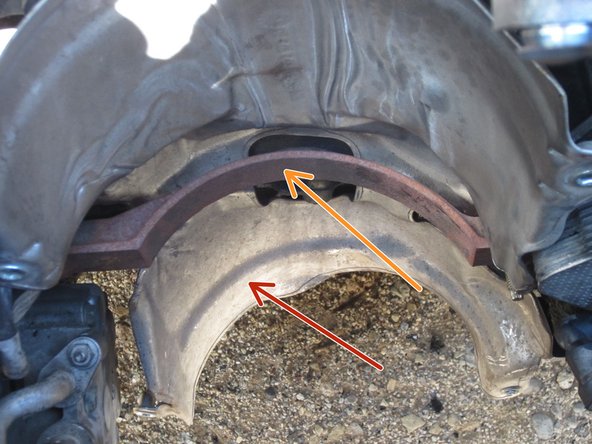
Dévisser les 7 vis de fixation
-
Attention a ne pas abîmer le radiateur moteur pendant le retrait
-
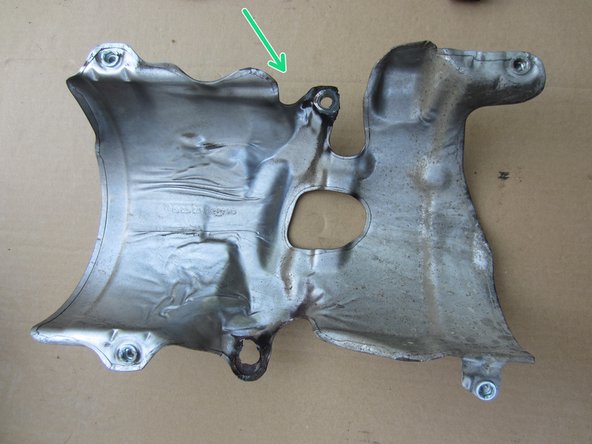
Faire descendre et pivoter vers l'arrière la protection thermique pour la sortir du compartiment moteur
-
Ranger la protection et les 7 vis
-
-
-
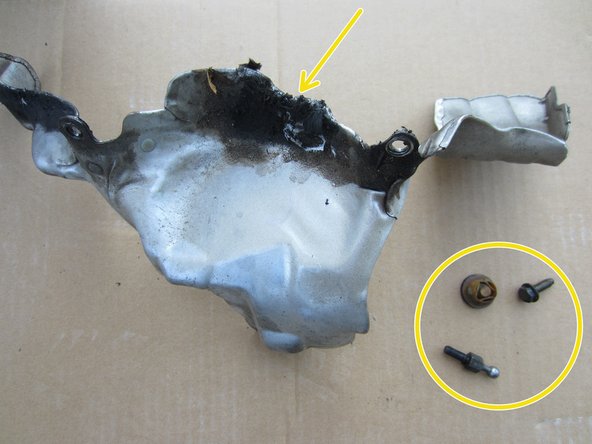
Retirer le plot plastique
-
Dévisser les 2 fixations
-
Ranger la protection et les 2 vis + le plot
-
-
-
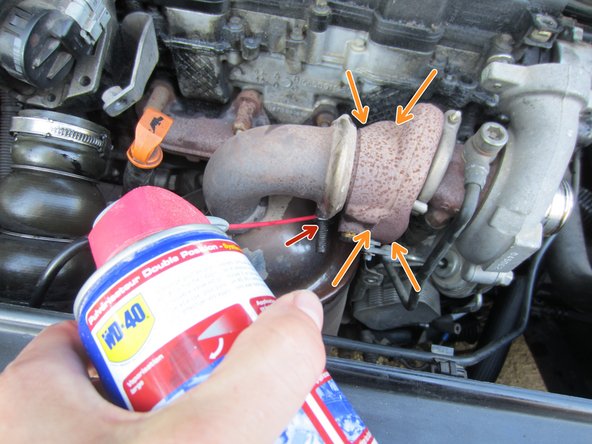
Pulvérisez du dégrippant sur les fixations rouillées , cela vous facilitera le démontage
-
sur le collier d'échappement en sortie de turbo
-
Sur les 4 écrous de la pipe d'échappement
-
sur le collier d'échappement en sortie de catalyseur
-
-
-
Dévisser la vis de serrage du colliers
-
Ecarter le collier avec une vis et 2 écrous (en serrant les 2 écrous cela écarte le collier)
-
Décaler le vers la gauche pour libérer le catalyseur
-
Faire de même sous le moteur entre le catalyseur et la ligne d'échappement
-
-
-
Dévisser les 2 écrous de fixation du catlyseur
-
Retirer le catalyseur par le bas
-
Ranger le catalyseur, les colliers et les écrous de fixation + le support
-
Retirer et ranger la protection thermique
-
-
-
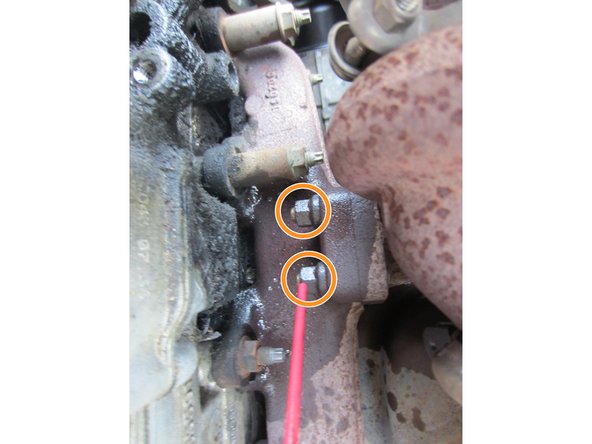
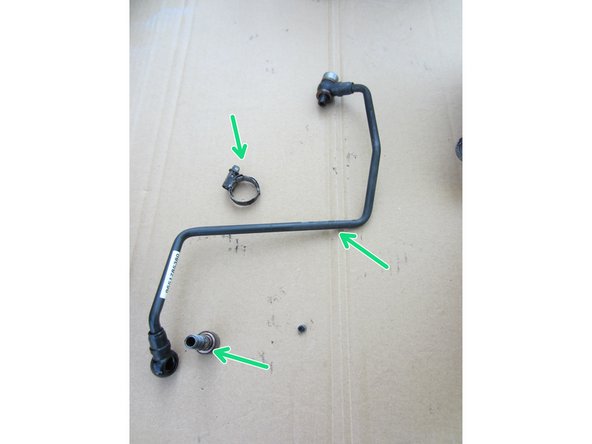
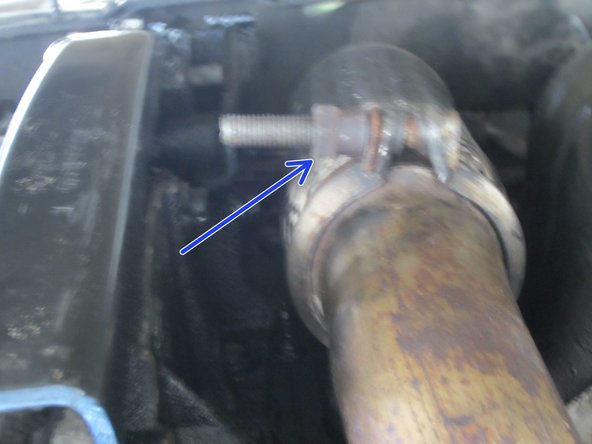
Démonter la vis 6 pans d'arrivée d huile en sortie moteur
-
Desserrer le collier de serrage de la durite de retour d'huile
-
Démonter la vis 6 pans d'arrivée d huile sur le turbo
-
Retirer et ranger la durite et la vis plus le collier
-
-
-
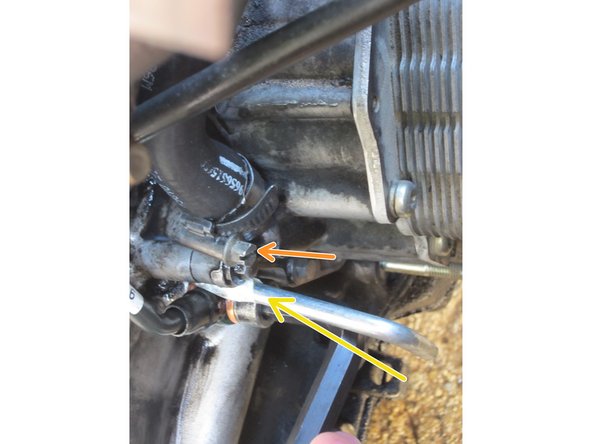
Débrancher le tuyau de dépression
-
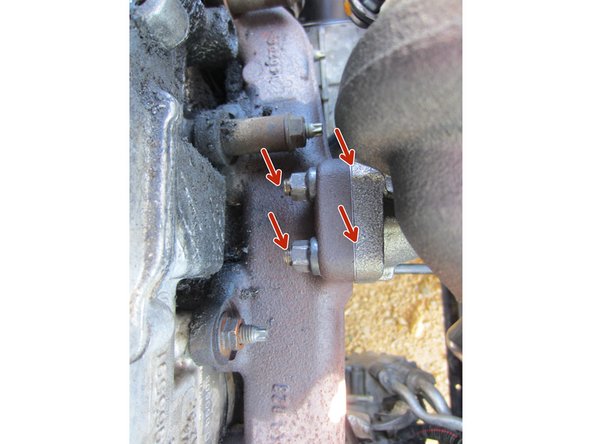
Desserrer les 4 écrous de fixation du turbo sur la pipe d'échappement
-
Retirer le turbo du moteur
-
-
-
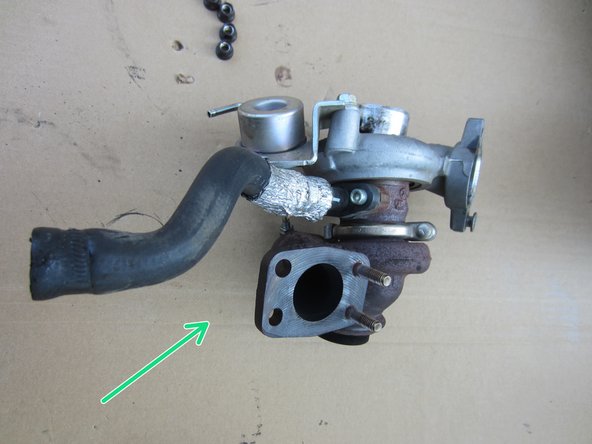
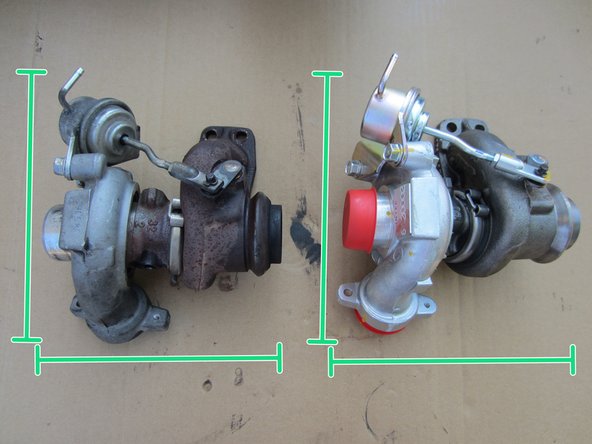
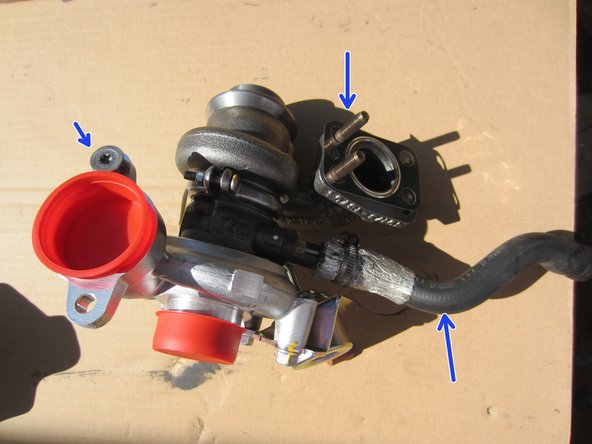
Vérifier les pièces à démonter sur l'ancien turbo pour installer sur le nouveau
-
durite huile
-
les goujons
-
la vis torx
-
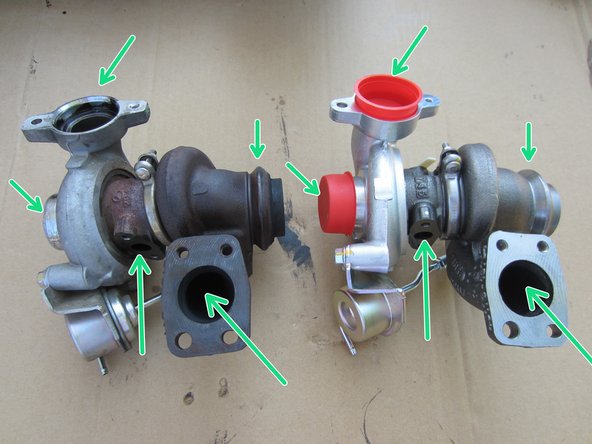
comparaison des 2 turbos (taille, connections , etc...)
-
-
-
Précharge d'huile avec une seringue
-
Remontage durite, vis torx et goujons
-
-
-
Fixer le turbo avec les 4 écrous
-
Reconnecter le tuyau de dépression
-
-
-
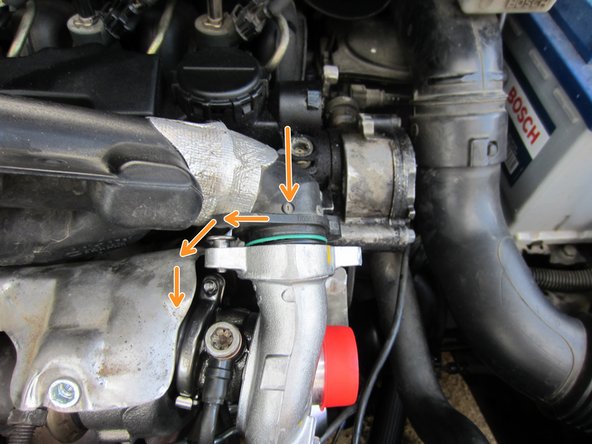
Retirer le filtre de rodage sur la vis creuse du bas
-
Connecter et serrer le collier de la durite de retour d'huile
-
Serrer la vis creuse de retour d'huile avec une clé pour caler le raccord (environ 7mm de diamètre)
-
Serrer la vis creuse de retour d'huile avec une douille pour caler le raccord (environ 20mm de diamètre)
-
-
-
Le tube doit être parfaitement centré sur le raccord du bas et du haut
-
Risque de fuite d'huile, et donc casse turbo
-
si besoin refaire l'étape précédente
-
-
-
Remonter la protection arriere
-
Remonter la fixation
-
Remonter le catalyseur
-
fixer le catalyseur avec les 2 ecrous
-
fixer le catalyseur sur le turbo et sur la ligne d'échappement avec les 2 colliers metalliques
-
-
-
Remonter la protection haute + le pion plastique
-
Remonter la durite de sortie d air en la faisant pivoter
-
Serrer la vis et les 2 colliers
-
-
-
Remonter la durite et serrer les 2 colliers
-
Remonter la protection thermique et serrer les 7 vis
-
-
-
Déconnecter les 4 injecteurs (pour éviter le démarrage du moteur et commencer la lubrification du turbo)
-
Faire tourner le démarreur pendant 30 secondes pour que la circulation d'huile commence avant la rotation du turbo
-
Si on démarre le turbo sans cette étape, cela peut conduire a une usure irrémédiable du turbo
-
Reconnecter les injecteurs et démarrer la voiture, laisser tourner au ralenti pendant 10 min
-
Suite a la déconnexion des injecteurs il va y avoir des alarmes de pollution, après plusieurs démarrage elles disparaîtront
-


Annulation : je n'ai pas terminé ce tutoriel.
5 autres ont terminé cette réparation.
21 commentaires
Bonjour vous parler pas de la crépine normalement faut ma remplacer
thomas.du19 - Résolu à la publication Réponse
j ai fais tout comme vous très bon tuto j’ai contrôlé mon n huile arrive bien suite a sa après 2000km sa a cassé une 2eme fois je comprend pas tout a était changé en plus .moi ses Eric merci a toi
lib_ana_eri - Résolu à la publication Réponse