Difficulté
Facile
Étapes
6
Temps nécessaire
00:20:00

Ce tutoriel a été créé par la communauté
User contributed
Introduction
On ne remplace ici que la coque. Ce tutoriel ne traite pas du remplacement des switchs.
Il vaut mieux commander un kit de réparation avec une pile neuve.
Parts
-
-
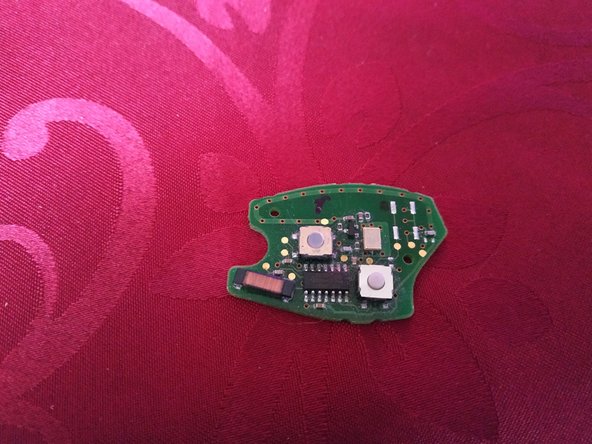
Avant d'attaquer quoi que ce soit et avant même de commander le kit de réparation, vérifier que les switchs ne sont pas abîmés.
-
en rouge, switchs ok, la réparation va être simple
-
en jaune, switch hs, la réparation est possible mais elle va être beaucoup plus délicate et ne sera pas traitée ici
-
S'assurer aussi que l'on dispose d'un double en état de marche (une clé programmée qui démarre la voiture). C'est une précaution, un plan B, au cas où les choses ne se déroulent pas comme prévu.
-
-
-
dévisser la vis de maintien de la lame avec un petit tournevis cruciforme
-
puis retirer la lame en tirant
-
insérer un petit tournevis plat dans l'encoche à l'angle de la clé et faire 1/4 de tour dans le sens horaire pour désolidariser les deux parties de la coque
-
-
-
on peut à ce stade nettoyer le circuit imprimé mais il faut obligatoirement utiliser un nettoyant contacts (si vous n'en avez pas, remontez tel quel)
-
Ce circuit imprimé gère aussi l'antidémarrage. Si on utilise un produit inapproprié ou pire encore, si on gratte, on peut rendre la clé (et la voiture) inutilisable.
-
-
-
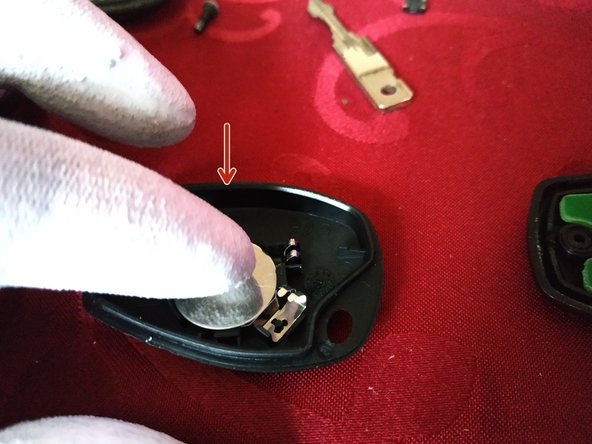
sur la coque inférieure, mettre la pile neuve dans son logement en appuyant dessus et vérifier qu'elle est bien en place
-
La pile est maintenue par 2 petites languettes en plastique.
-
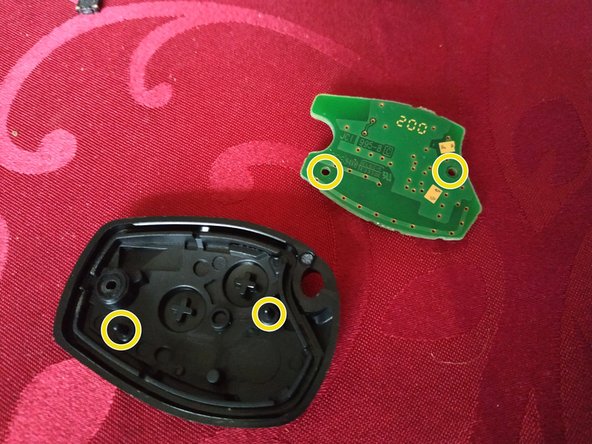
sur la coque supérieure, mettre en place le circuit imprimé (il y a des pions de centrage)
-
mettre les deux parties face à face et pincer pour les clipser
-
-
-
remettre la lame en place en la poussant dans son logement jusqu'en butée
-
Si le kit fournit une lame neuve, on peut la faire tailler chez un professionnel. Ceci dit, il est tout-à-fait possible de réutiliser l'ancienne lame.
-
visser la vis de maintien de la lame avec un petit tournevis cruciforme
-
-
-
vérifier que la fermeture centralisée fonctionne correctement
-
plus important encore, vérifier que la voiture démarre
-