


Difficulté
Modérée
Étapes
7
Temps nécessaire
02:00:00 - 03:00:00
- Changer le récepteur d'embrayage 7 étapes

Ce tutoriel a été créé par la communauté
User contributed
-
-
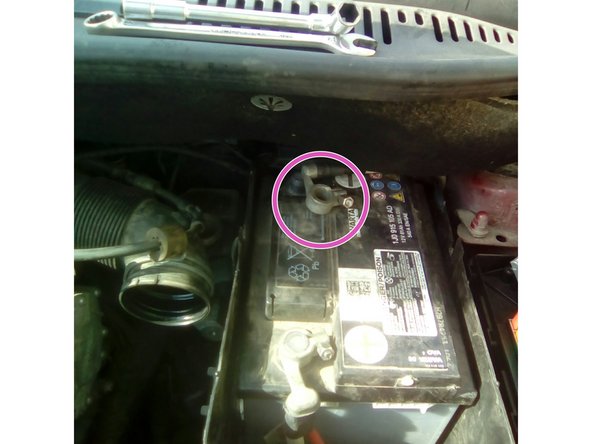
avant tout, il faudra débrancher la batterie
-
déconnecté d'abord la borne négative et en suite la positive.
-
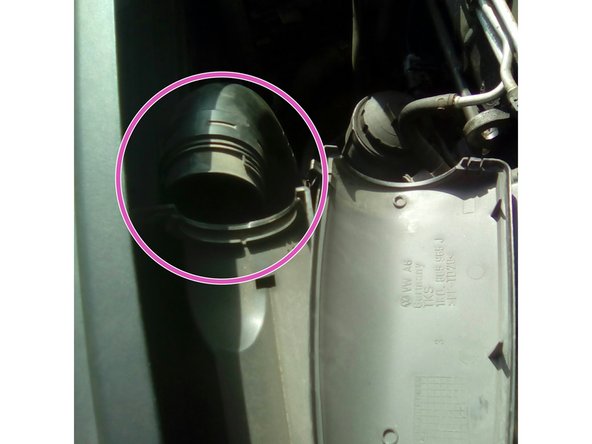
enlevez le couvercle du boitier de fusibles en tirant les ergots en direction du choc et soulevez l'ensemble.
-
débranchez le premier câble de puissance pour permettre de déposer le support de la batterie
-
-
-
démonter le la barre de renfort entre le support de boite et la boite.
-
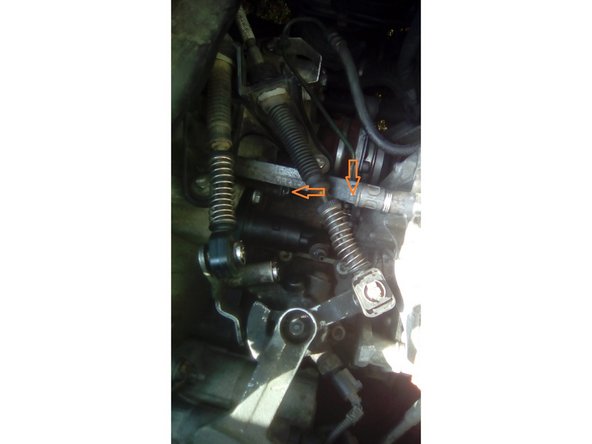
si besoin démontez les commandes de boite en faisant attention de bien bloquer le réglage des tirants avec du collant.
-
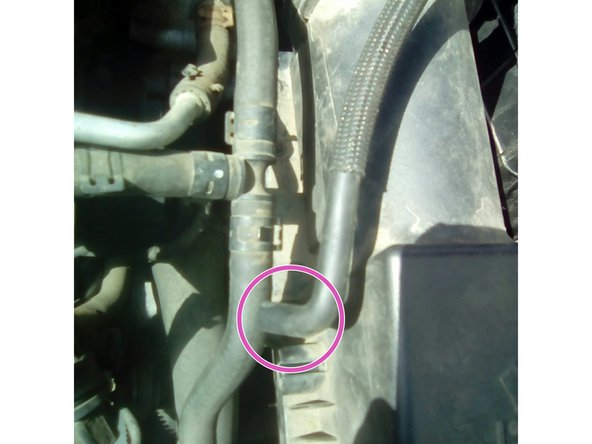
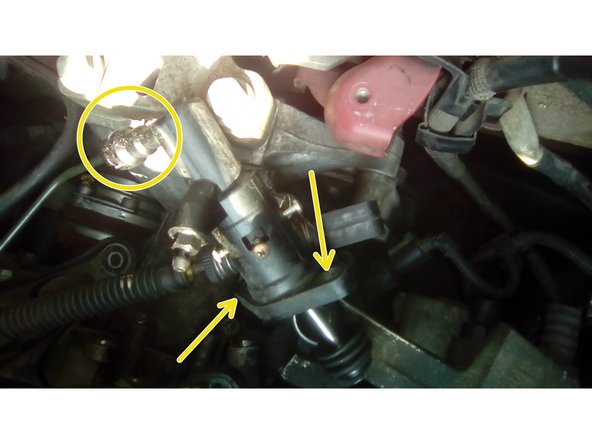
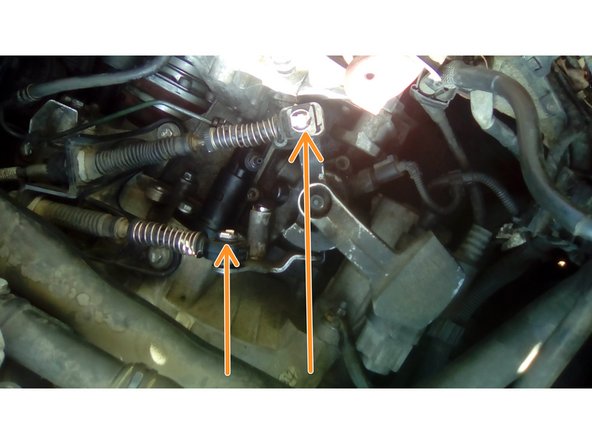
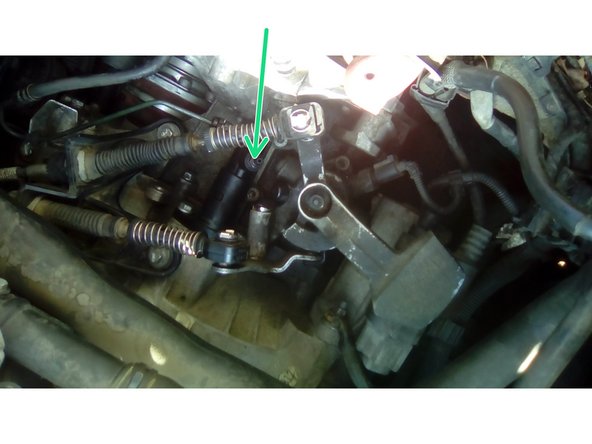
démonter les vis du récepteur d'embrayage. de-clipsez le tuyau d'alimentation du recepteur de la bride support.
-
-
-
démontez le raccord du recepteur en enlevant le clips
-
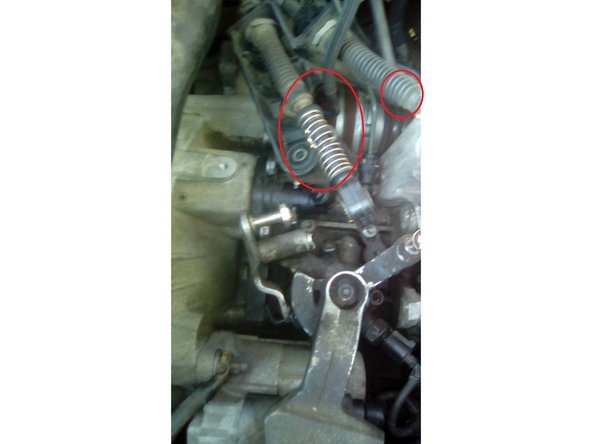
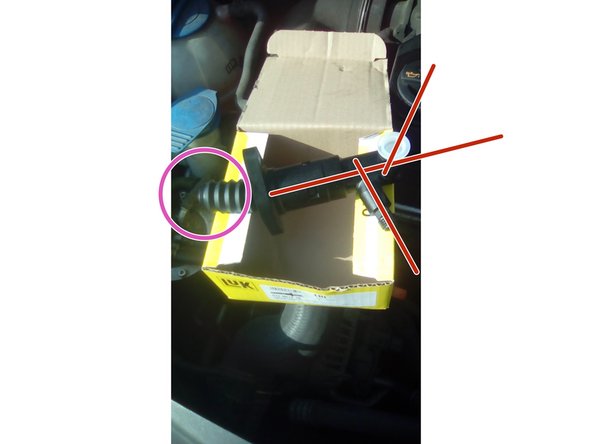
remplacez le recepteur, le ressort de rappel vos mettra des battons dans le roues pour le remontage, prenez votre temps.
-
remontez le raccord et avec son clips
-
attention de bien choisir le bon modèle de recepteur. il y a plusieurs modèles de recepteur avec l'angle du raccord différent.
-
remontez les commandes
-
-
-
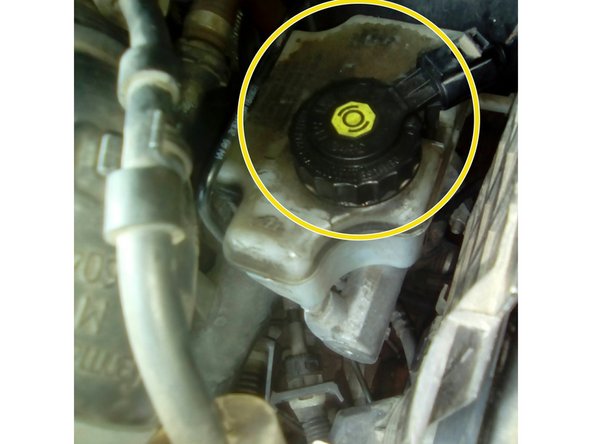
démontez le bouchon de remplissage de liquide de frein et faites l'appoint tout au long de l'étape de purge du circuit.
-
il vous faudra être deux.
-
un a pédalier et l'autre a la vis de purge.mettre un tuyau au bout de la vis de purge et u n réceptacle au bout du tuyau.
-
a tour de rôle ouvrez la purge a l'appuie de la pédale et fermez la purge avant de retirez la pédale vers l'arrière.
-
il ne faut plus aucunes bulles dans le tuyau. faites le niveaux a la fin de la purge.
-
-
-
il ne vous reste plus qu'a tout remonter;
-
remontez le support de batterie, la batterie ( attention a bien replacez les câble avec le cache). remontez le cache batterie.
-
remontez le boitier de filtre a air ( bien appuyé sur le porte filtre pour le remettre dans les ergots en caoutchouc) , replacez correctement les tuyaux du boitier.
-
remontez le tuyau d'admission, le tuyau de dépression. clipsez le boitier d'entrée d'air. rebranchez le connecteur du débitmètre
-
finissez par rebrancher le négatif de la batterie.
-
ATTENTION , le voyant d'anomalie de direction (voyant jaune en forme de volant) restera allumé.ceci est normal après le débranchement de la batterie. il disparaitra en roulant .
-


Annulation : je n'ai pas terminé ce tutoriel.
Une autre personne a terminé cette réparation.