


Difficulté
Modérée
Étapes
9
Temps nécessaire
00:45:00

Ce tutoriel a été créé par la communauté
User contributed
Introduction
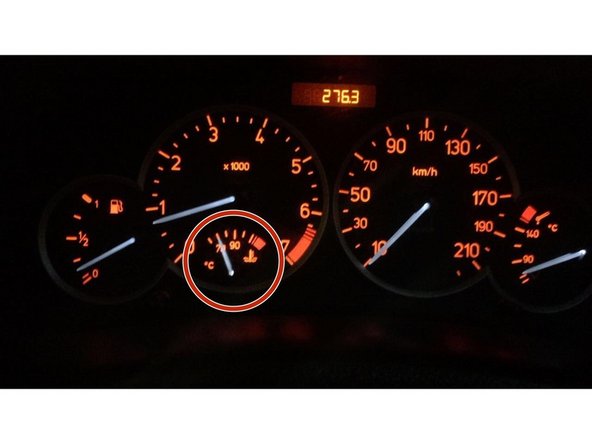
Operation à faire moteur froid
-
-
Repérage des vis de purge
-
Une sur la durite supérieur qui va au radiateur de chauffage
-
Une sur le boitier d'eau Torx de 35
-
-
-
J'accélère légerement afin de faire augmenter la température duliquide de refroidissemet et ainsi déclencher mon ventilateur
-
Une fois la température MAXIMUM atteinte je reprocède à une purge à chaud, afin d'évacuer l'air restant
-
N'oubliez pas de vérifier le niveau du vase d'expansion
-
Coupez le moteur, puis faire le niveau à froid
-
-
-
Ouvrir le capot moteur
-
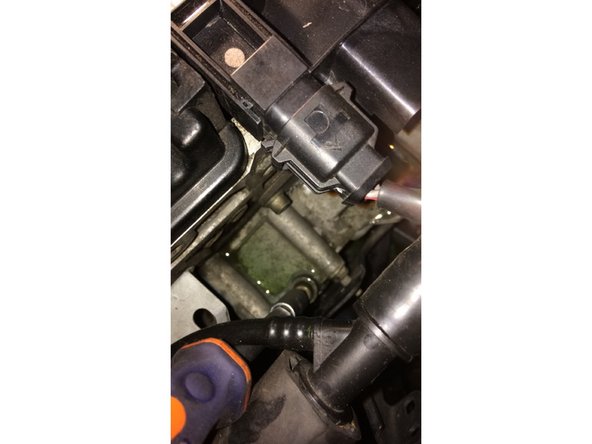
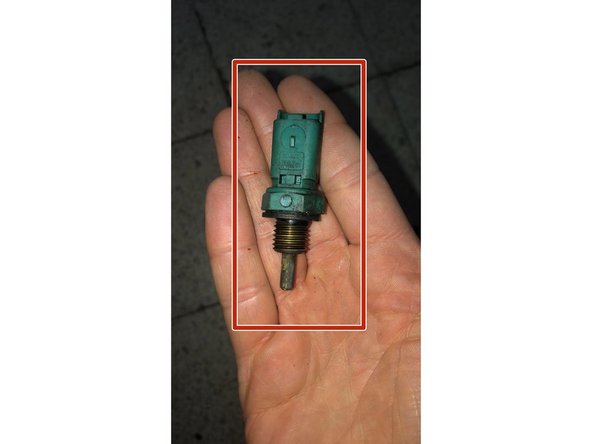
Repérer la sonde
-
-
-
En desserant la sonde du liquide de refroidissement va s’écouler
-
Je débloque la sonde avec la clé de 16 mm est finis le desserage à la main afin de pouvoir replacer immédiatement la nouvelle est ne perdre qu'un minimum de liquide de refroidissement.
-
Placer une bassine sous le vehicule
-
On apercoit le liquide qui commence à s'écouler
-


Annulation : je n'ai pas terminé ce tutoriel.
Une autre personne a terminé cette réparation.