


Difficulté
Facile
Étapes
8
Temps nécessaire
01:00:00

Ce tutoriel a été créé par la communauté
User contributed
Introduction
Ce tutoriel montre comment remplacer la sonde lambda située après le catalyseur.
Tutoriel réalisé sur Audi A3 1.6L Essence 2006
Pièces
-
-
Cric, Chandelle, Clé plate de 22mm, Cliquet et douille de 10mm ; et sonde lambda.
-
-
-
Lever la roue arrière du véhicule à l'aide du cric et placer la chandelle pour sécuriser l'installation.
-
-
-
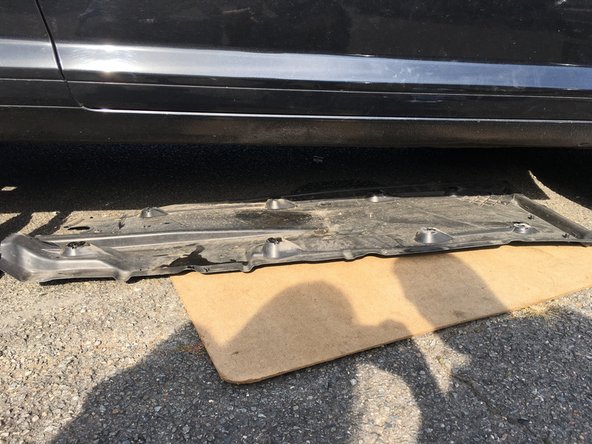
Dévisser les vis qui soutiennent la protection plastique, à l'aide de la clé de 10mm.
-
La sonde lambda 2 se situe du côté droit de la voiture.
-
-
-
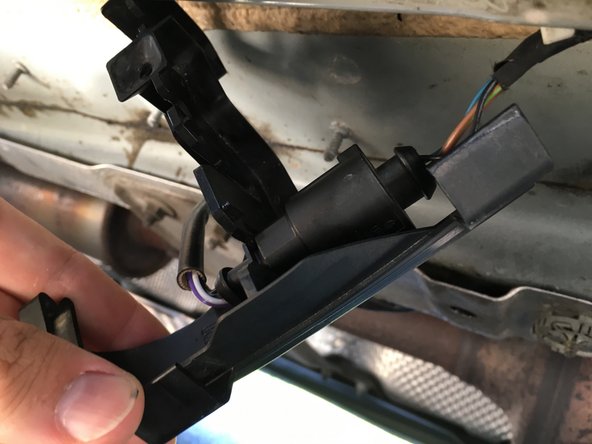
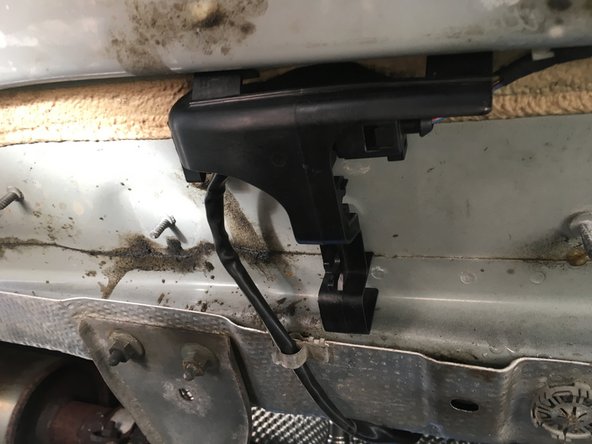
Retirer le support de la prise de la sonde en tirant celui-ci vers le bas. Sortir la prise de son emplacement en la faisant glisser du côté de la rainure.
-
Débrancher ensuite la sonde lambda
-
-
-
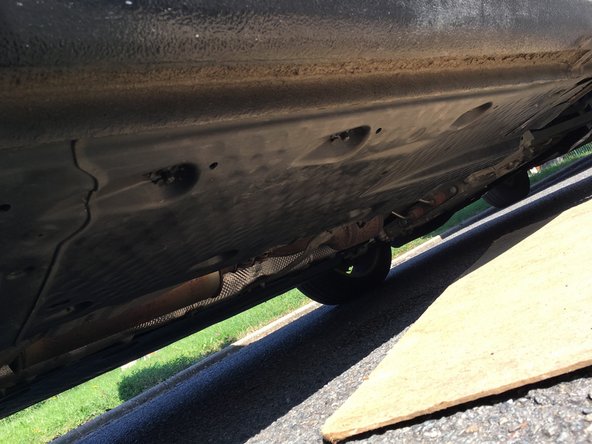
Localiser la sonde lambda 2. Elle se situe sur la ligne d'échappement, après le catalyseur.
-
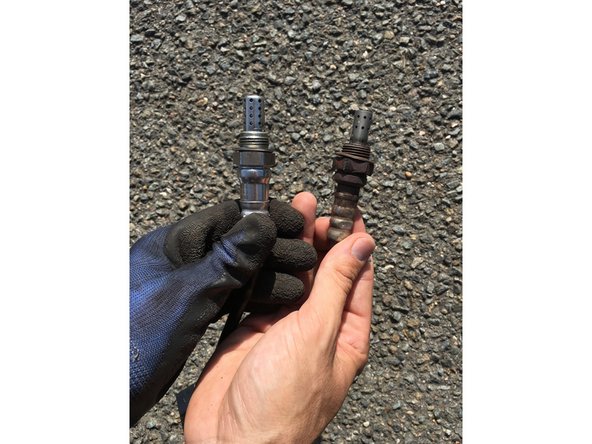
Dévisser la sonde lambda (Clé plate de 22mm) et la comparer à la nouvelle.
-
-
-
Visser la sonde à l'aide de la clé plate de 22mm. Eviter les chocs sur la partie de la sonde qui sera dans la ligne d'échappement.
-
-
-
Rebrancher la sonde en respectant la correspondance des chiffres (variant de 1 à 4) situés sur la sonde et sur la prise.
-
Replacer le support de la prise de la sonde.
-
-
-
Revisser les vis qui supportent la protection plastique (clé de 10mm).
-


Annulation : je n'ai pas terminé ce tutoriel.
3 autres ont terminé cette réparation.
2 commentaires
Merci pour ce tutoriel j'ai un code erreur p242d capteur de température des gaz d'échappement (capteur 3 ligne 1) circuit haut.
C'est aussi une sonde lambda ? Comment savoir où elle est ? Merci d'avance pour votre aide.
Cordialement
Lionel DESMARTHON - Résolu à la publication Réponse