


Difficulté
Modérée
Étapes
7
Temps nécessaire
00:40:00

Ce tutoriel a été créé par la communauté
User contributed
Introduction
Remplacement de la courroie accessoire sur Mercedes type 203:W203, CL203, S203, Berline, Break, Coupé.
Pièces
-
-
Tirer la manette rouge située sous le volant. Le capot va légèrement se soulever.
-
Tirer la manette noire située à l'avant du capot pour procéder à son ouverture complète.
-
-
-
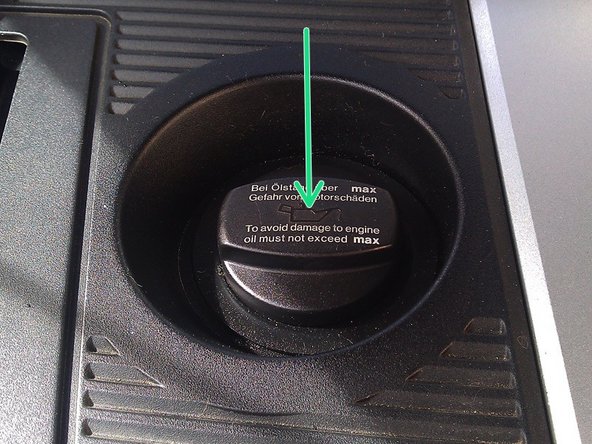
Localiser le bouchon d’huile.
-
Attention : La position peut varier d’une motorisation à l’autre mais le principe sera toujours le même.
-
Dévisser le bouchon d’huile d’un quart de tour, puis le retirer.
-
Dé-clipper le cache moteur en le soulevant fermement.
-
Revisser le bouchon d’huile.
-
-
-
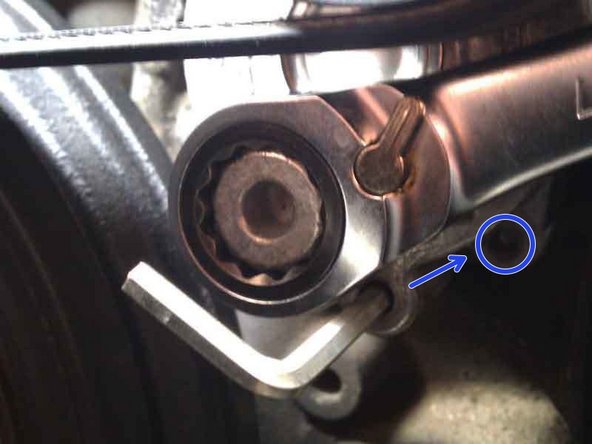
Localiser le galet tendeur.
-
Localiser la prise de mise en tension du ressort et l’orifice de blocage du tendeur.
-
Positionner la clé de 17 à 12 pans, et garder la Tige de blocage à porter de main.
-
Attention : Cette étape nécessite la mise en tension du ressort, procéder avec précaution.
-
En tournant la clé dans le sens inverse des aiguilles d'une montre, mettre en tension le ressort jusqu’à ce que la Tige de blocage puisse être insérée dans l’orifice de blocage. Le tendeur est maintenant bloqué.
-
-
-
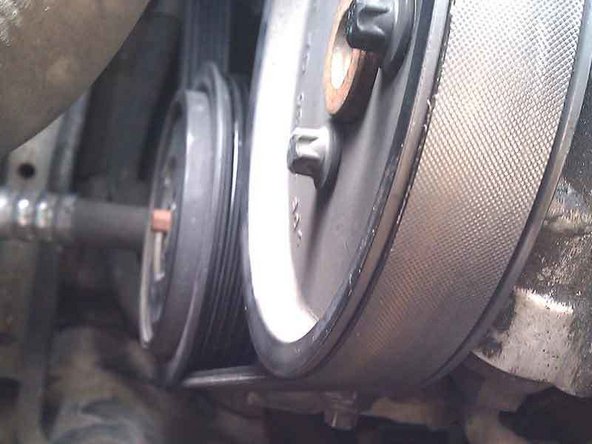
Attention : avant de retirer la courroie faire un schéma de son parcourt sur les différentes poulies ou prendre une photo. La courroie devra être remontée à l’identique.
-
La courroie n’étant plu sous tension, elle peut être retirée avec facilité.
-
-
-
Cette étape est optionnelle, il n'est pas obligatoire de remplacer le galet tendeur, mais c'est toutefois conseillé.
-
Localiser les 2 boulons qui maintiennent le galet tendeur en position puis le dévisser à l’aide de la clé de 8 mm
-
Retirer l’ancien tendeur puis mettre en place le nouveau. Revisser les boulons de maintien.
-
-
-
Remettre en position la courroie en ce référant au schéma ou à la photo.
-
Remise en tension : Comme pour l’étape n°3, exercer une tension sur le tendeur à l’aide de la clé de 17. Retirer la clé Allen qui sert de blocage puis relâcher doucement pour mettre la courroie en tension.
-
Vérifier attentivement que la courroie soit bien positionnée au niveau des différentes poulies.
-
Attention : Il est impératif de vérifier le montage correct de la nouvelle courroie avant de démarrer le moteur.
-
-
-
Dévisser le bouchon d’huile, il se soulève après l’avoir tourné d’un quart de tour.
-
Clipper le cache moteur en appuyant dessus fermement.
-
Revisser le bouchon d’huile.
-
Fermer le capot l’intervention est terminée.
-


Annulation : je n'ai pas terminé ce tutoriel.
8 autres ont terminé cette réparation.

3 commentaires
serait bien plus simple de retirer conduit plastique noir.(fitre a air calandre ) pour plus de place
pacco76620 - Résolu à la publication Réponse
C’EST CLAIRE mais une vue plus élargie serait très bien aussi . compliment.
dr.segbeaya.akuete - Résolu à la publication Réponse
Bonjour Est ce la même méthode pour une Mercedes 200 cdi de 1998
Merci
jean luc poirier - Résolu à la publication Réponse