


-
-
Déposer le vide poche central et le cache à droite du cendrier avec un petit tournevis
-
-
-
Déposer les 4 vis situées sur la façade à l'air dela clé Torx
-
Déposer les deux vis sur le cache coté conducteur et répéter l'opération coté passager.
-
Repérer les vis pour les remonter au bon endroit.
-
Déposer le pions sapin en tirant légèrement sur le cache. Répéter l'opération coté passager.
-
Déposer l'insonorisation sous la planche de bord coté conducteur à l'aide du tournevis. (retirer les pions sapins)
-
Déconnecter l'allume-cigares et l'éclairage du cendrier.
-
Déposer le cache climatiseur.
-
-
-
Démonter la vis de maintien de la colonne et désaccoupler la colonne en la tirant fermement ver le bas
-
Déconnecter les faisceaux du pulseur en exerçant une pression sur les ergots de maintient.
-
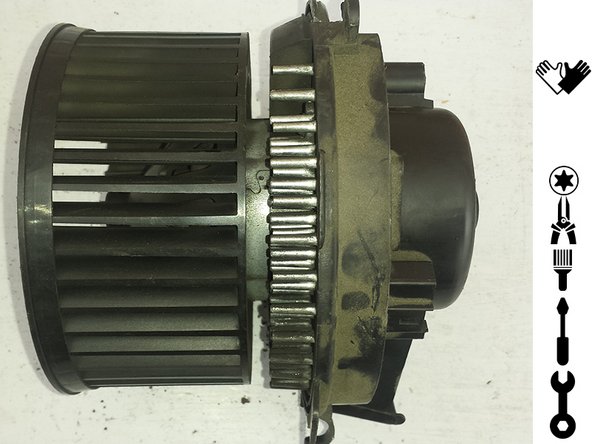
Effectuer une rotation du pulseur pour le déverrouiller et le tirer. Sortir le pulseur.
-
-
-
Déposer la vis de fixation du rotor.
-
A l'aide d'un tournevis, écarter le rotor de son support en le glissant entre les deux pièces.
-
Attention à ne pas trop forcer avec le tournevis
-
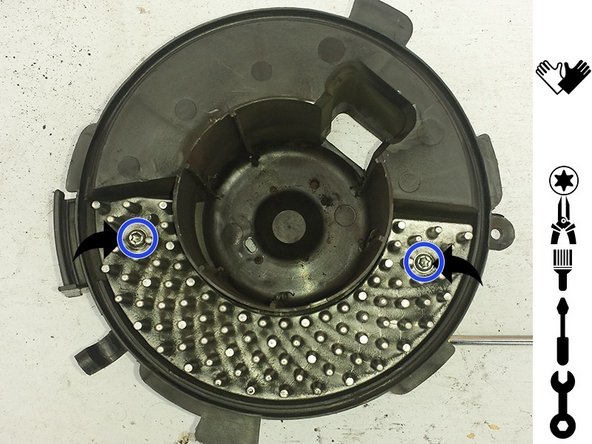
Puis déposer le module en retirant les deux vis de fixation.
-
Profiter du démontage pour effectuer un petit nettoyage de l'ensemble à l'aide d'un pinceau.
-
-
-
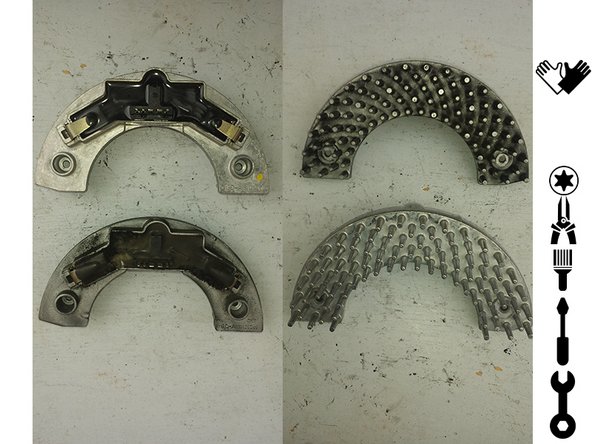
Contrôler la correspondance entre l'ancien et le nouveau module
-
Remonter le module dans l'ordre inverse de la dépose.
-
Remonter le rotor sur son support dans l'ordre inverse de la dépose.
-
Procéder au remontage du pulseur dans la planche de bord en procédant dans l'ordre inverse de la dépose.
-
Ne pas oublier le serrage l'arbre intermédiaire de la colonne de direction.
-


Annulation : je n'ai pas terminé ce tutoriel.
23 autres ont terminé cette réparation.
14 commentaires
Bravo pour la clareté de votre reportage. Bonne continuation.
Djelloul OMARI - Résolu à la publication Réponse
Changement réalisé sur mon véhicule, la ventilation fonctionnait au maximum sans possibilité de l’éteindre. Un point très important qui manque dans le tuto, lors du desacouplage de la colonne de direction il faut absolument bloquer le volant sinon le capteur d’angle sera déréglé entrainant un défaut ESP : passage a la valise obligatoire ensuite.
Franck BARON - Résolu à la publication Réponse
Bonjour moi mon xsara Picasso avec clim j ai le ventilateur ne tourne pas du tout est ce quelqu un aurait une idée d ou sa peut venir merci
Thierry Cisse - Résolu à la publication Réponse
On arrive pas à remettre la visse qui tient la colonne au volant
Martial Picard - Résolu à la publication Réponse