


Difficulté
Difficile
Étapes
12
Temps nécessaire
02:00:00
- Démonter le pare-choc avant sur Clio 3 9 étapes
- Remplacer feu avant sur Clio 3 3 étapes

Ce tutoriel a été créé par la communauté
User contributed
-
-
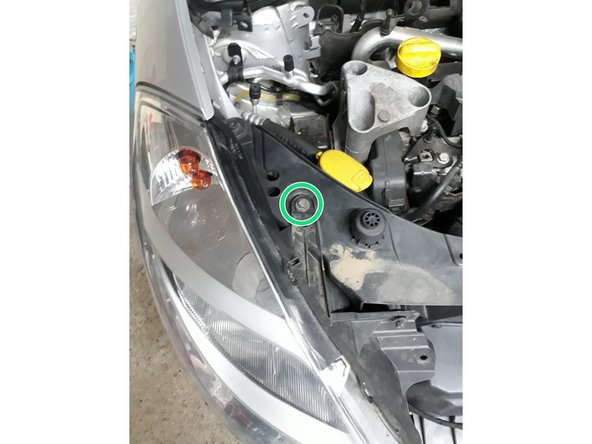
Démonter les pions à l’extérieur en plaçant un tournevis plat entre les 2 parties du pions et faire levier
-
Puis tirer l'ensemble du pion
-
-
-
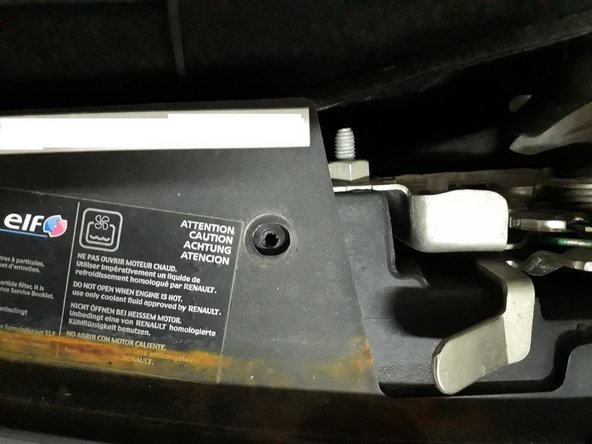
Sous la voiture, vous pouvez accéder sans la lever aux deux vis à démonter
-
Pour dévisser, utiliser une clé de 10mm
-
-
-
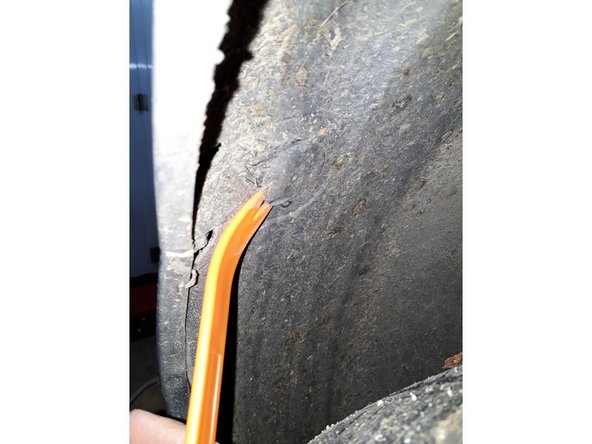
Retirer le clips du passage de roue
-
Pour le retirer, utiliser un outil de démontage de garniture, puis tirer sur le clips.
-
Faire les côtés droit et gauche.
-
-
-
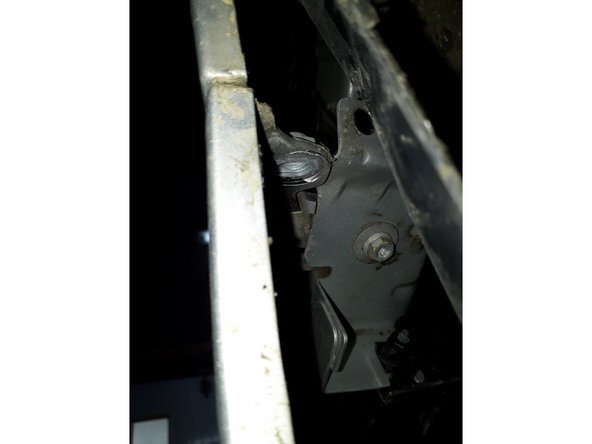
Dévisser la vis avec une clé de 10mm.
-
Conseil: utiliser une clé plate à cliquet ou un cliquet avec des rallonges et cardan pour travailler plus facilement.
-
Faire les côtés droit et gauche
-
-
-
Dévisser les deux vis en bas du passage de roue et le soubassement du pare-choc. Utiliser un embout Torx T20.
-
Faire les côtés droit et gauche.
-
-
-
Tirer ver l'extérieure le pare-choc
-
S'il est bloqué, utiliser les outils de démontage de garniture.
-
Faire les côtés droit et gauche.
-
-
-
Pour démonter, soulever d'abord la partie centrale,
-
Puis vérifier que les ailes su pare-choc sont bien ressorties,
-
Enfin tirer vers l'avant.
-
-
-
Retirer le feu en tirant vers l'avant
-
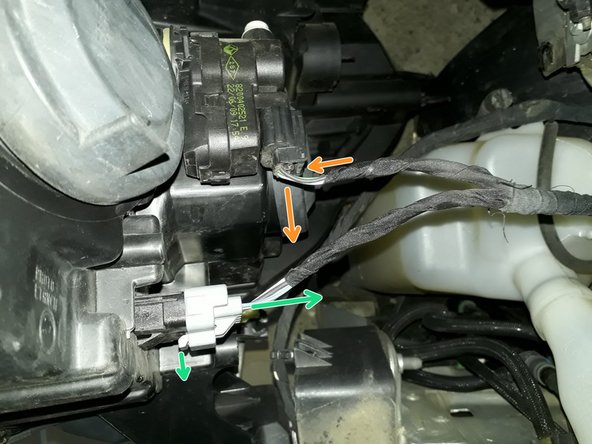
Retirer la connectique:
-
Appuyer puis tirer la cosse
-
Soulever puis tirer la cosse
-
-
-
Remplacer la pièce défectueuse
-
Soit le feu s'il est endommagé.
-
Soit une ampoule du feu car elles sont très difficilement accessibles sans démonter le feu.
-
Remonter le(s) feu(x) puis le pare-choc en suivant les opérations dans le sens inverse.
-


Annulation : je n'ai pas terminé ce tutoriel.
9 autres ont terminé cette réparation.
11 commentaires
Bonjour,
Votre guide ne parle pas de la partie rivetée sur le phare qu’il faut enlever de l’ancien et mettre sur le nouveau (deux rivets à percer)
Ni du module de réglage de la hauteur des feux qu’il faut pivoter pour retirer de l’ancien et mettre sur le nouveau
Merci pour ces photos ainsi que les explications simple. Temps respecté. Sans cela la concession me demandait 1 heure et demi de main d’œuvre.
fabrice cassin - Résolu à la publication Réponse