


Introduction
Permet une réparation rapide du pneu tubeless en cas de perforation simple (clou, vis...). Seule une réparation de la bande de roulement est possible, l’entaille ne doit pas dépasser 6 mm.
Vidéo d'introduction
-
-
Il est possible d'effectuer cette réparation sans démonter le pneu si la crevaison est "lente". Dans ce cas le pneu est complètement dégonflé et a été déposé.
-
Mise en sécurité du véhicule : démontage et remontage de la roue
-
Localiser, sur la bande de roulement, l'origine de la crevaison. Utiliser si nécessaire de l'eau savonneuse pour trouver la perforation qui produira des bulles d'air.
-
Si l'origine de la crevaison est une vis, clou etc, utiliser un tournevis ou une pince pour l'enlever sans agrandir le trou.
-
-
-
Utiliser la lime fournit dans le kit pour preparer le trou avant la pose de la cheville.
-
Insérer la lime dans le pneu puis faire des mouvements de va et vient ainsi que des rotations.
-
Retirer la lime.
-
-
-
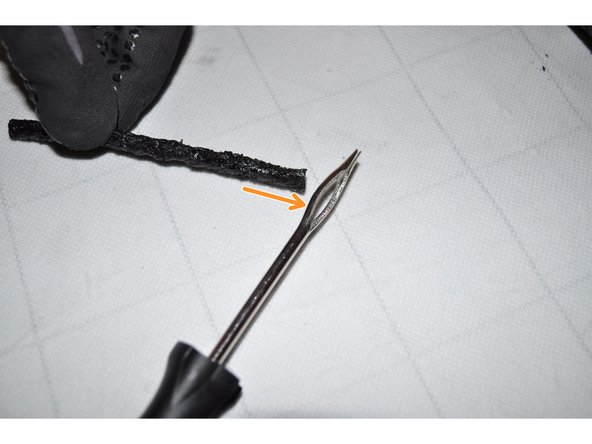
Retirer une mèche autovulcanisante de son emballage ainsi que le porte mèche en forme d'aiguille.
-
Placer la mèche dans le chas de l’aiguille jusqu’à mi-longueur.
-
-
-
Placer la pointe de l’aiguille dans l'axe de la perforation.
-
Pousser fortement pour insérer la mèche dans le pneu.
-
La mèche doit traverser toute l’épaisseur de la structure du pneu mais en laissant 2 ou 3 cm à l’extérieure.
-
-
-
Tourner le porte mèche d'un quart de tour (90 degrés).
-
Tirer d'un coup sec pour retirer l'aiguille et ainsi déposer la mèche.
-
-
-
Découper le surplus de mèche en laissant au moins 1 cm, ne pas découper à ras du pneu.
-
Gonfler le pneu selon les caractéristiques du constructeur.
-
Laisser le processus de vulcanisation faire effet pendant 10 minutes.
-
Vérifié l’étanchéité de la réparation.
-


Annulation : je n'ai pas terminé ce tutoriel.
10 autres ont terminé cette réparation.

3 commentaires
Cool, ça marche très bien, mieux que les explications fumeuses fournies avec le kit. Merci !
vincent.ramond.09 - Résolu à la publication Réponse
Merci Oscaro pour le commentaire j’en ai pris note , il ne me reste plus qu’à m’en servir….
salvador fenoy - Résolu à la publication Réponse