


Difficulté
Modérée
Étapes
14
Temps nécessaire
02:00:00

Ce tutoriel a été créé par la communauté
User contributed
Introduction
Changement des freins arrières (mâchoires + cylindre) sur Clio II 1.5L dCi de 2003.
-
-
Avec la voiture encore au sol et le frein à main enclenché, on commence par desserrer les boulons de roues puis on enlève le cache poussière avec un tournevis plat et un marteau puis on débloque l'écrou d'axe d'un demi tour. Celui-ci peut être serré très fort et grippé.
-
-
-
On lève ensuite le véhicule et on le sécurise avec un chandelle. On peut alors enlever la roue que l'on place sous la voiture.
-
-
-
On fini de dévisser l'écrou d'axe (30 mm) puis on desserre le frein à main puis on repousse le levier du frein à mais avec un petit tournevis.
-
-
-
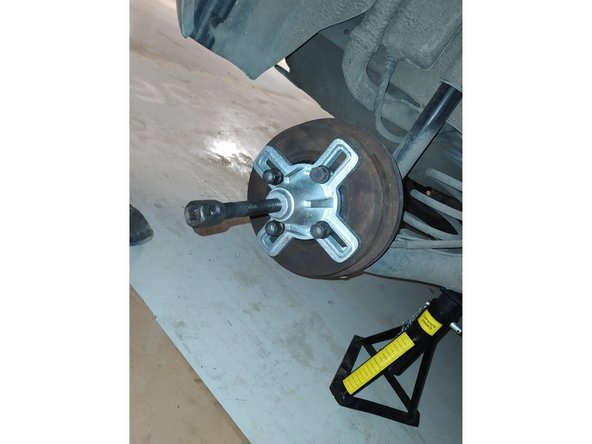
Dans la plupart des cas, le tambour peut se retirer à la main en le tournant un peu dans les sens ou en l'aidant au maillet. Si le tambour est bloqué (décollage d'une garniture par exemple), on peut utiliser un extracteur, ce qui est le cas ici.
-
On a alors accès aux vieilles mâchoires.
-
-
-
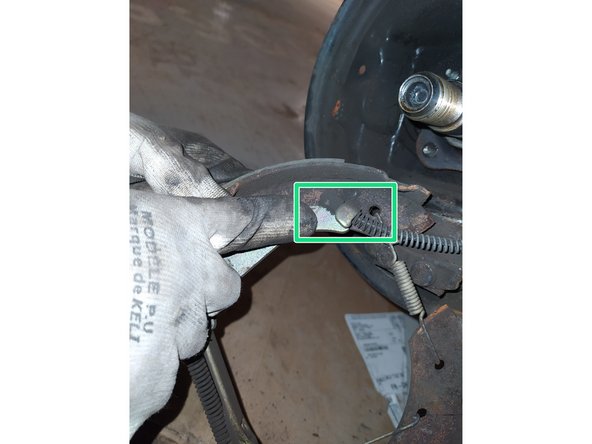
Retirer les anciennes goupilles et coupelles à l'aide d'une pince ou d'un outil dédié (en rouge) afin de libérer les anciennes mâchoires puis retirer le câble de frein à main (qui se situe derrière, en vert) avec un pince ou un outil dédié en prenant soin de ne pas l’abîmer.
-
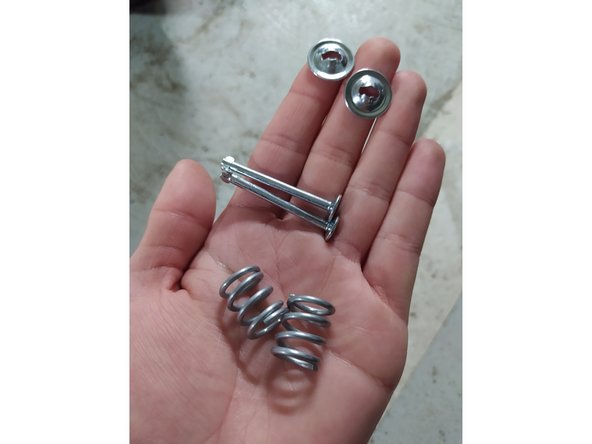
Pour retirer les anciennes coupelles, il suffit de les tourner d'un quart de tour comme on peut le voir avec les coupelles et goupilles neuves fournies avec le nouveau kit.
-
-
-
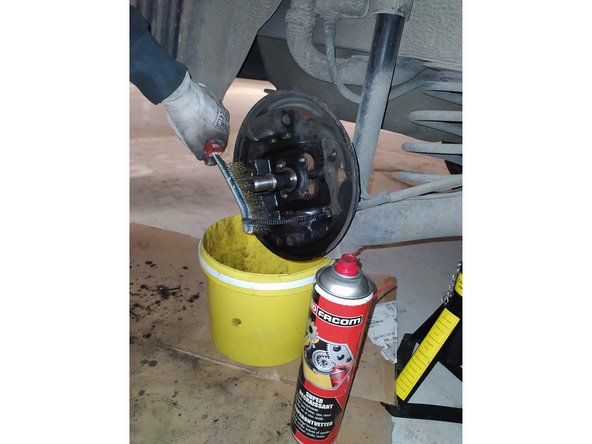
Nettoyage le flasque avec du nettoyant frein et une brosse. Ne pas utiliser de soufflette, le poussière de frein est très toxique !
-
Veillez à ne pas endommager le capteur ABS ou le câble de frein à main.
-
-
-
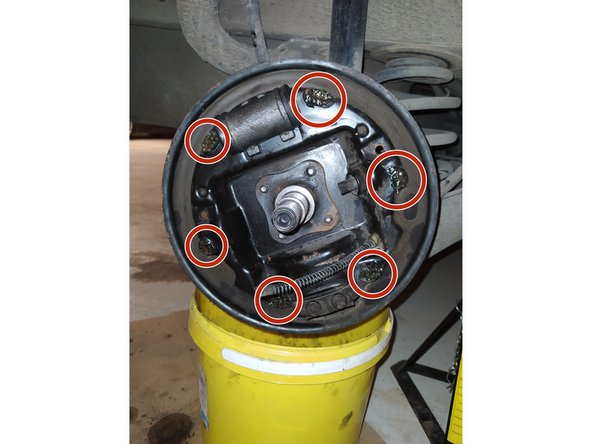
Commencer à dévisser le tuyau d'arrivée hydraulique (en vert) avec une clé à tuyauter (11mm) afin de ne pas endommager l'écrou puis dévisser les deux vis servant à fixer le cylindre (10 mm) (en rouge). Ensuite, finir de dévisser la conduite hydraulique puis déposer le cylindre.
-
Du liquide de frein va couler à petites gouttes donc prévoir un récipient.
-
Une purge sera effectuée à la fin de l'opération.
-
-
-
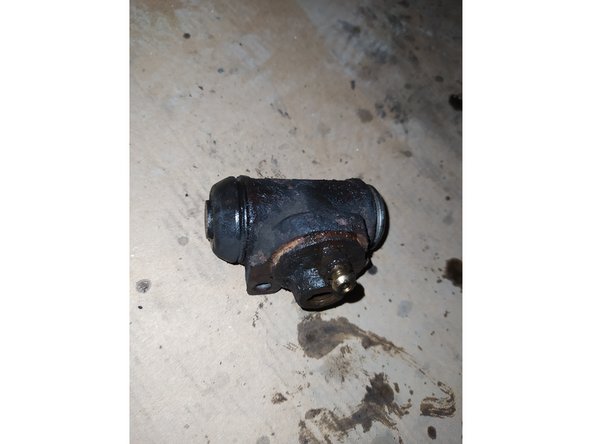
Nettoyer la portée du cylindre comme précédemment puis installer le nouveau cylindre (retirer le bouchon du conduit) en procédant de manière identique à sa dépose.
-
-
-
Graisser légèrement les points d'appuis des mâchoires (en rouge) avec la graisse fournie dans le kit. Un peu sachet suffit pour les deux côtés.
-
-
-
On repose le kit de mâchoires prémontées de manière analogue à la dépose. Le levier du câble de frein à main (en rouge) doit être vers l'arrière de la voiture (ici on fait le côté droit). Ne pas oublier de remettre le câble de frein à main. La partie verte remplace la cale du kit prémonté.
-
Veillez à ce que les mâchoires prennent bien appui sur les pistons du cylindre.
-
Fixer le kit avec les coupelles, goupilles et ressorts fournis. L'opération peut se faire sans outil adapté (une simple pince) mais est assez compliquée.
-
-
-
Tirer le frein à main d'un cran, puis de deux. Le téton sur le levier de frein à main (en rouge) doit se décoller du segment au second cran.
-
Ci cela n'est pas le cas, il faut régler le frein à main (sous la voiture). Consulter le tutoriel adapté pour plus de détails.
-
-
-
Retirer le capuchon (en rouge) et mettez en place un tuyau avec un bidon de purge. Dévissez alors légèrement la vis de purge (8mm). Et demandez à une autre personne de pomper sur la pédale de frein.
-
Lorsqu'il n'y a plus de bulles, la purge est bonne. Remettez du liquide de frein Dot4 dans le bocal.
-
Vous pouvez également contrôler son état avec un testeur de liquide frein (qui mesure le taux d'humidité)
-
-
-
Graisser l'axe et remonter le tambour.
-
Le couple de serrage pour l'écrou d'axe est 175 N.m et 100 N.m pour les vis de roues. Remettre le cache poussière à l'aide d'un maillet.
-
Remonter la roue et reposer le véhicule au sol.
-
-
-
Une fois les deux côtés réalisés, pomper sur la pédale de frein. Vous devez entendre un clic. Il est du à la rotation de la roue dentée du rattrapage automatique servant à placer les mâchoires au plus près du tambour. Pomper jusqu'à ne plus entendre les 'clics'.
-
Essayer sur route, commencer par des petits freinage avant de partie. Tester également le frein à main en pente.
-


Annulation : je n'ai pas terminé ce tutoriel.
5 autres ont terminé cette réparation.
3 commentaires
Parfait, ça ma beaucoup aidé pour mon vieux kangoo 1! Merci
thomas78260 - Résolu à la publication Réponse
Le circlips visible après avoir retiré l'écrou central ne doit pas être retiré, celui-ci sert a maintenir les roulements dans le tambour.
Letof21 -