Introduction
Ce guide vous aidera à créer un tutoriel mécanique.
-
-
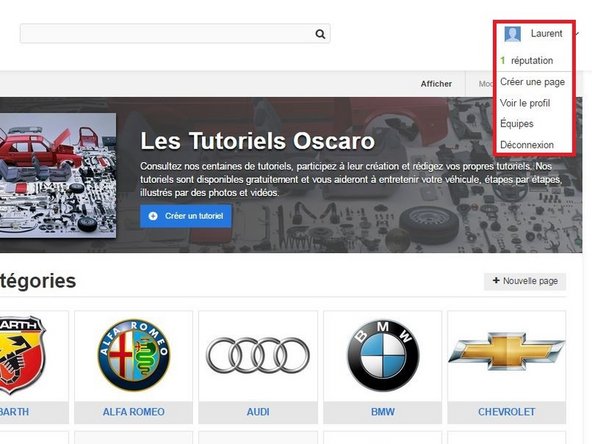
Cliquez sur le menu utilisateur en haut à droite de la page.
-
Une liste d'actions apparaît.
-
-
-
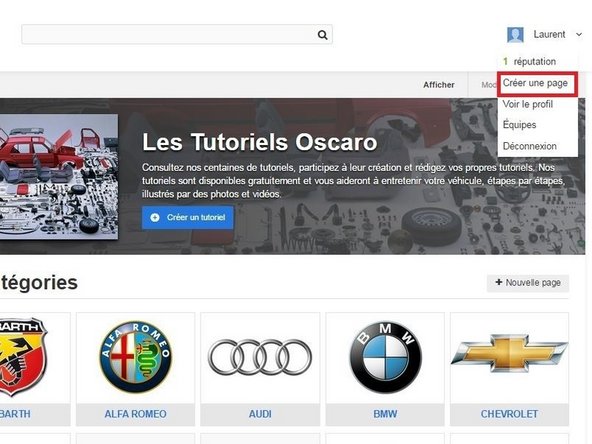
Cliquez sur Créer une page dans la liste d'actions qui est apparue.
-
-
-
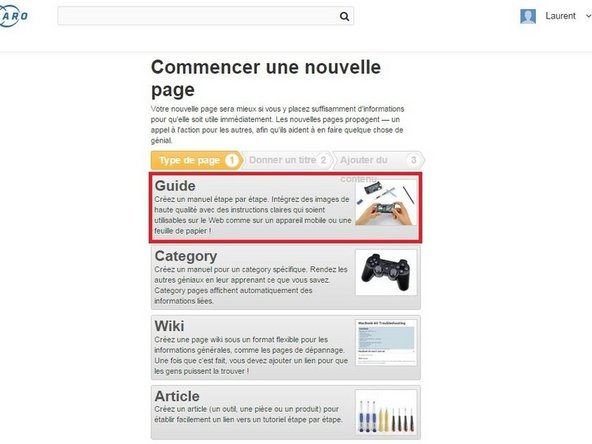
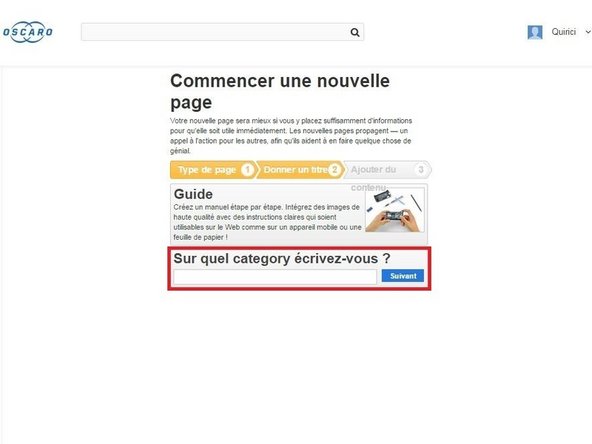
Vous serez redirigé vers une page où vous avez la possibilité de créer quatre types de page.
-
Sélectionnez Guide.
-
-
-
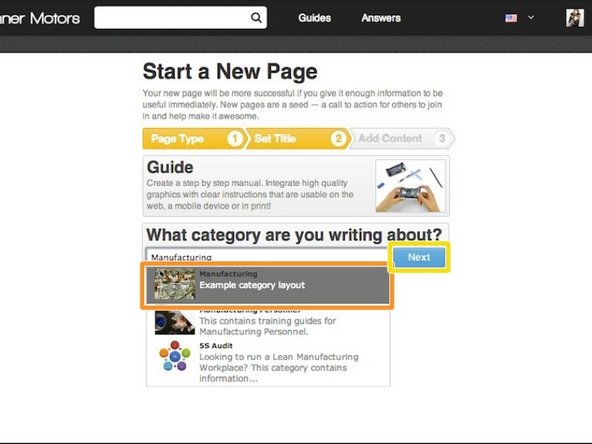
Tapez la marque du véhicule pour lequel vous souhaitez créer un tutoriel.
-
Si la marque du véhicule est déjà créée, celle-ci apparaîtra dans la liste déroulante sous le texte.
-
Sélectionnez la marque du véhicule dans la liste déroulante.
-
Cliquez sur Suivant.
-
-
-
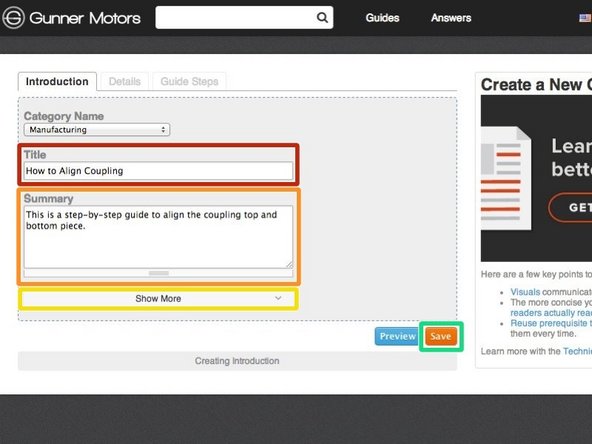
Give your guide a title.
-
Add a summary about what the guide will accomplish.
-
If you would like to add other information at this time, such as an introduction or flags, press See More.
-
When finished adding information, press Save.
-
-
-
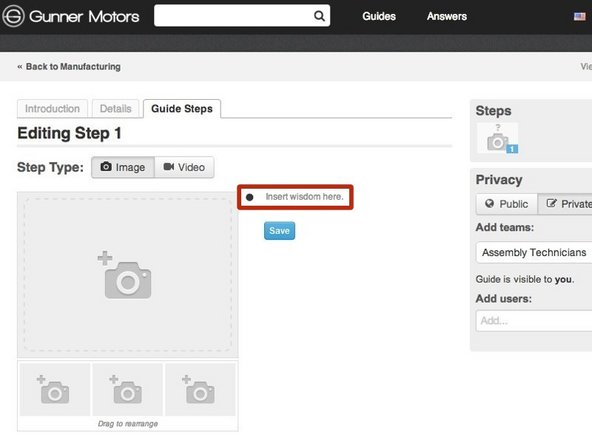
Begin creating the body of your guide by inserting step-by-step instructions.
-
Click Insert Wisdom Here to select a bullet point to type in.
-
-
-
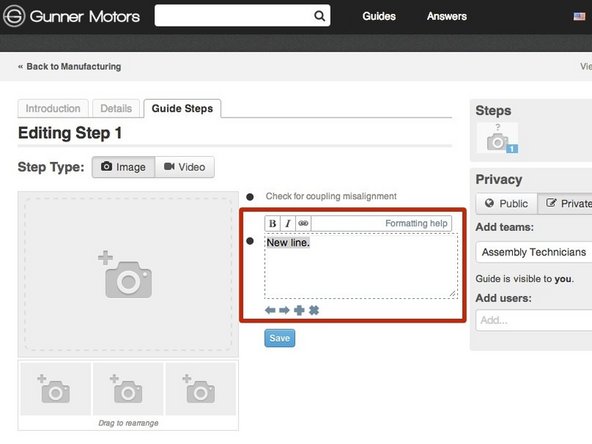
Type instructions into the text box that appears.
-
-
-
To add another bullet point, press Enter while in the text box of a previous bullet point or press the + below the previous text box.
-
Type all of the information that you need for this step into bullets.
-
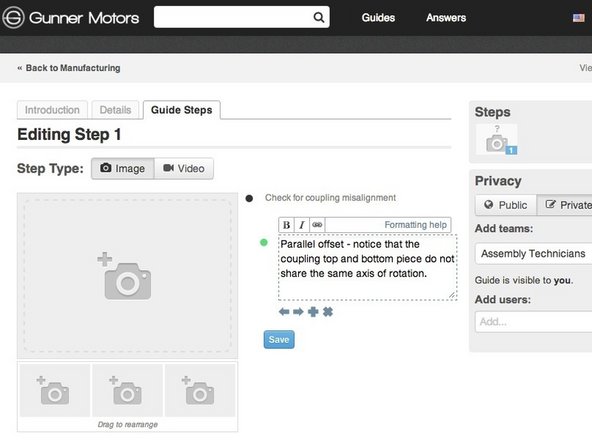
For additional formatting of bullets, such as making them colored or a symbol, see [lien de tutoriel non valide].
-
If you would like to indent a bullet, like shown in the picture, either click the right arrow below the text box or press tab.
-
When you are done adding information, press Save.
-
-
-
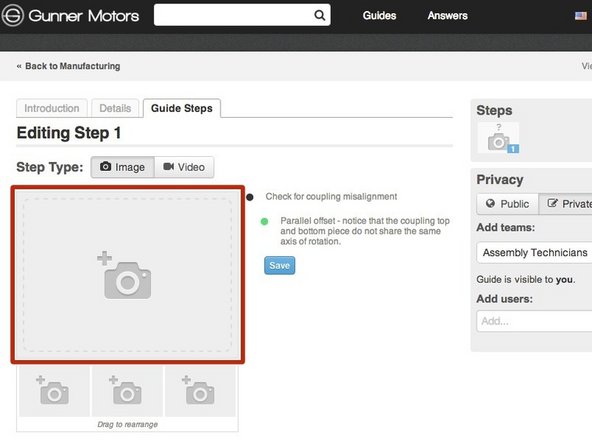
Now that you have added written instructions, it's time to add visuals.
-
Click on the the grey image placeholder next to the bullet points of information that you typed.
-
-
-
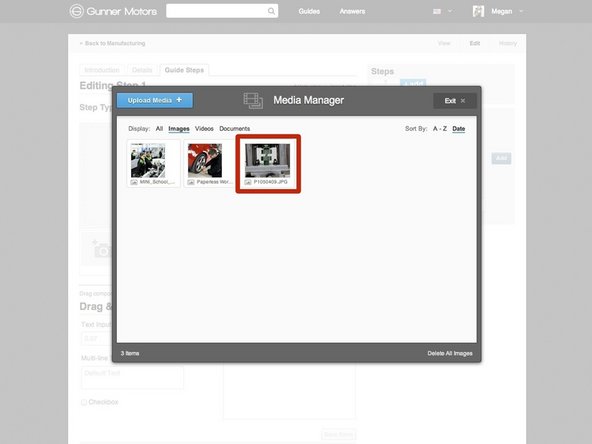
When you click on the image placeholer, the Media Manager will pop up.
-
For in depth instructions on how to use the Media Manager, see [lien de tutoriel non valide].
-
Choose a photo or video to insert by clicking on it.
-
All images must be at least 800 px by 600 px, and in 4:3 aspect ratio.
-
Press Save.
-
-
-
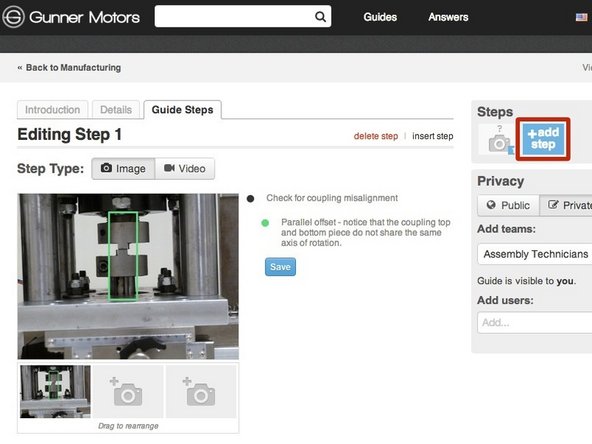
To add another step to your guide, press the Add Step button.
-
Repeat [lien de tutoriel non valide] through [lien de tutoriel non valide] until all of your information is in the guide.
-
For further information on guides, please see the Dozuki Help Documentation about Guides.
-


![For additional formatting of bullets, such as making them colored or a symbol, see [lien de tutoriel non valide].](https://d3t0tbmlie281e.cloudfront.net/igi/oscaro/y53qoJsgXLmtVMSn.medium)
![For in depth instructions on how to use the Media Manager, see [lien de tutoriel non valide].](https://d3t0tbmlie281e.cloudfront.net/igi/oscaro/n1MFQOBXoovKasHB.medium)