


Difficulté
Modérée
Étapes
7
Temps nécessaire
04:00:00

Ce tutoriel a été créé par la communauté
User contributed
Introduction
Suite au contrôle technique on m'a indiqué un problème au niveau du train avant, en effet on entend un craquement lors du passage sur dos d'âne alors que les amortisseurs sont flambants neufs.
-
-
Lever et caler l'avant du véhicule. Déposer les roues.
-
Mise en sécurité du véhicule : démontage et remontage de la roue
-
Utiliser une sangle pour immobiliser la jambe de suspension sur le châssis, cela empêchera la transmission de se déboîter.
-
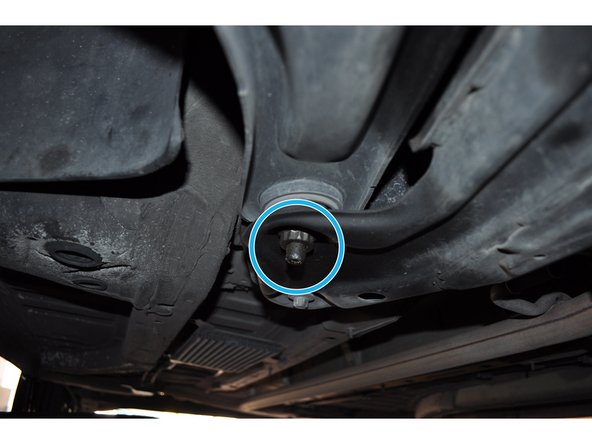
Dévisser l'écrou de la bride à l'aide d'une clé de 16 mm.
-
-
-
Retirer la vis de la bride.
-
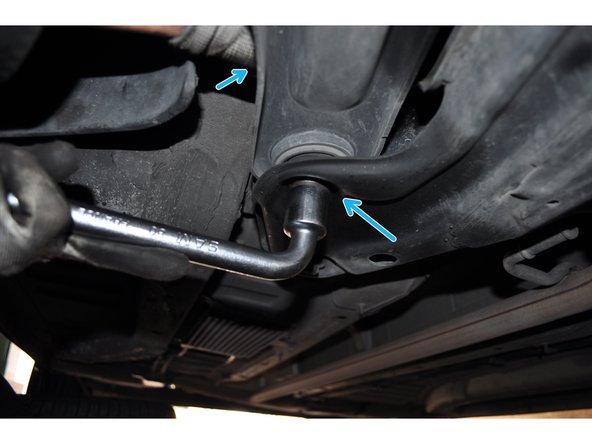
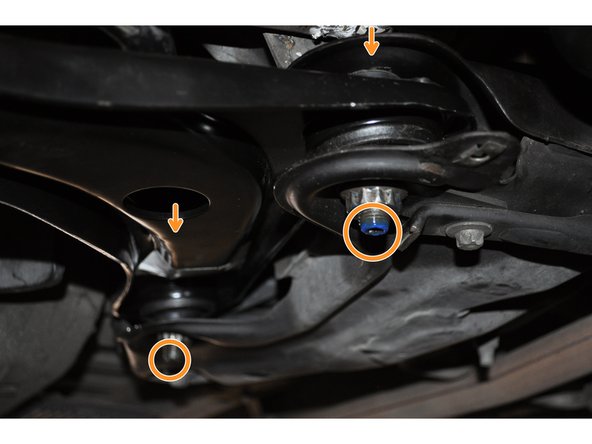
Mettre le triangle à l'horizontale à l'aide du cric et d'une cale placée sous le disque de frein pour libérer la tension que la suspension applique sur le triangle et faciliter l'extraction de la rotule.
-
Utiliser l'arrache rotule pour la séparer du pivot.
-
-
-
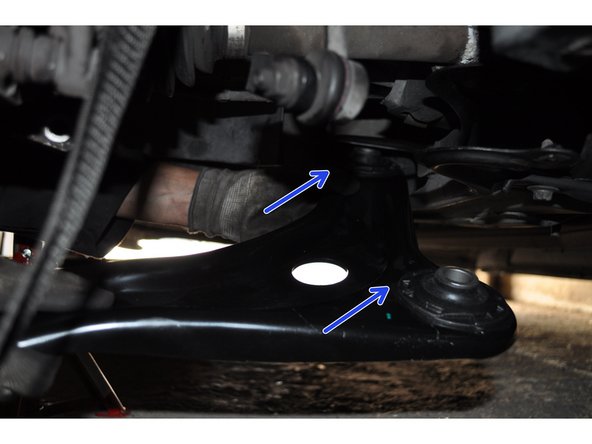
Le triangle possède deux vis de fixations sur le berceau avant.
-
Maintenir la vis Torx T50 par dessus et déposer l'écrou de 22 mm en dessous.
-
-
-
Faire de même sur l'autre point de fixation du triangle.
-
Déposer le triangle en tirant dessus vers l’extérieure.
-
-
-
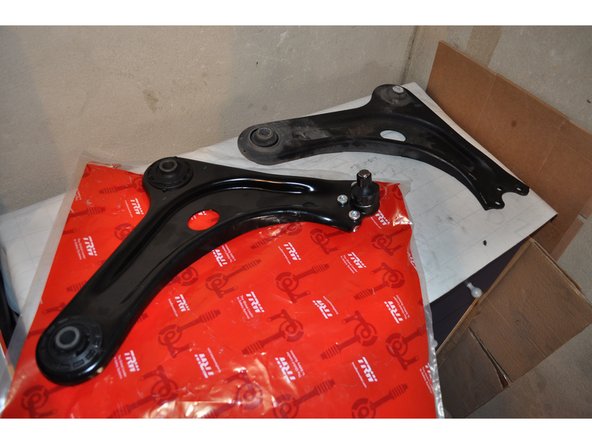
Replacer le nouveau triangle dans le berceau avant.
-
Appliquer du frein filet moyen (1 à 2 gouttes suffisent au bout de chaque vis) et insérer les 2 vis de fixation puis approcher les écrous.
-
Resserrer les écrous.
-
-
-
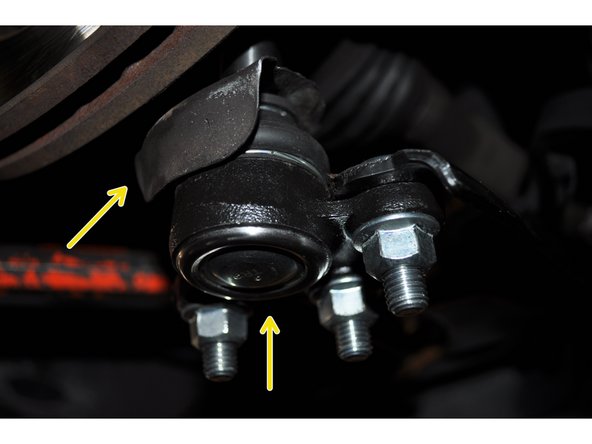
Ne pas oublier la petite plaque de protection de rotule et terminer en replaçant la rotule dans le pivot.
-
Retirer la sangle et vérifier le bon fonctionnement.
-
Remonter la roue: Mise en sécurité du véhicule : démontage et remontage de la roue
-


Annulation : je n'ai pas terminé ce tutoriel.
4 autres ont terminé cette réparation.
5 commentaires
Perso j'ai eu du mal à maintenir la jambe de force proche du châssis, il faut vraiment une sangle a mécanisme pour éviter que ça travaille au niveau du nœud, conséquence pour moi deboitage de la transmission et huile de boite par terre.
thomas remy71 - Résolu à la publication Réponse
Bonjour, j’ai eu des difficultés à faire ce démontage ! Par chance, j’ai découvert votre explication en images : c’est clair et qq astuces pour aller au bout ce que d’autres cachent pour un motif vicieux … A dire vrai les gens feront vite la différence comme ce fut mon cas ! Bravo pour un document clair et concis .
Daniel (Lodan)
Daniel Azzis - Résolu à la publication Réponse