


Introduction
Motorisation du véhicule 1.4 HDi 70 cv
-
-
Débrancher les cosses de la batterie
-
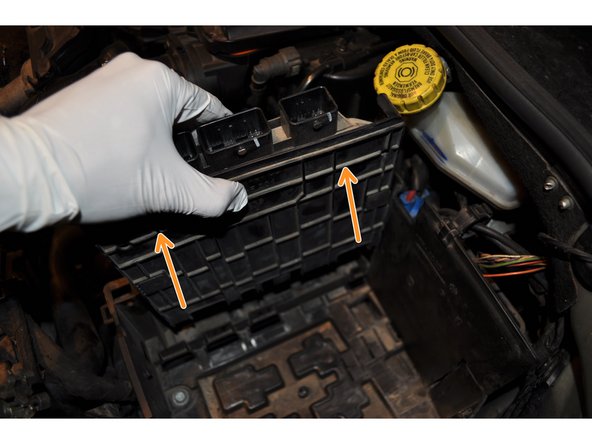
Sortir la batterie de son bac
-
-
-
-
Débrancher les trois connecteurs du calculateur electro injection
-
Faire pivoter la partie grise pour déverrouiller le connecteur
-
Tirer à la verticale pour sortir le calculateur du bac à batterie
-
-
-
Déposer la cloison protégeant le calculateur direction assistée
-
Débrancher les trois connecteurs du calculateur
-
Dégrafer les câbles fixés sur le bac à batterie
-
-
-
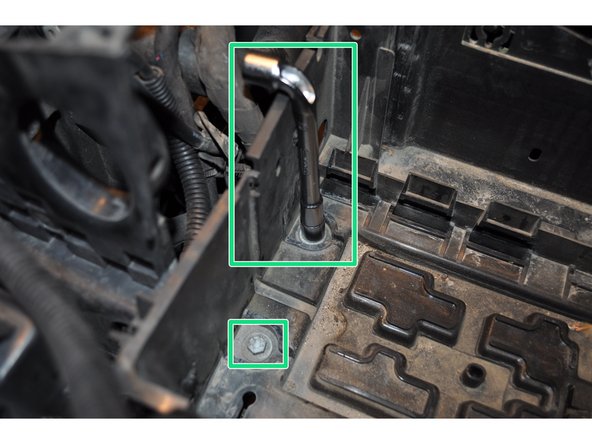
Le bac est maintenu par deux vis
-
Utiliser une clé de 10 mm pour les déposer
-
Sortir le bac à batterie du compartiment moteur
-
-
-
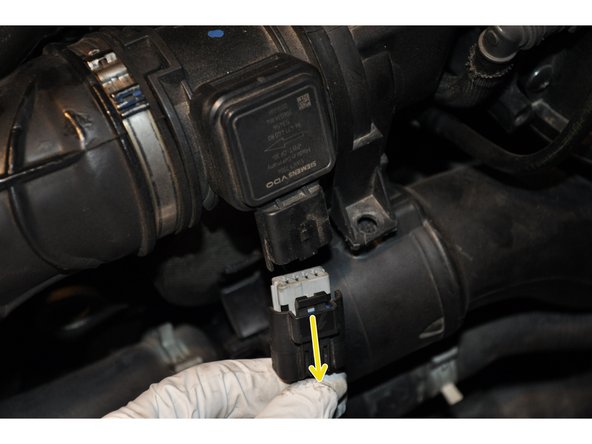
Déposer le connecteur du débimetre d'air
-
Déposer la seconde conduite d'admission d'air qui est coudée et emboîtée sous la boite à air
-
-
-
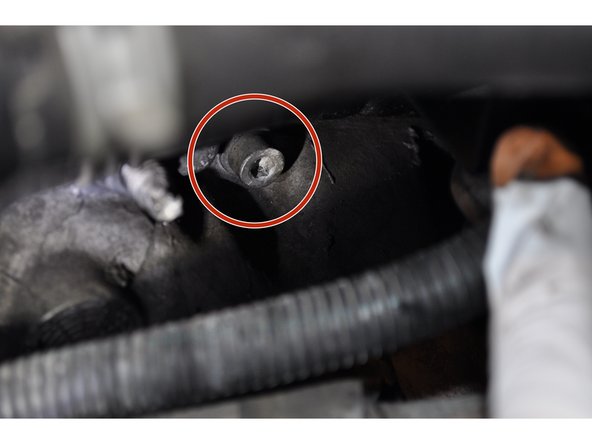
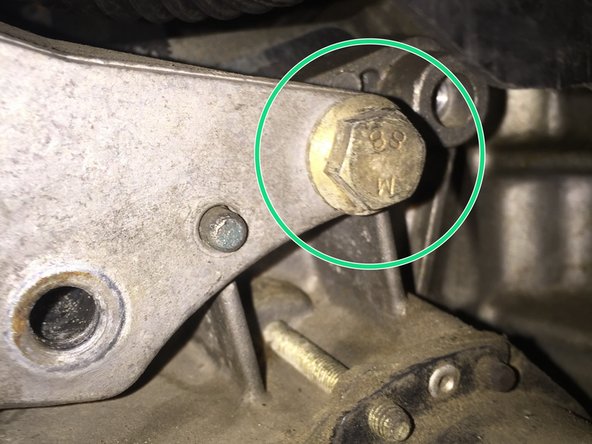
Il est à présent possible d’accéder à la vis supérieure du démarreur située sur le châssis de la boite de vitesse
-
Utiliser un embout six pan de 6 mm pour déposer la vis supérieure
-
-
-
Lever et caler l'avant du véhicule
-
Mise en sécurité du véhicule : démontage et remontage de la roue
-
L’accès au démarreur se fait sous le véhicule, à l’arrière de l’ensemble moteur + boite de vitesse
-
Déposer les deux cosses situées sur le solénoïde à l'aide de clés de 8 et 10 mm
-
Déposer la vis inférieure du démarreur
-
-
-
La troisième et dernière vis de fixation du démarreur est plus difficile d’accès. Elle se situe au dessus du solénoïde
-
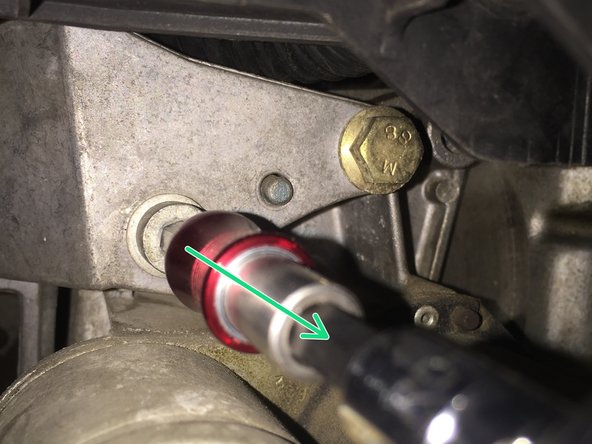
Utiliser un cliquet et une rallonge avec un embout six pan 6 mm
-
-
-
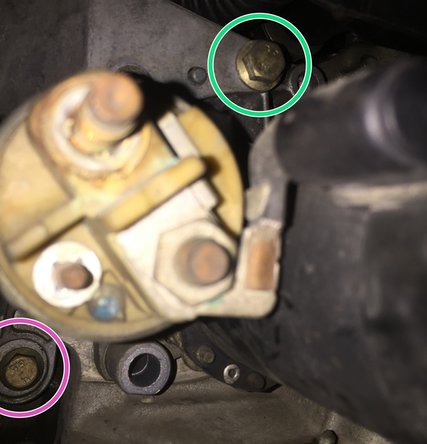
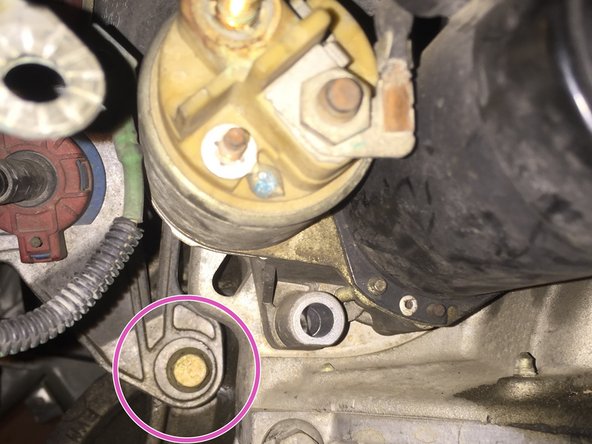
La pâte de support des câbles de boite de vitesse est fixée sur le démarreur en deux points
-
Déposer l'écrou inférieure a laide d'une clé de 13 mm
-
Faire de même avec la seconde vis au dessus du démarreur
-
-
-
Déloger le démarreur de son emplacement
-
Sortir le démarreur par l’arrière du véhicule, au dessus de la crémaillère de direction. Le long des câbles de la boite de vitesse puis entre le berceau avant et le tuyau d’échappement
-
-
-
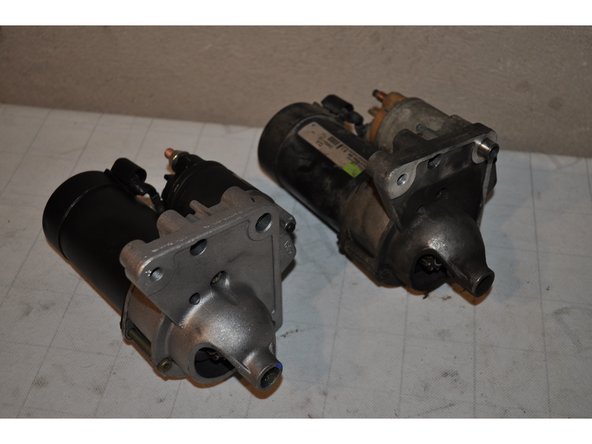
Comparer les caractéristiques des démarreurs
-
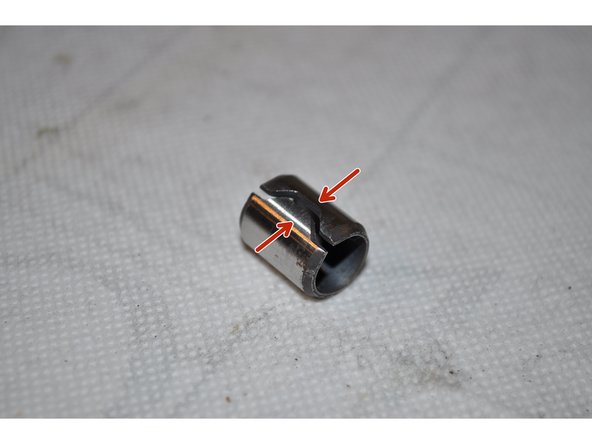
Récupérer le centreur sur l'ancien démarreur et le placer sur le nouveau
-
-
-
Faire rentrer le démarreur par dessous le véhicule
-
Le mettre en place sur la boite de vitesse grâce au centreur
-
Reposer les quatre vis
-
-
-
Vérifier l'état des cosses et nettoyer la surface de contact avec une brosse métallique
-
Serrer les écrous des cosses sur le solénoïde
-
Remettre en place la vis supérieure du démarreur
-
-
-
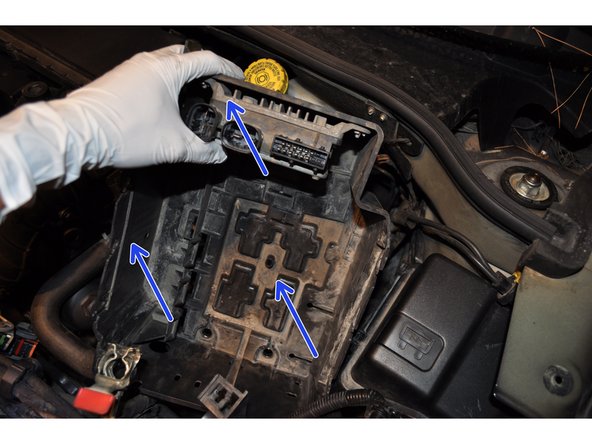
Remettre en place le bac à batterie et les calculateurs
-
Reposer la batterie et les caches
-
-
Patienter 5 minutes après le rebranchement pour que le calculateur puisse s'initialiser avant de démarrer le véhicule
-


Annulation : je n'ai pas terminé ce tutoriel.
13 autres ont terminé cette réparation.

10 commentaires
La vis du haut ?? Vous prenez vraiment les gens pour des idiots ! On ne la voit pas et lorsqu'on y a accès à l'aveugle la rallonge du cliquet ne peut pas être droite ! Faire des tutos pour des garagistes avec des ponts et qui ont démonté la moitié du châssis pour les photos c'est top PAR CONTRE INUTILE POUR UN GARS QUI GALÈRE SUR LE TROTTOIR 😡😡😡 idiots
puglianoclaudio - Résolu à la publication Réponse
bravo
mais pas seulement un bon cric et des chandelles
haward.jean - Résolu à la publication Réponse
Très bon tuto , bien détaillé.
Le plus gros du travail s’effectue dessous la voiture donc prévoir un bon cric!
Cédric PASCAL - Résolu à la publication Réponse
Merci pour le tuto, ça m’a apporté une aide précieuse surtout pour bien visualiser cette ce maudit support de câble de vitesses. Intervention réalisé sur une c3 hdi 1.4. C’est exactement le même chose.
Eric Crevon - Résolu à la publication Réponse
Merci beaucoup, première intervention sur une voiture rondement menée (4h au moins, dernière vis la plus compliquée à mon sens). Ce qui démontre la qualité du tuto ;)
Bruno Marchal - Résolu à la publication Réponse