


Introduction
Ce tutoriel est réalisé sur Une Peugeot 307 2.0 Hdi 90 Cv
Vidéo d'introduction
-
-
Avant de commencer placer les roues avant bien droite de façon à centrer la direction en vous aidant du volant
-
Porte conducteur ouverte et contact coupé depuis plus de 10 minutes
-
Déconnecter la borne + de la batterie pour la mise hors tension du véhicule
-
-
-
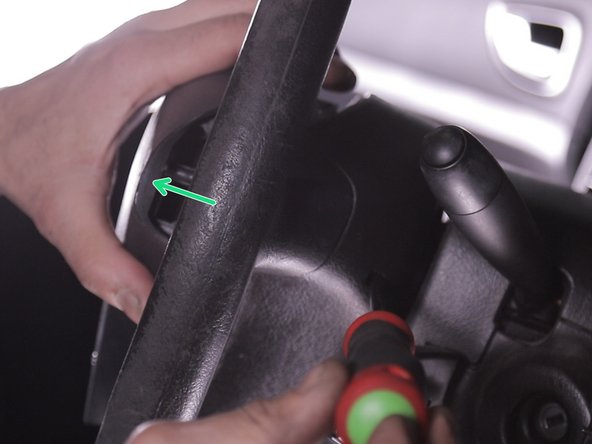
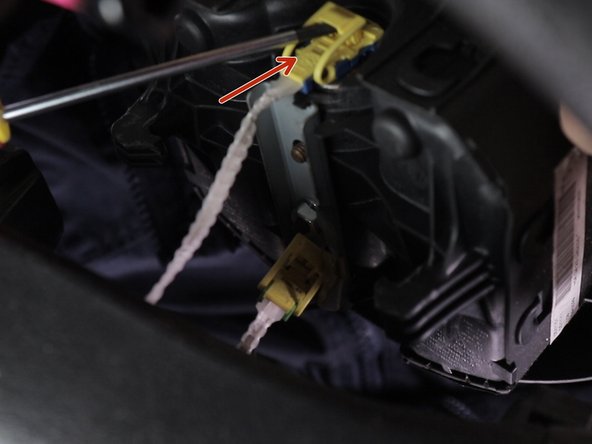
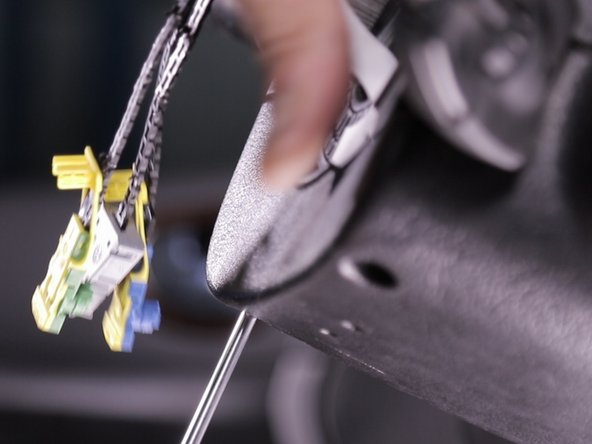
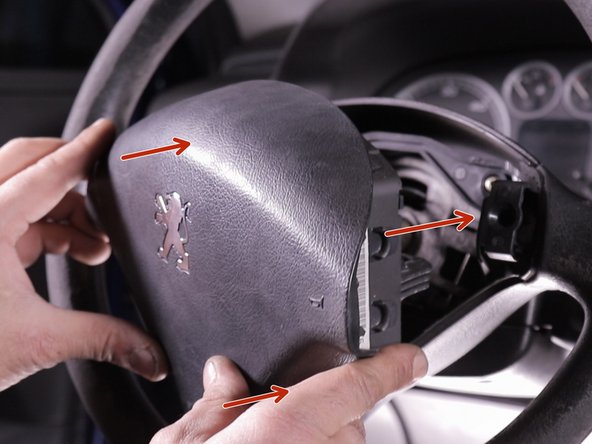
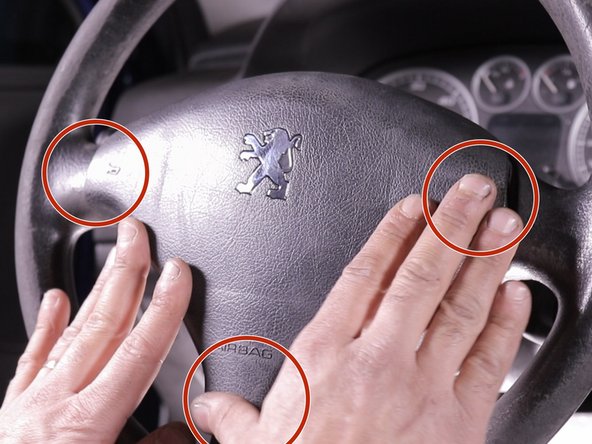
Déclipser l'air bag avec un tournevis en poussant le ressort de chaque côté du volant
-
Introduire le tournevis dans les trous qui se trouvent de chaque côtés du volant
-
Pousser pour déclipser et tirer sur l'air bag
-
-
-
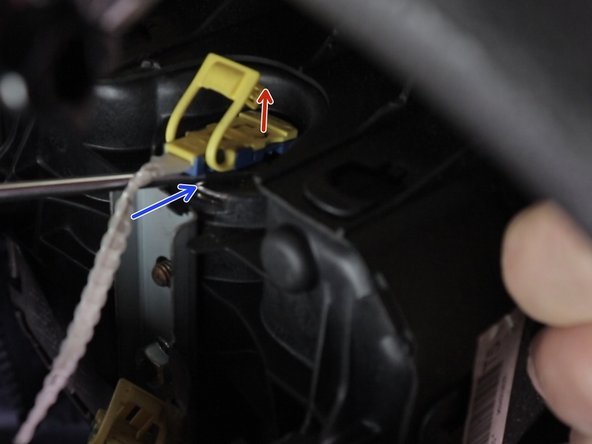
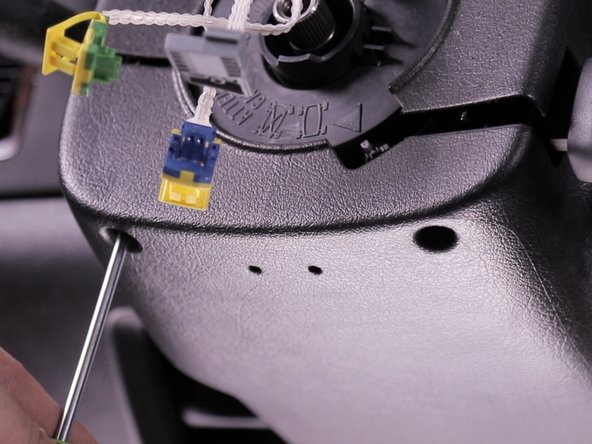
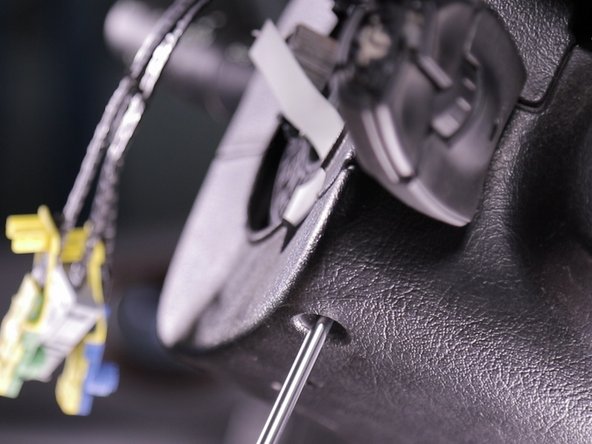
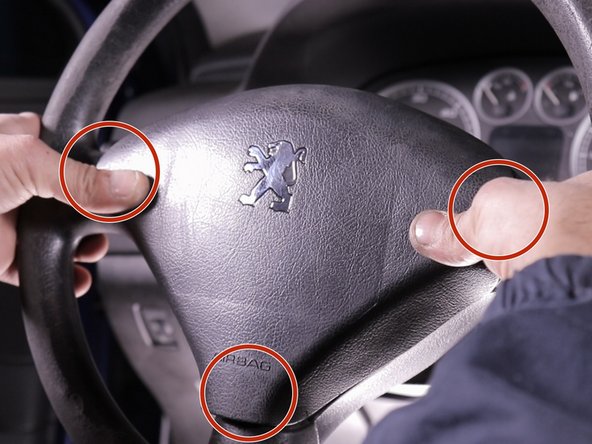
Introduire le tournevis dans le second trou du volant
-
Pousser sur le tournevis
-
Déclipser l'airbag et tirer la totalité de l'airbag vers vous
-
-
-
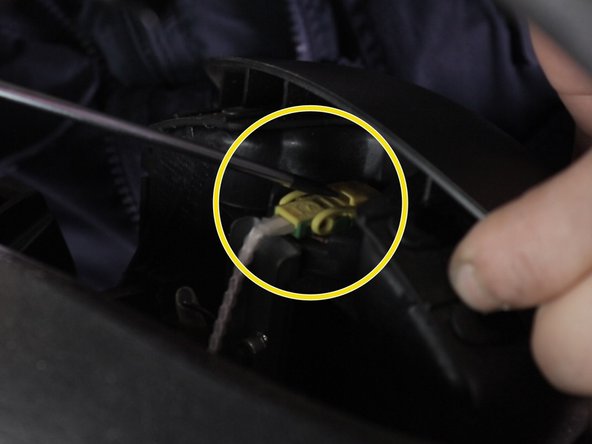
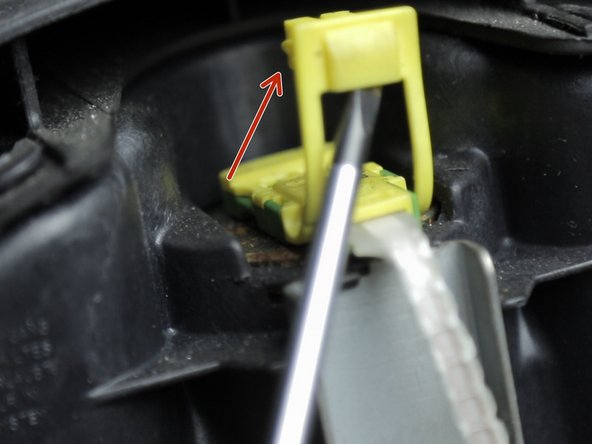
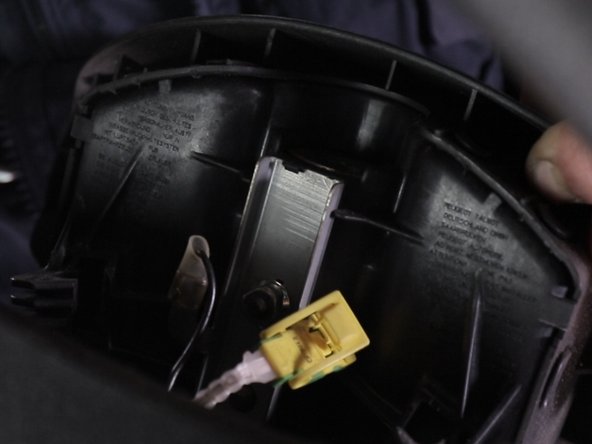
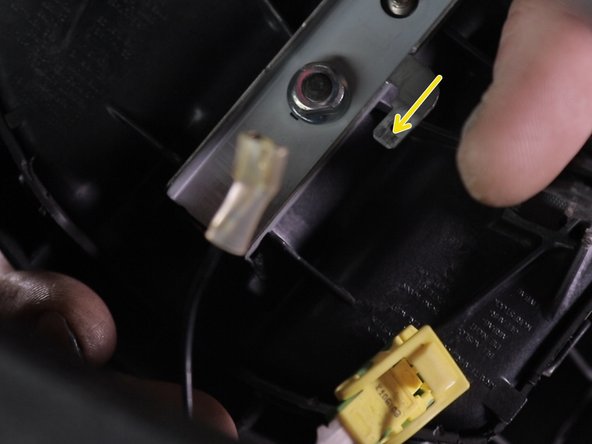
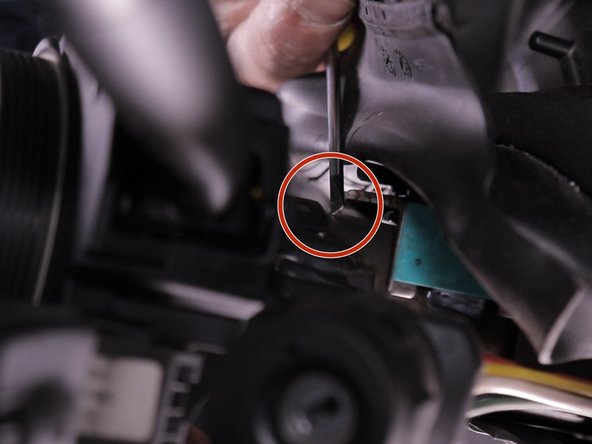
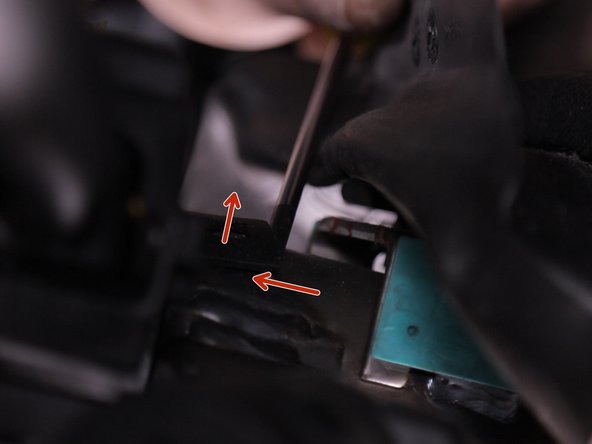
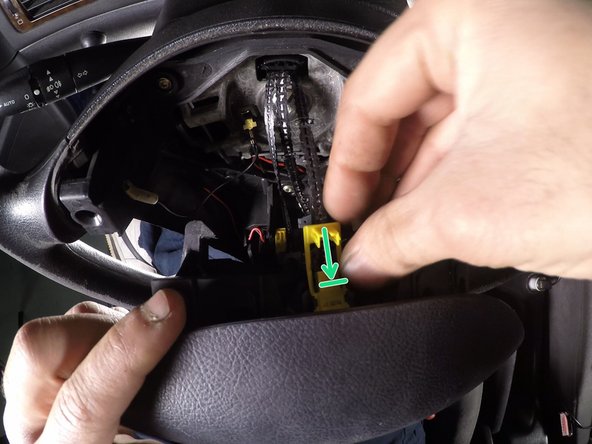
Derrière l'airbag se trouve les connecteurs (un en haut et un autre en bas) soulever la languette de verrouillage du connecteur avec un tournevis plat
-
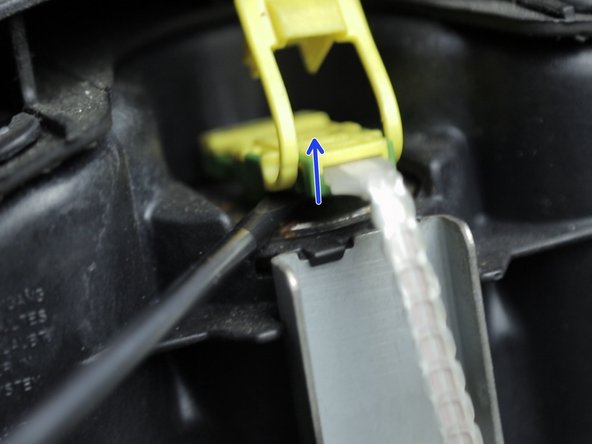
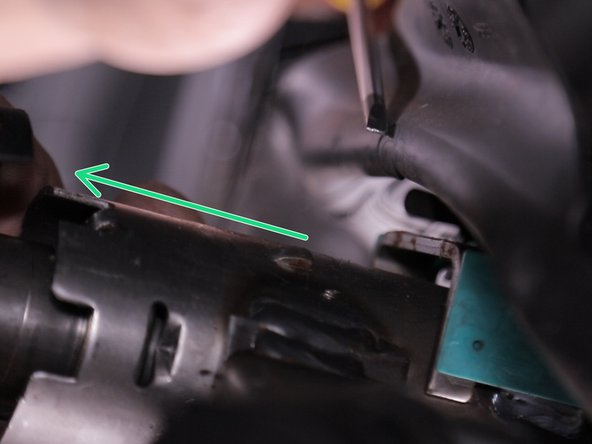
Retirer le connecteur en faisant levier avec le tournevis plat
-
-
-
Retourner l'air bag pour accéder à celui d'en bas puis répéter la même opération
-
Retirer le connecteur en faisant levier avec le tournevis plat
-
-
-
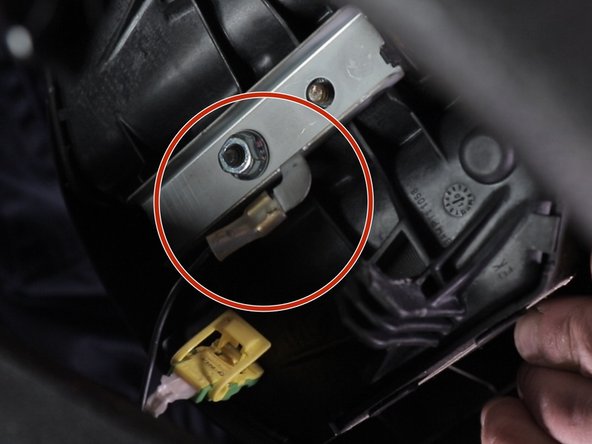
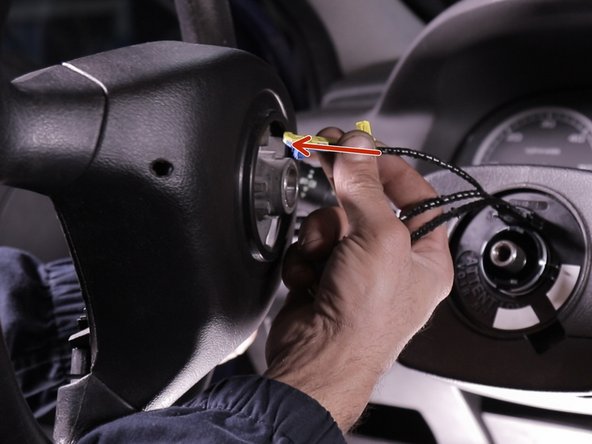
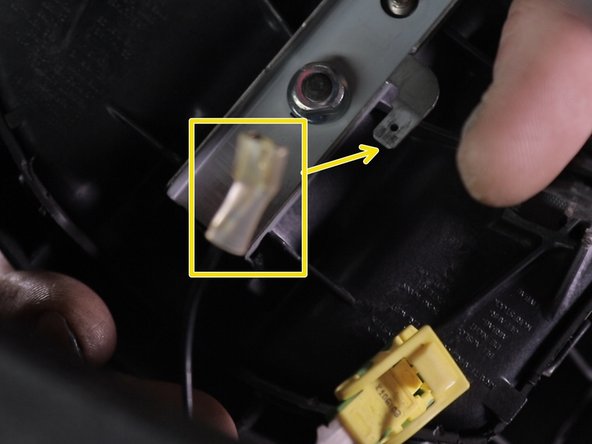
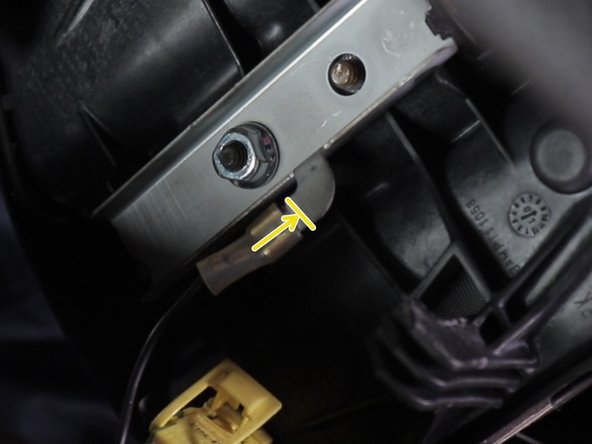
Débrancher la cosse de masse en poussant dessus
-
Déposer l'air bag
-
-
-
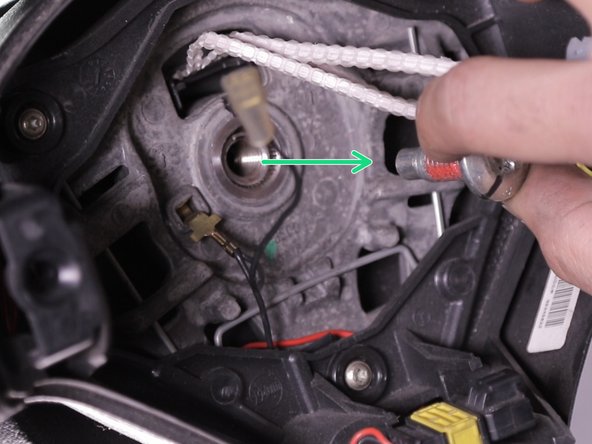
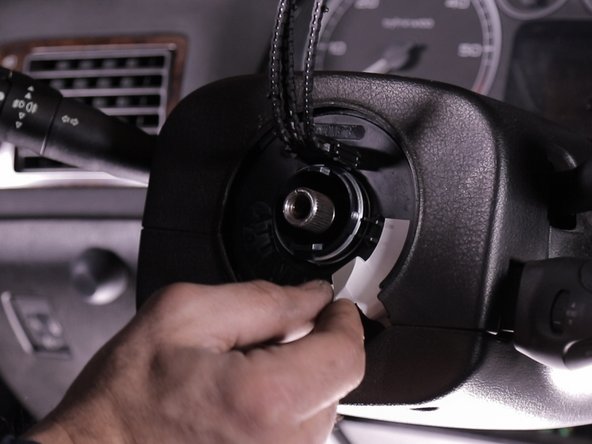
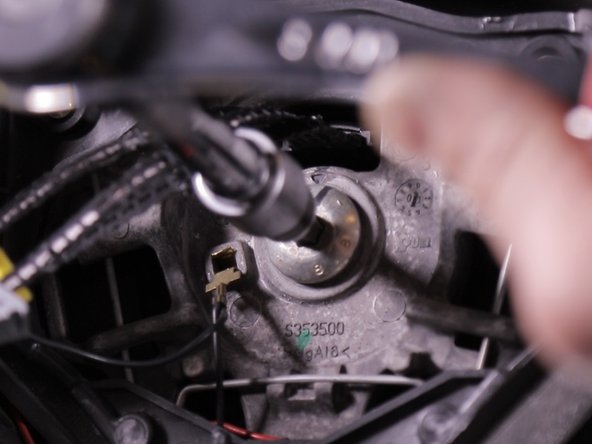
Desserrer la vis centrale à l'aide d'une douille torx 45, une rallonge et un cliquet
-
Astuce : bloquer le volant avec vos deux genoux pour facilité le desserrage
-
Retirer la vis centrale
-
-
-
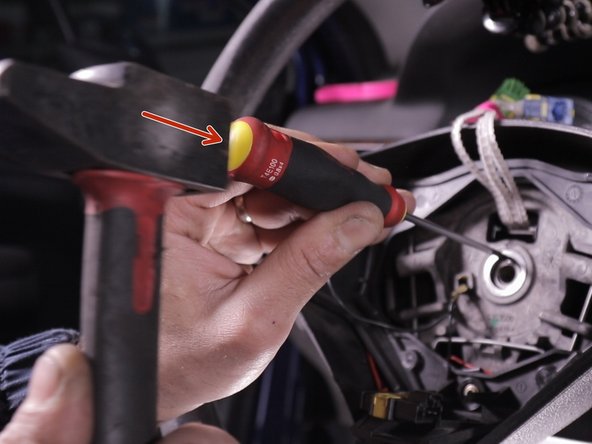
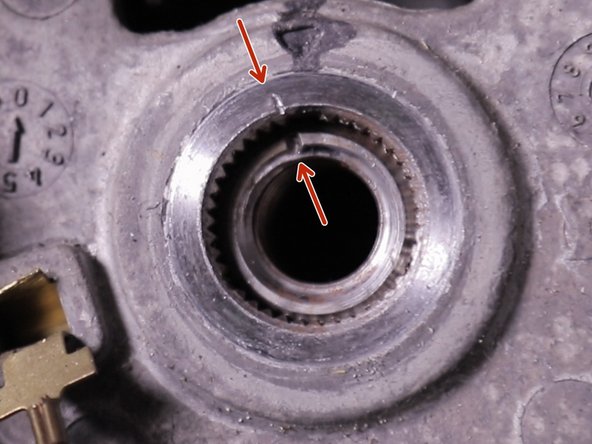
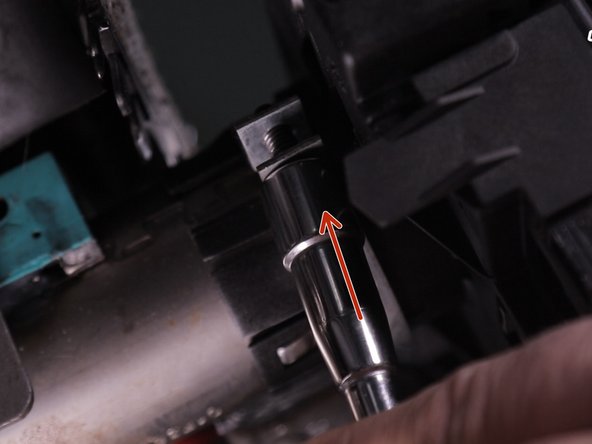
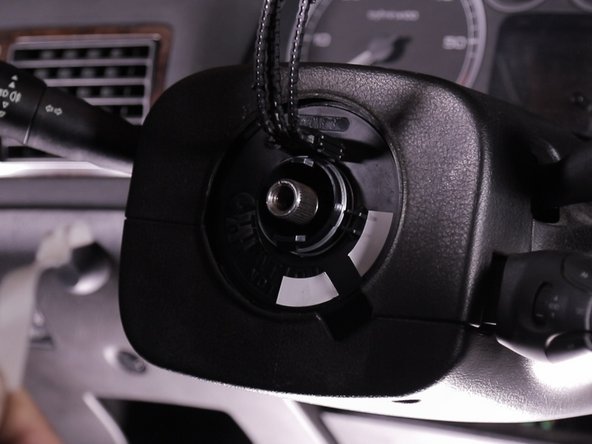
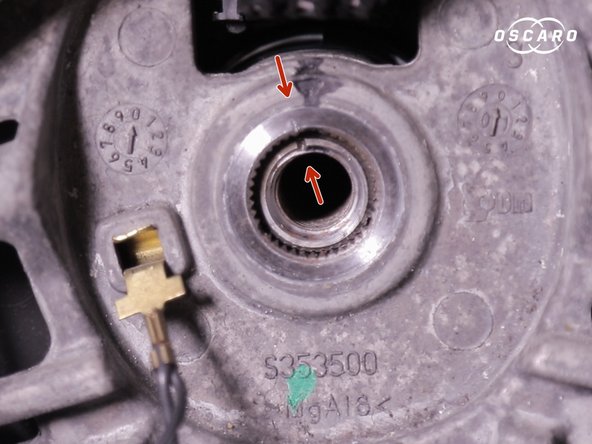
Afin de faciliter la repose du volant, effectuer un marquage sur le volant afin de le remettre parfaitement droit comme à la dépose
-
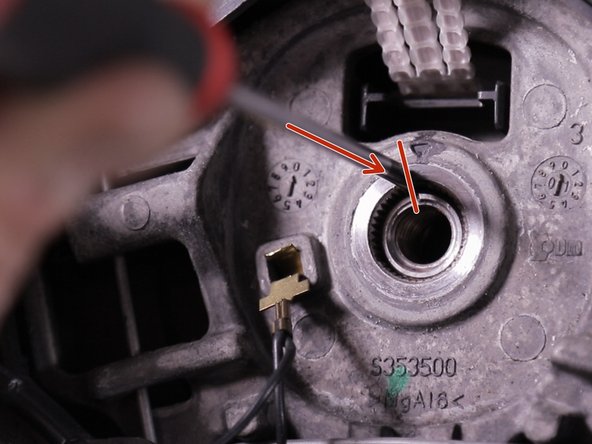
Pour cela, un repère est indiqué sur la direction, saisissez un tournevis plat et un marteau puis marquez le volant du même repère, bien droit à celui de la direction
-
A la repose, vous n'aurez plus qu'à aligner les deux repères et votre volant sera aligner à la direction
-
-
-
Le volant n'est pas libre, en le tirant vers vous vous risquer de vous faire mal
-
Astuce : Tapez fort plusieurs fois sur les deux extrémités du volant avec vos mains et tirez-le tranquillement.
-
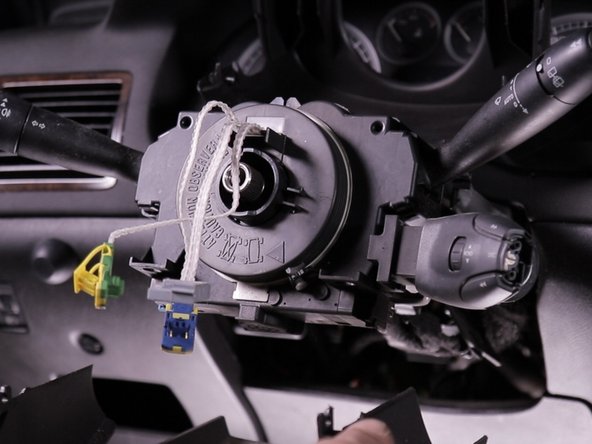
Retirer le volant en guidant les connecteurs
-
-
-
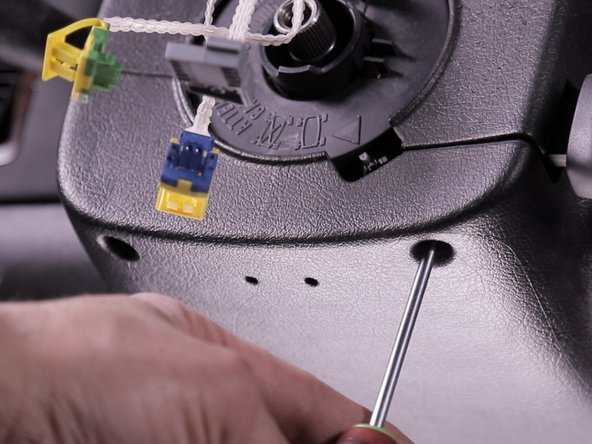
Passer les connecteurs un par un, par le trou du volant
-
Déposer le volant
-
-
-
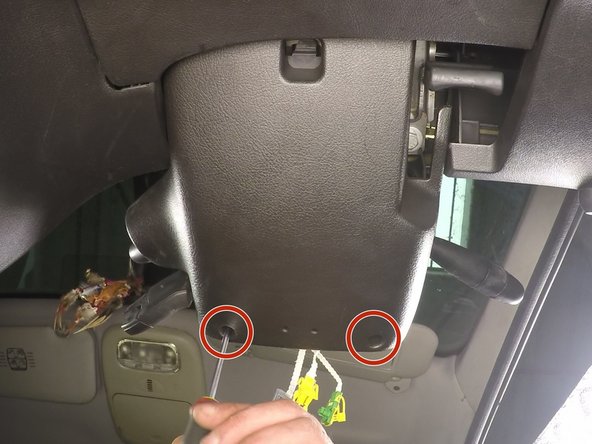
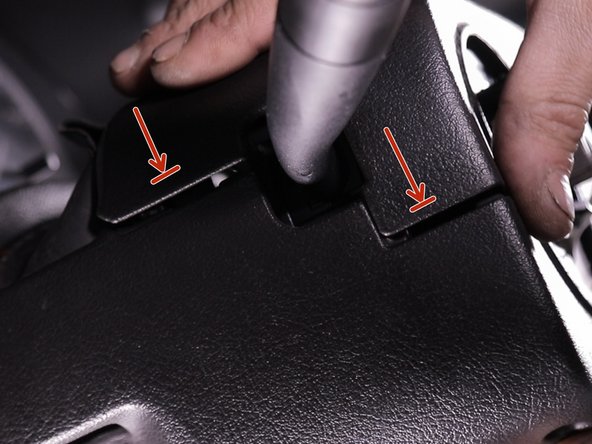
Desserrer les deux vis se trouvant dans la coquille inférieur du volant à l'aide d'un torx T20, ces vis ne se retirent pas
-
-
-
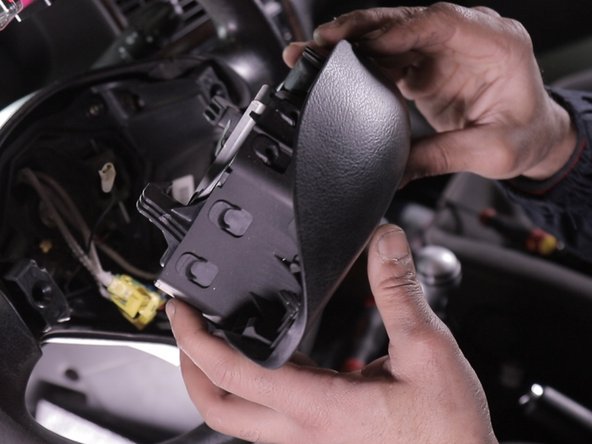
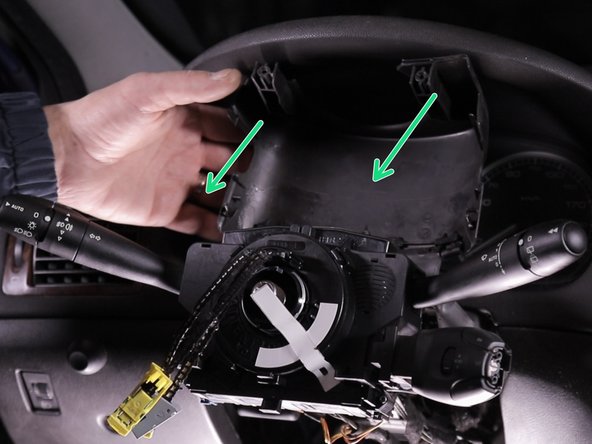
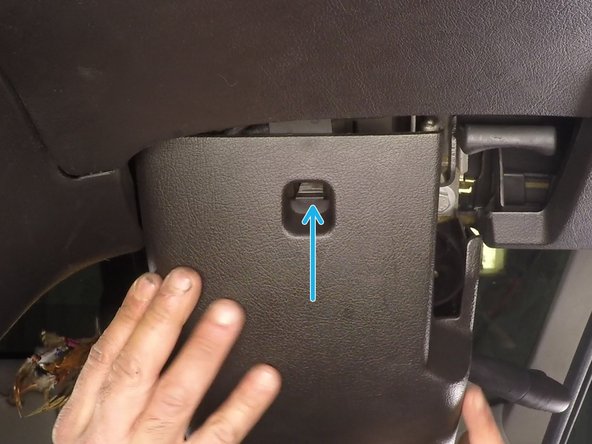
Soulever la coquille supérieure pour la déclipser
-
Puis retirer la coquille inférieure
-
-
-
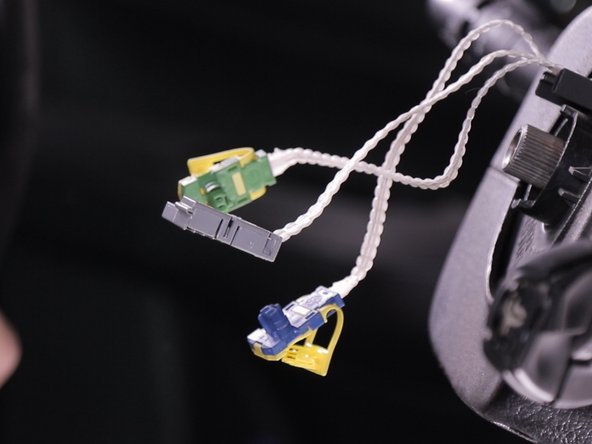
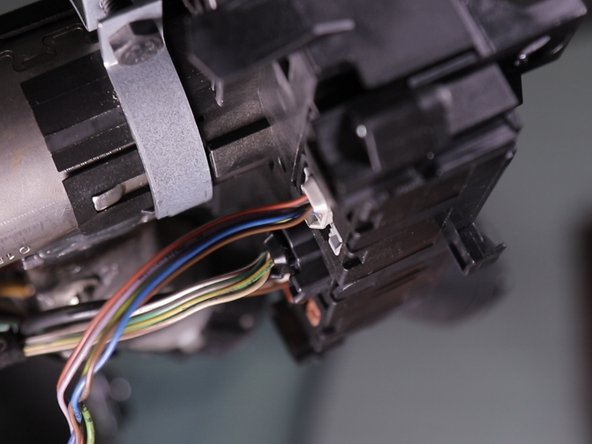
Débranché les connecteurs
-
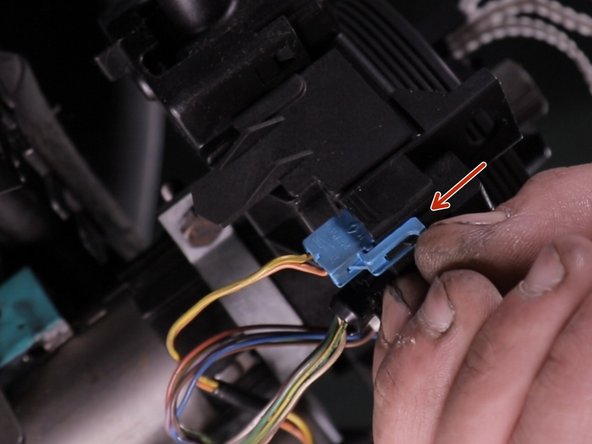
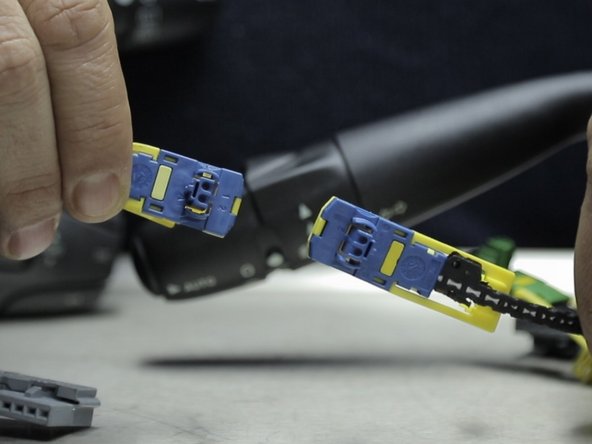
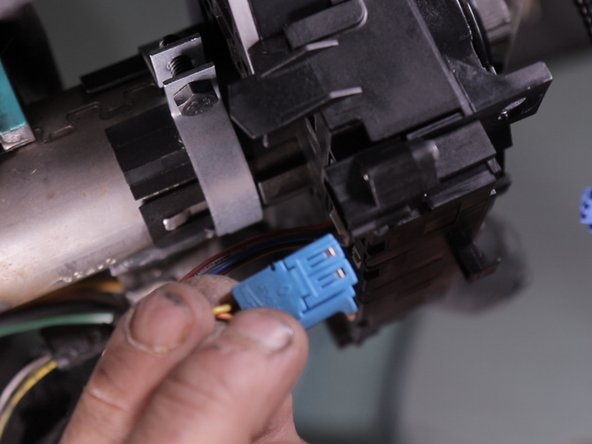
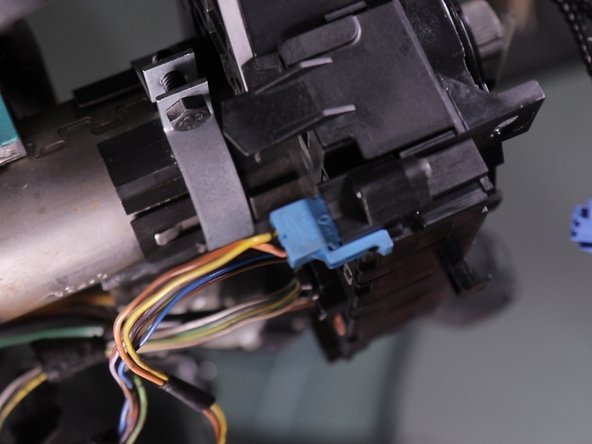
Retirer le connecteur d'air bag (bleu) en écartant la languette
-
-
-
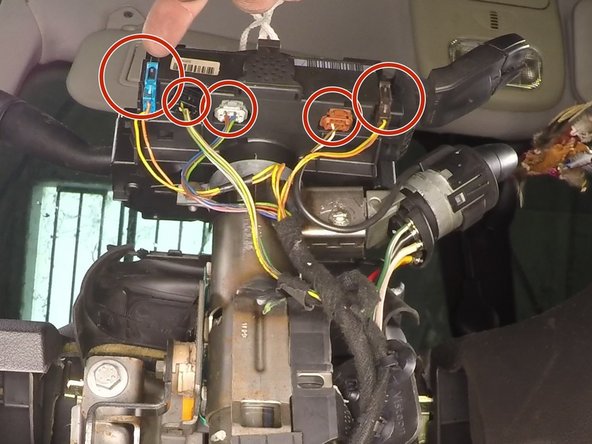
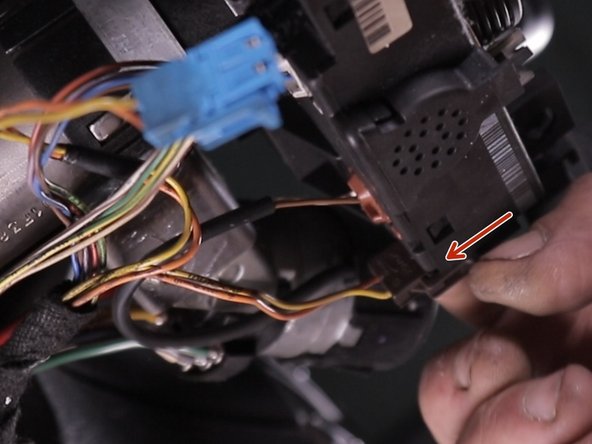
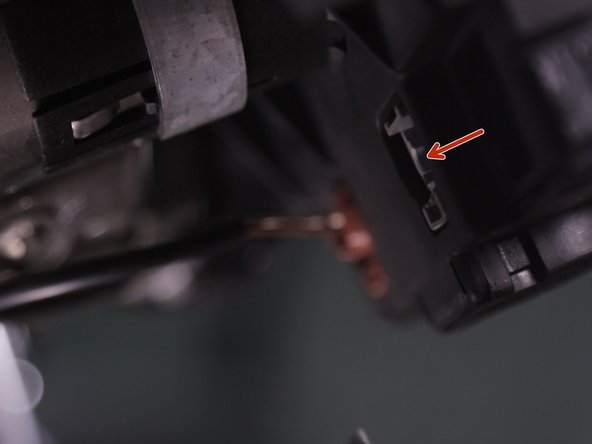
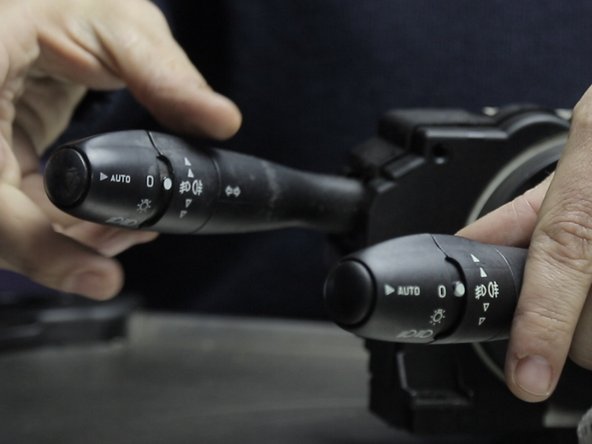
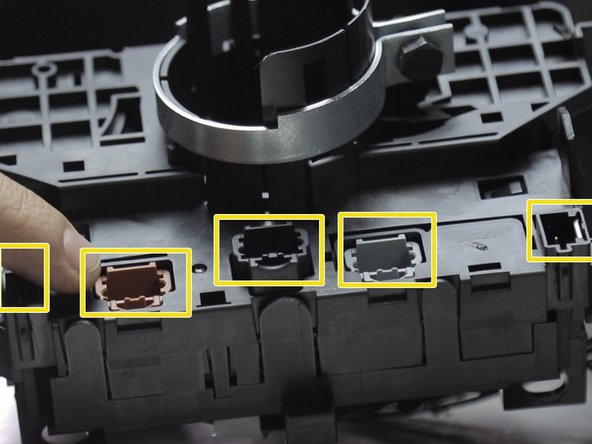
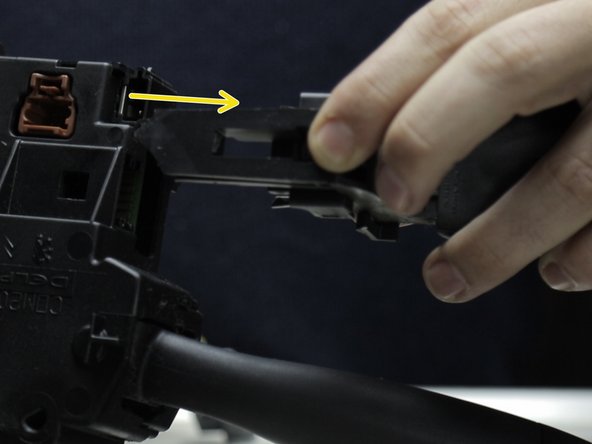
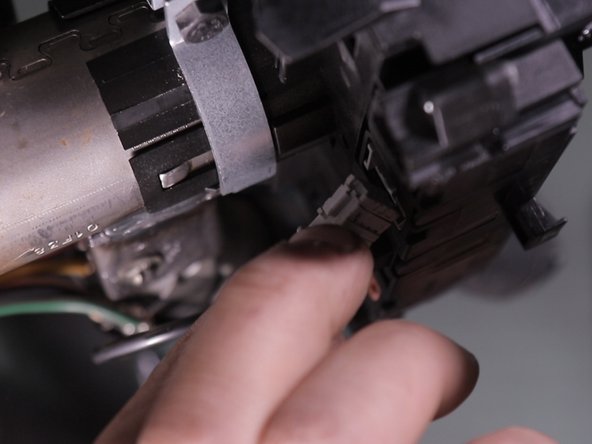
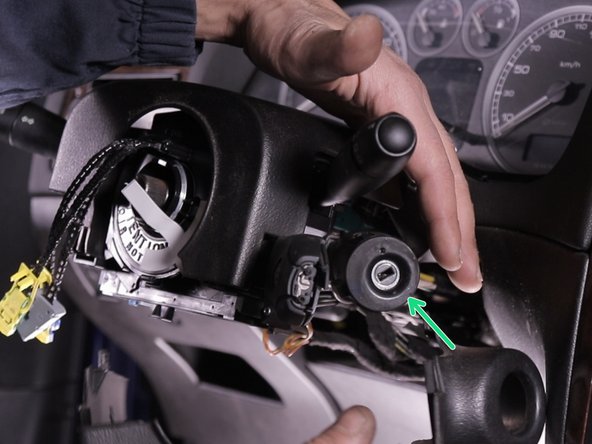
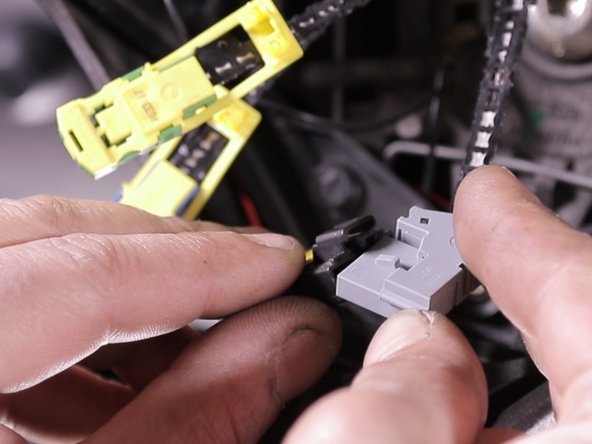
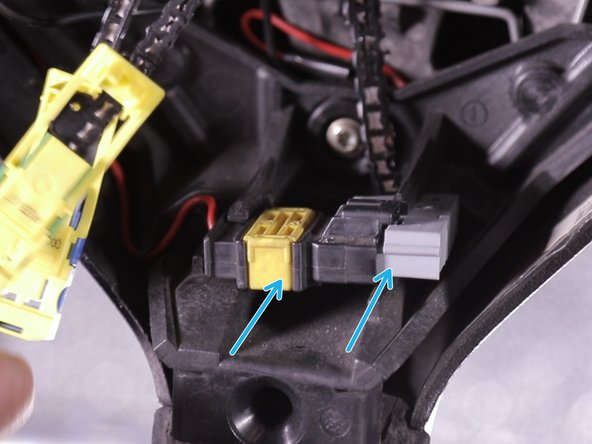
Débrancher les connecteurs du commodo, le nombre varie selon l'équipement du véhicule
-
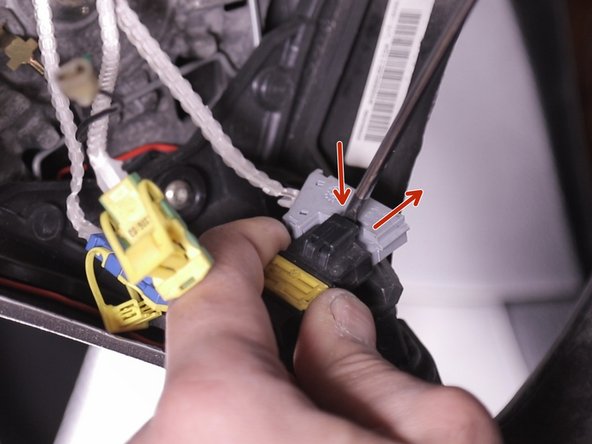
A l'aide d'un tournevis plat, appuyer sur la languette de verrouillage pour libérer le connecteur
-
-
-
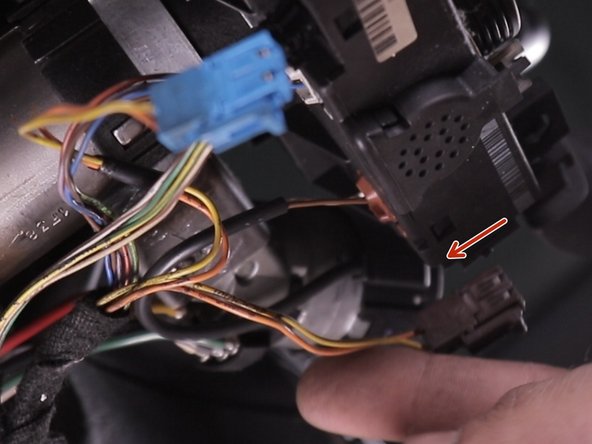
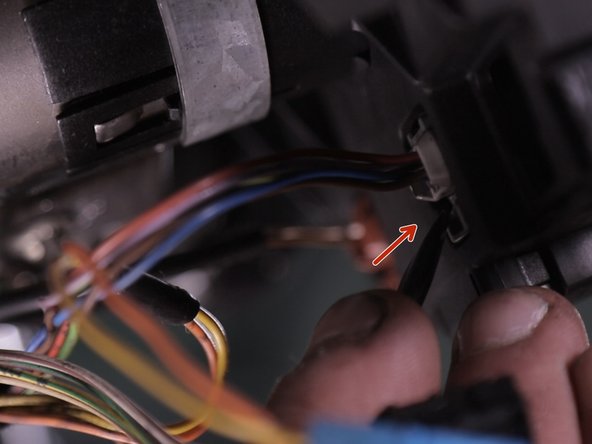
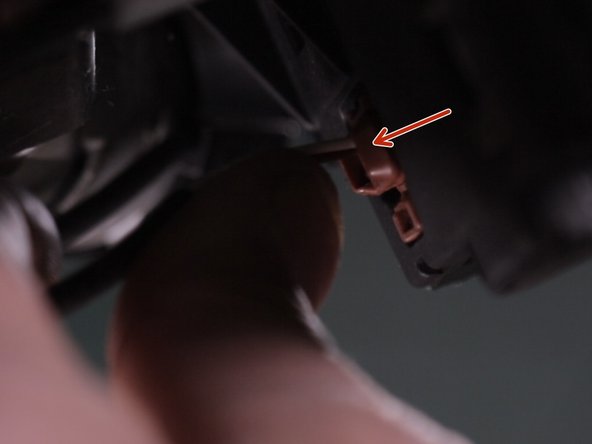
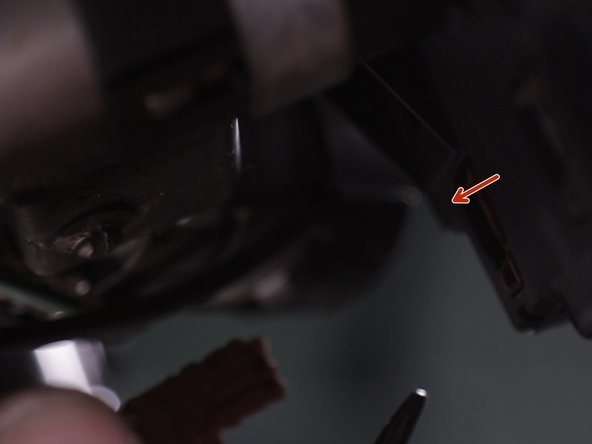
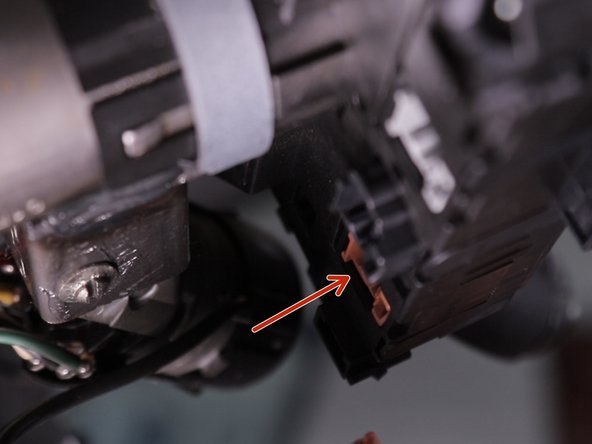
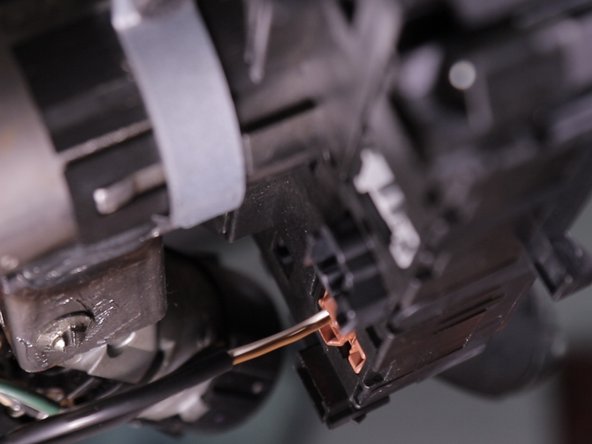
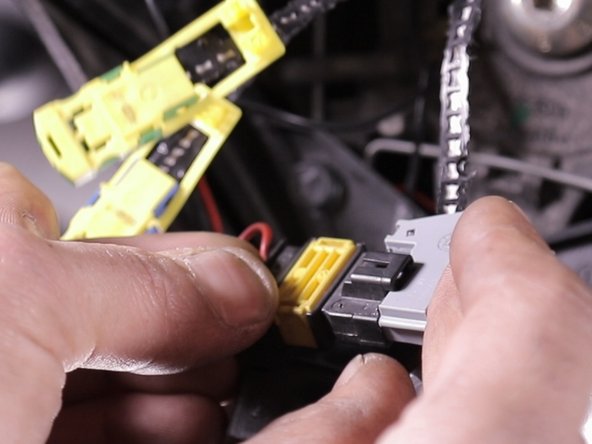
Débrancher le connecteur marron à l'aide d'un tournevis plat, appuyer sur la languette de verrouillage pour libérer le connecteur
-
-
-
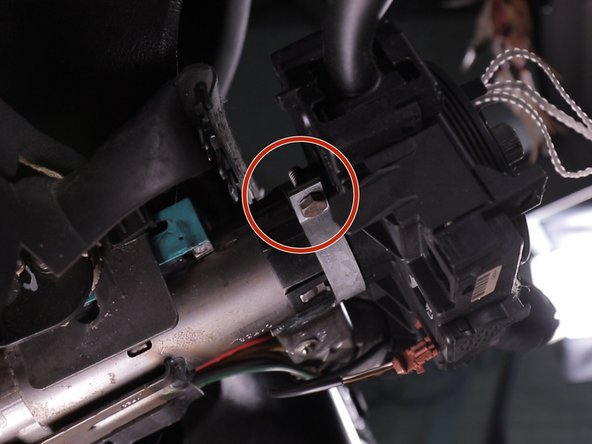
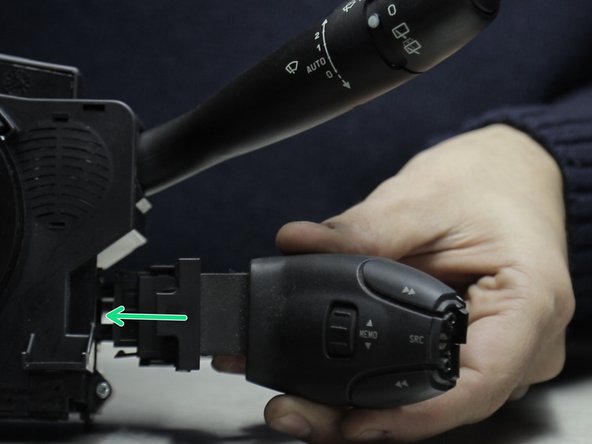
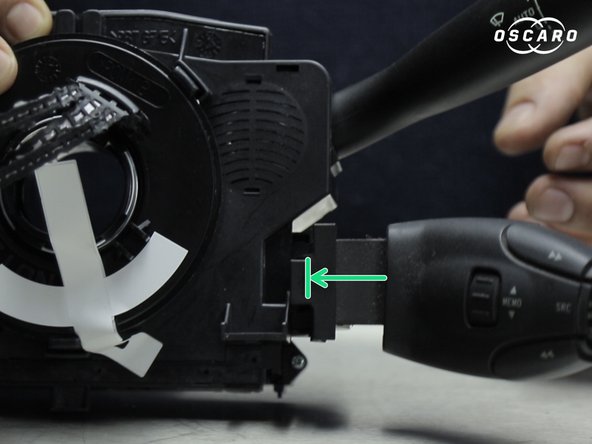
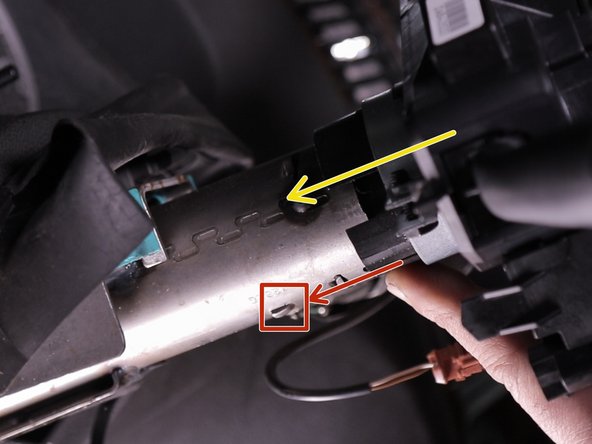
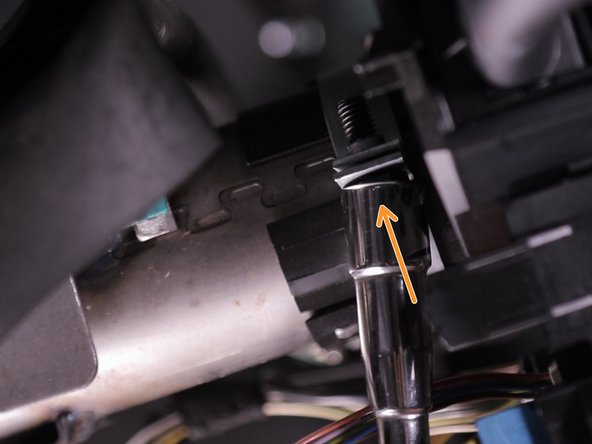
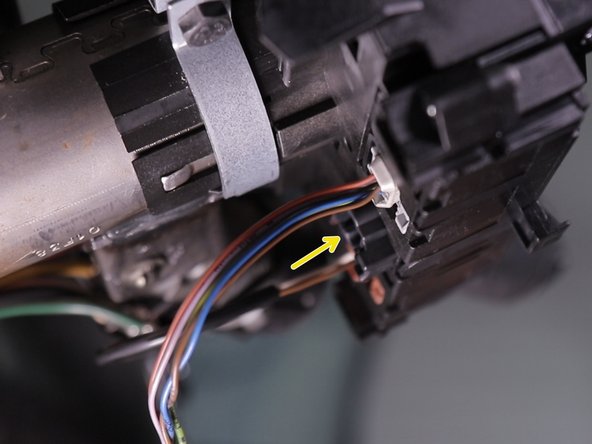
Desserrer le collier du comodo à l'aide d'un clé à pipe de 10, ne pas retirer la vis
-
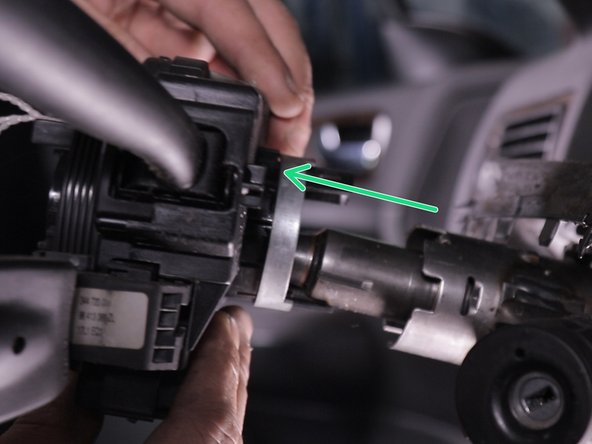
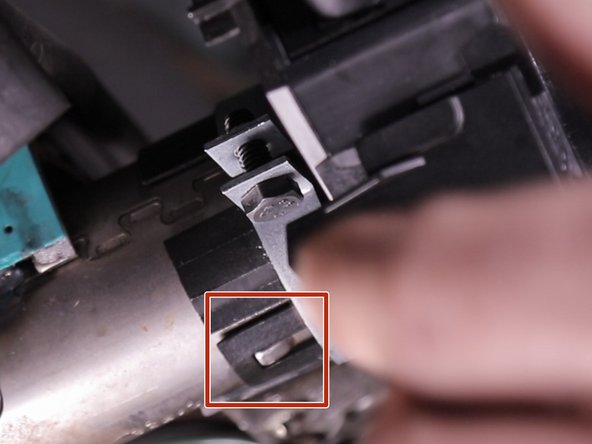
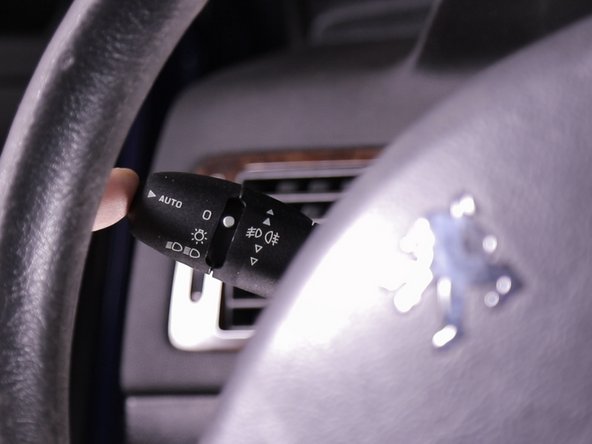
Relever les languettes de guidage du comodo à l'aide d'un tournevis plat et tirer dessus pour le retirer
-
-
-
Déverrouiller et retirer la commande de radio et si équiper la commande de régulateur de vitesse
-
Retirer le cache pour installer la ou les commandes
-
-
-
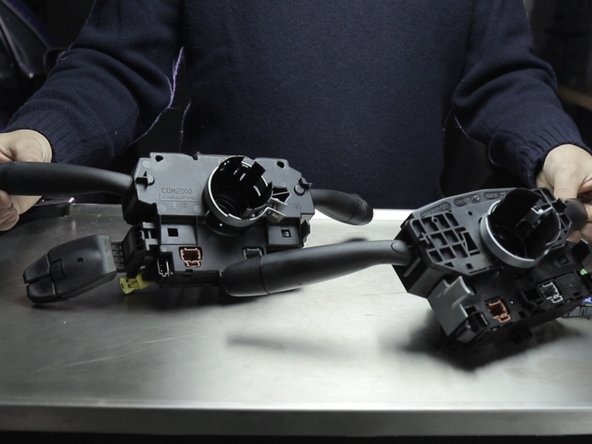
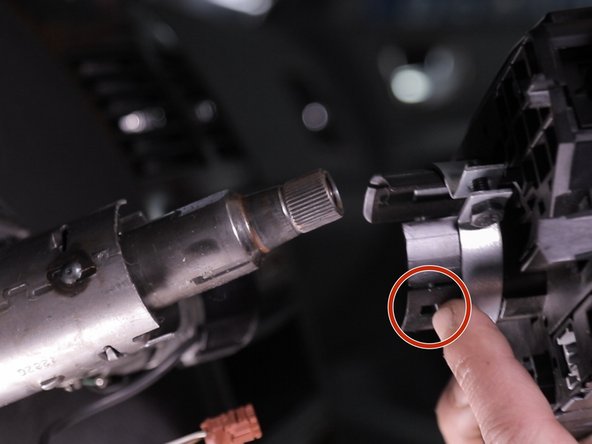
Reposer le comodo sur la colone
-
Placer le comodo en guidant les languettes sur les guides
-
-
-
Resserrer le collier du comodo avec une clé à pipe de 10
-
Reposer la coquille supérieure sur le comodo
-
-
-
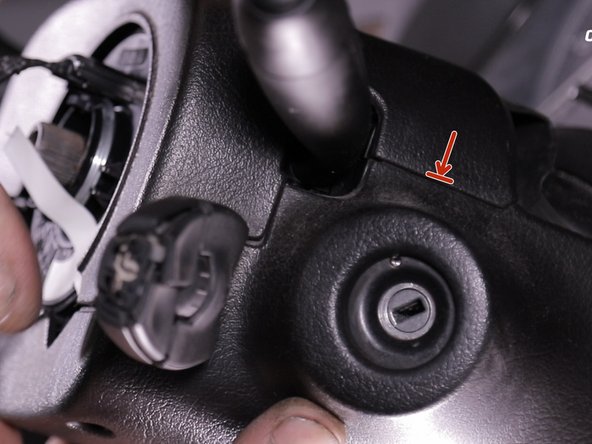
Aligner le trou de la coquille avec la serrure
-
Guider la coquille pour clipser la languette
-
-
-
Serrer les deux vis de la coquille inférieure pour serrer cette dernières
-
-
-
Retirer la languette de maintient de position du faisceau de comodo
-
-
-
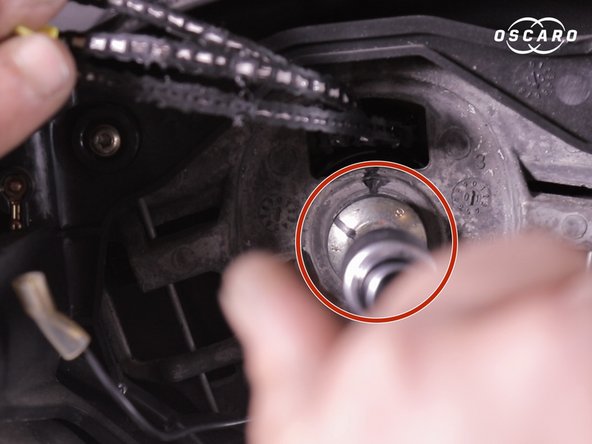
S'aider du repère pour replacer le volant, un détrompeur sur la colonne empêchera son mauvais positionnement
-
-
-
Resserrer la vis du volant
-
Bloquer la vis
-
Vous pouvez toujours utiliser vos genoux pour bloquer le volant
-
-
-
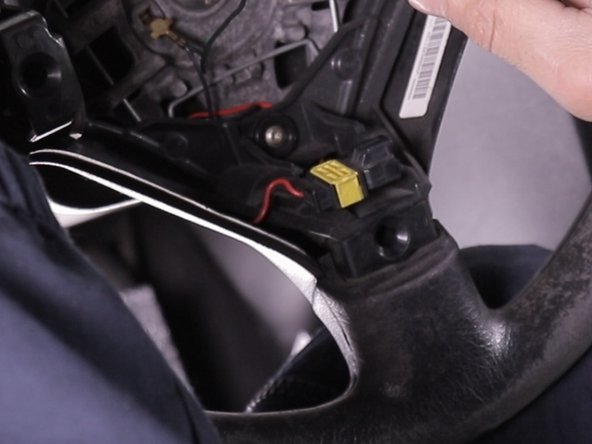
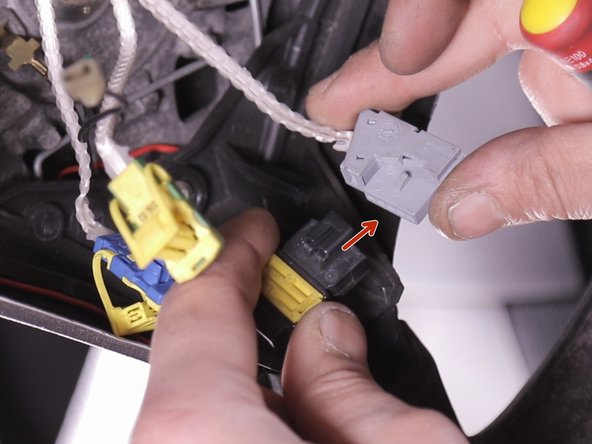
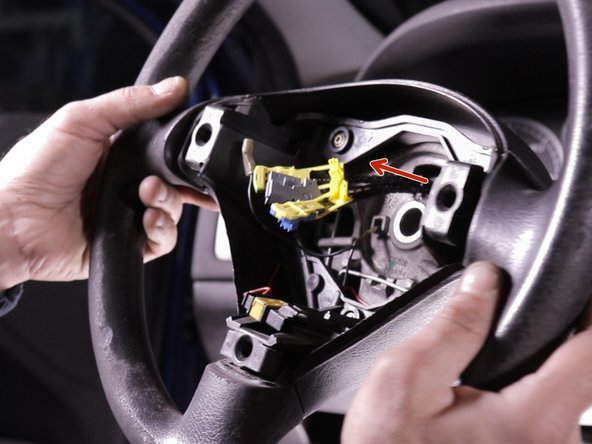
Rebrancher le connecteur gris
-
Reposer le connecteur sur son emplacement, se trouvant sur la branche basse du volant
-
-
-
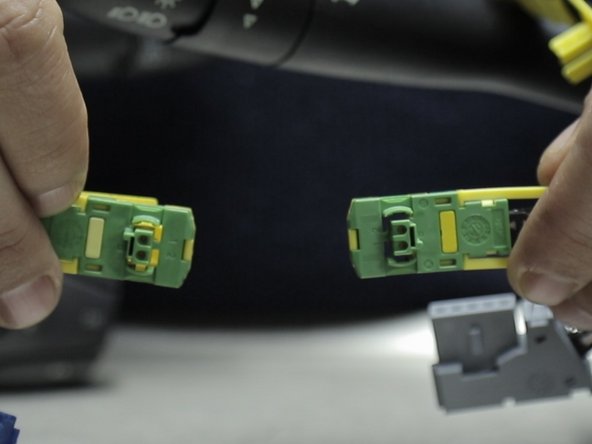
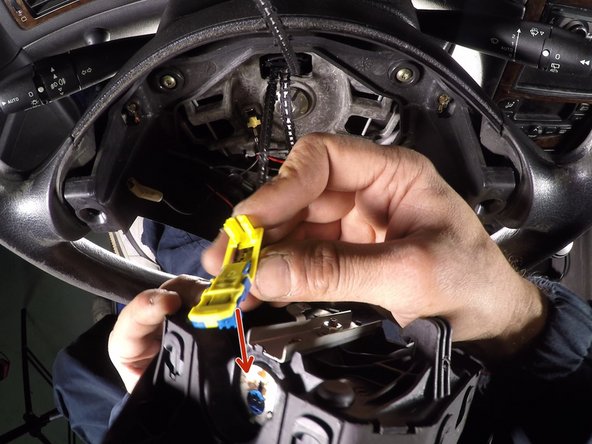
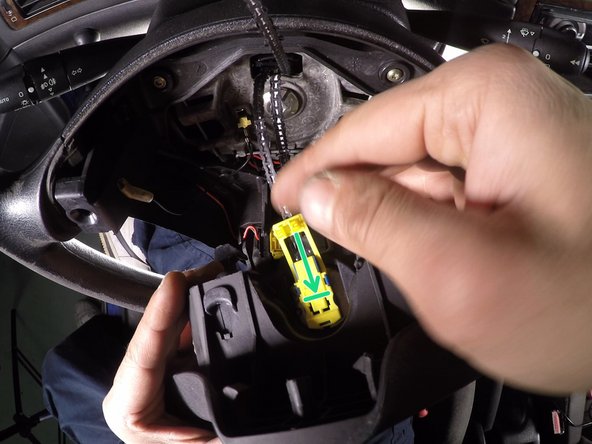
Approcher l'air bag et rebrancher les connecteurs suivant leurs couleurs : le bleu en bas et le vert en haut
-
Refermer la languette de verrouillage
-
-
-
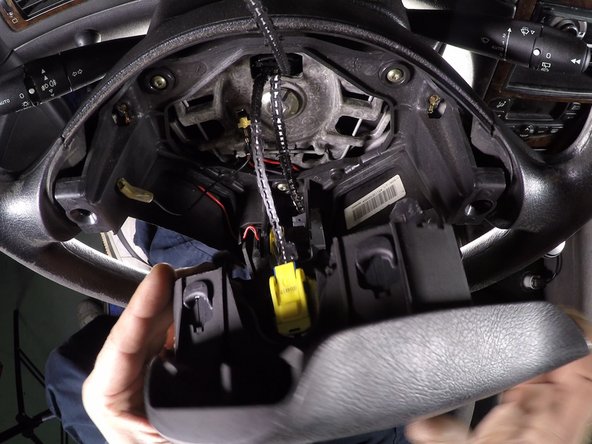
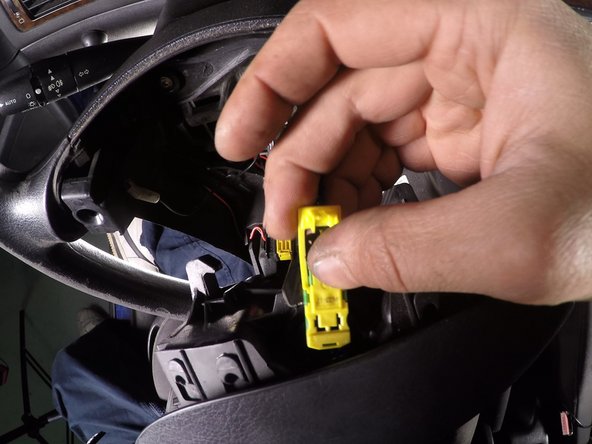
Brancher le deuxième connecteur
-
Refermer la languette de verrouillage
-
-
-
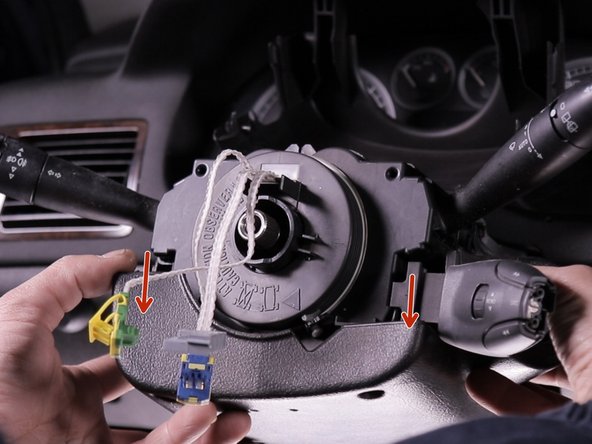
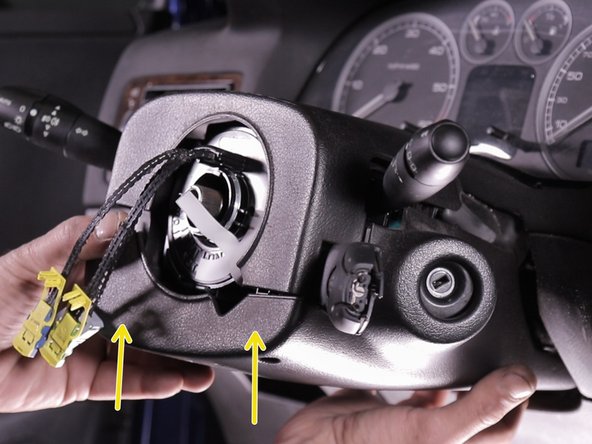
Réinstaller l'air bag en le clipsant sur le volant des deux côtés et en bas
-
-
-
Reconnecter la batterie puis attendre 10 minutes avant de vérifier le bon fonctionnement des différentes fonctionnalités du comodo
-


Annulation : je n'ai pas terminé ce tutoriel.
8 autres ont terminé cette réparation.

Équipe

9 commentaires
Bonjour, j'ai suivit ce tuto pas a pas, démontage et remontage impeccable :)
Par contre ma voiture (307 1.6 16v) ne démarre plus, message au tableau de bord : antidemarrage défaillant.
Je n'ai qu'une clé a pile (le double est mécanique uniquement), j'ai essayé de suivre la procédure du manuel utilisateur pour re synchroniser la clé avec la voiture (mettre le contact, retirer le contact, le remettre en appuyant sur le bouton de fermeture, maintenir ce bouton appuyé quelques secondes, enlever la clef), sans succès.
Je tourne depuis 24 sur cette bêtise sans trouver ... Help :)
Merci !
Raphaël
Bonjour,
J’ai effectué ce matin le changement du comodo. En installant le nouveau, je me suis aperçu que ce dernier n’avait pas d’emplacement central (entre le gris et le marron) pour y mettre le connecteur noir. J’ai néanmoins tout remonté sans brancher ce connecteur noir. J’ai vérifier que les différentes fonctions (clignotants, tous les différents feux, ordi de bord, radio, essuie-glace avant et arrière + nettoyage) et tout fonctionnait bien. Pouvez-vous me dire à quoi sert ce connecteur et est-il dangereux de rouler sans qu’il soit connecté?
Merci par avance pour votre réponse.
Thomas
Thomas Bédot - Résolu à la publication Réponse
Bonjour, j’ai pu lire que le commodos pour la version 207 est identique à celui de la 307, est ce que pour le tutoriel de changement cela est aussi identique ? Mon but est donc de changer le commodo sur ma 207.
Thomas Bonzom - Résolu à la publication Réponse
Bonjour,
Oui le commodo pour 307 est identique à celui de la 207, seul le démontage de l’airbag est différent !
Dylan
Bonjour le passage a la valise est il obligatoire si comme dans la video on a mis les roues droites. combien coute ceci.et comment avoir la reference du comodo sans demonter merci
laoiri ben amar - Résolu à la publication Réponse